Kbatz Krafts : A Gothic Litter Box Disguise!

The litter box is a necessity for every cat lover, but it doesn’t have to be so unsightly! Inspired by expensive faux planter litter box designs, Kristin Battestella aka Kbatz breaks out the gloss black spray paint and re-purposes a free fake plant for a unique gothic privy!  

The cut, paint, and plant – easy peasy in a weekend concept, however, took a lot of caulk and elbow grease to make this litter box look so glam! The weather had to cooperate, too. After $40 original cost for the hooded box itself; $12 in spray paint, caulk, plant foam, fake moss, and decorative stone supplies; the final cost here is still less than those lux terracotta litter box designs. A few dramatic side projects also came along for the ride, but in the end, the cat could care less anyway. 😸

More Kbatz Krafts:

Paint It Black

Repurposing Black Topiaries

Glam Spider Balls

Gothic Cardboard Window

Using Halloween Scene Setters Everyday

Mystical Orbs

For more Project Photos, follow Kbatz Krafts on Instagram and Facebook!

Circus Waltz – Silent Film Light by Kevin MacLeod is licensed under a Creative Commons Attribution 4.0 license. https://creativecommons.org/licenses/by/4.0/ Source: http://incompetech.com/music/royalty-free/index.html?isrc=USUAN1100291 Artist: http://incompetech.com/

Kbatz Krafts: DIY Cardboard Stained Glass Window

Thanks to the faux stained glass windows on the Halloween Cat Shelter and a serendipitous black drapery seen in my Halloween Thrift Haul video, my ideas for a fake window room divider can now come to fruition! Can cardboard be painted like stained glass of olde? Will a Goodwill curtain create the perfect backdrop? Can Kbatz work on the floor without the cat stepping in paint? Yes, yes, yes!

After not saving much cardboard over plague fears, I finally kept two large boxes that were too good not to re-purpose – cutting the flaps open and taping the folds with masking tape to create an accordion style divider that can stand on its own. This is both tall enough to hold the thrift valance above me as a photo backdrop (a black curtain behind black clothes wouldn’t help very much!) yet short enough to move under the rafters in my Dark Shadows Basement Studio. I laid the cardboard on the floor, using a thrift yardstick and an old school protractor to measure and draw grid lines for the window panes. Working with the cardboard folds created window squares or rectangles either eight or ten inches – a simple pattern in that Dark Shadows spirit mimicking both the stained glass windows at the top of the Collinwood foyer stairs as well as the fake studio window of the drawing room. Did you expect anything else from me? 🙂 The pencil line panes were retraced in black marker and then a coat of black paint, but the perimeter cardboard will be brown to match my wall color. Before committing to painting the window directly on the cardboard, however, I practiced in Photoshop with some random but symmetrical color patterns of red, green, yellow, and orange panes to compliment the majority faux glass blue. Once I was certain on my template, I marked each pane color before multiple, darkening coats of the red, yellow, and orange – mixing each with brown for a deep but faded hue a la ye olde. New Spring Green and Caribbean Blue paint colors were mixed with a darker Cobalt Blue for their depth, and after a day of drying time, it felt like forever touching up all the black grid lines, but it was really only two days.  

Now it was time for the black valance, which was too short for my tall divider so two similar dollar store table runners were cut in threes and sew back together to match the panel widths before being sewn to the bottom of the curtains themselves. The runner lengths didn’t quite match either, but when drawn back with simple black ties, their tiered length creates a fine layered drape. While these fabrics are not durable quality for a real curtain in an active area – and the seam fraying, jammed threads, and bobbin breaks might discouraged beginning sewers – they work perfectly for a backdrop facade. The valance was loosely gathered and glued to the top edge of the cardboard using my preferred hot glue. Rather than a tougher adhesive or stapling, hot glue makes for an easier removal if needed, and the curtain sides are simply taped in the back so they can remain adjustable. The fabric can flip behind the cardboard if it needs to be out of the way, and tassels or faux vines or other ~aesthetics can be added as needed. While not everyone may need a large divider like this, the faux window painting technique is perfect for adding a gothic frame anywhere in your space and the kids can have some cardboard fun, too. Thanks to a $4 curtain, $25 in paints, $1 masking tape, $2 table runners, and free cardboard, a gothic vision came together with a clutter-hiding chef’s kiss.

Click for More Trash to Treasures:

DIY Cardboard Tombstones Video

DIY Cardboard Coffin

DIY Halloween Repairs


Visit Kbatz Krafts on Facebook or Instagram for more Project Photos!


Kbatz Kraft: A Victorian Guest Room Makeover!


Despite budget and moments of doubt, Kristin Battestella aka Kbatz adds storage and dark flair to the multipurpose guest room with a classic changing table, skirted ottoman, and a dramatic bed frame as progress is made on turning the vintage carriage into a deer themed bassinet. The cheeky wildlife, however, remains somewhat elusive.  

Kristin Battestella aka Kbatz has finished the carriage to bassinet transformation as well as the daybed and trundle assembly. Handmade bolster pillows add to the lush bedding as red and black patterns and textiles add classic comforts alongside sewing custom baby linens, practical accessories, and a feline guest. 


Kristin Battestella aka Kbatz completes the Victorian guest room with affordable artwork, family friendly touches, baby essentials, sentimental accessories, handmade princess costumes, and a dramatic closet curtain creating a newborn alcove – which is easier said than done.

After virus worries, discussing the final budget, and the Victorian guest room’s zones for adults, babies, and room to grow with a forthcoming crib, it’s finally time for an emotional reveal with the visiting mom-to-be!


Thank you for being part of Horror Addicts.net and enjoying our video, podcast, and media coverage!

Visit more Kbatz Krafts on HorrorAddicts.net including:

Curbside Playhouse Turned Halloween Cat Shelter

Decorating Like Dark Shadows Video Series!

DIY Halloween Candle Clusters

Goth Parasol Upgrade

For more Project Photos, Follow Kbatz Krafts on Facebook!


Kbatz Kraft: Mini Macabre Bone Wreath

It’s the Autumn of Bones for Kbatz Krafts! What’s one to do with the smaller bones left over from my Pot O’ Bones Tower? Why make a morbid little wreath of course!

A dollar store metal frame was wrapped in brown yarn for the base, as I intended to finish off the glued on bones with some twine ties for a rusted look. However, this fourteen inch wreath seemed too big for the angular bones. Unlike more traditional wreath items like leaves or pine cones, the bones didn’t seem to fit with too much yarn and twine showing gaps between the bones. Fortunately, switching to a smaller diameter wreath frame meant the bones could be the star of the design, going off the edges of the round. Gluing onto the smaller wire frame, however, proved difficult with bones teetering on too few glue spots. Thankfully, switching to a nine inch willow wreath finally did the trick! This natural base that didn’t have to be hidden opened up the possibility for more raffia ties and small black branches sourced from more dollar store florals.

An additional bag of dollar store mini bones were tossed into the mix, too – again painted with the same dry brush brown technique as the Pot O’ Bones Tower to take off the new plastic edge while creating a cohesive, rustic look. After trying the bones in different positions and doubting if this wreath was meant to be because none of the arrangements looked right, I realized it was the largest bones that were the most troublesome. Without them, the smaller femurs and mini bones created a much nicer jointed and angular shape. Now that the placement was at last settled, each was hot glued on to the wreath with the black branches adding macabre but natural pop as well as hiding some of the glue globs. The slightly darker raffia loosely wrapped in symmetrically asymmetrical spots also hid the assembly. This bony wreath looks like the branches and ties are what’s holding it together, and a twine hanging loop sets off the natural motif.

Unlike a traditional wreath where any arrangement comes out complimentary, these morbid materials took some trial and error addition, subtraction, and experimentation. Fortunately, this afternoon project packs a demented little punch for a modest under $8 for supplies that were already in the craft closet – except for those extra Halloween season only mini bones! Compared to expensive skulls and florals, this macabre bone wreath is much more fun and affordable.

Revisit more Kbatz Krafts including:

Decorating Like Dark Shadows Video Series

Goth Parasol Upgrade

Mini Coffin Tray

DIY Cardboard Coffin

For more Project Photos, Follow Kbatz Krafts on Facebook! 

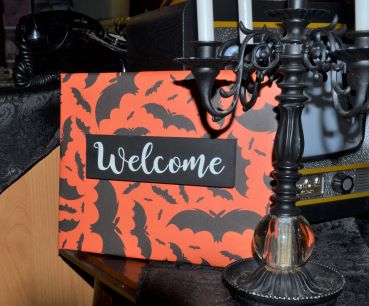
Kbatz Kraft: Halloween Canvas Art

I’m not a painter, but spotting assorted size canvases at the Dollar Store inspired me to get my spooky art on with a little multi-dimensional Halloween décor! Often shadow boxes or keepsake frames are designed inward with elaborate motifs and objects that you can’t see unless you’re up close. These, however, are certainly noticeable, oh yes.

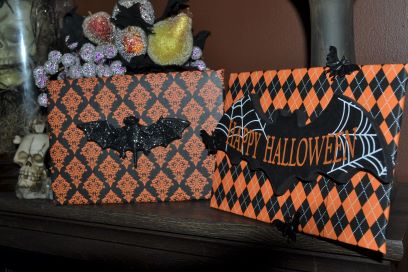
A $2 Goodwill Halloween craft paper block became the canvas backdrops – assorted patterns with damask skulls, spider webs, orange harlequins, and purple owls fittingly named “Dark Shadows.” Clearance Halloween paper placements also backing the 3D Skeleton Frames provided bats and candy corn designs for the larger canvases, and rummaging through my craft stash provided plastic lizards and scorpions, mini pumpkins, bone parts, weird looking potpourri pieces, and small holiday signs tossed into the potential pile as three dimensional art. Laying out my canvases, creepy papers, and morose objects helped match the right designs, bugs, and canvas sizes – eliminating patterns and items that clashed or didn’t fit while creating stand alones or series themes. Using papers and canvases both horizontally or vertically added variety, and now it was finally time to wrap each canvas like a present, folding the corners around the edges and hot gluing the the paper directly on the plain backs. The medium size canvases were a little larger than the square craft paper, so two pieces were seamed together – tape tested to carefully match the paper’s pattern before gluing down the line.

The small signs were only painted on their fronts, so they received some matching black or orange paint around the sides before being centered and glued on the large canvas fronts. The hangers on the back of these signs were removed, too – reused on the backs of the medium canvases now likewise redressed in proper batty fashion. When folding my wrapping too tight, the paper ripped on one, but Kbatz can roll with the punches and glue on more bat bling to fix anything! Not all the canvases nor patterns were perfectly square, however, and some uneven corners or abstract crooked have to be gotten over quickly. The square paper just came to the end of the smallest canvases, so their edges were painted black and the inside rim of the papers were lined with black marker to match the black and white backgrounds. Two red coats gave the bugs a unifying pop, and that foam mini pumpkin was cut in half and touched up around the edges before they were all mounted. Although the larger canvases can be hung themselves, the smaller ones are flat pieces probably meant for a tabletop easel display. A fitting orange yarn could anchor this small trio in a rustic, ladder style banner; but after taping the yarn on the backs, adjusting the placements, gluing the yarn in place, and securing it all with more masking tape, this attempt at hanging art looked totally terrible!

Between the weight of the canvases and the forward leaning objects, the series was no longer uniform as one leaned one way or titled the other. Recovering these canvases in fun prints and using zinger toppers is a family friendly project, but this looked like bad child art that mom has to stick on the refrigerator nonetheless. After getting some aggression out tearing off the yarn, necessity took over in the form of cardboard plucked right out of the recycling. I hadn’t yet used the last place mat pattern, a fun geometric Halloween design, and now it wrapped the cardboard as a new backer to a row of canvases. Though cute, it felt plain. Looking about my craft studio again for more trash to make treasure, I found the black frames removed from the new pictures for my Lenticular Gallery. They weren’t quite the right size for this wide series, so I cut the frames and re-squared them around the new artwork, again taping and gluing the surround in place. You can see the seams of this frame if you look closely enough, and I’m not sure if I totally like it. More creepy crawlies or traditional Halloween webs and creepy cloth drapes would hide these flaws, but all that seemed too busy. Fortunately, this canvas turned cardboard art does hang nicely with its orange yarn swag.

This Halloween Canvas Art was a lot of fun thanks to the craft inspirations and found affordability. For $7 I have five new Halloween displays – even if they didn’t all go as I expected. It also seems like a lot of materials and steps went into these, but having the craft basics to do this makes it wonderfully easy for a fall family night or an at home classroom project. Have a newspaper, special gift wrap, or small memento mori you want to save? Sentimental items or morose shockers make you an artist here!

Revisit more Kbatz Krafts including:

Gothic Gallery How-To

Goth Parasol Upgrade

DIY Flower Pens

How Not to Make a Spooky Spell Book

For more Project Photos, Follow Kbatz Krafts on Facebook! 

Kbatz Kraft: How *Not* to Make Mystical Orbs!

Cast a spell and make some magic any time of year with your very own mystical orbs! Except when you attempt a Pinterest method that results in disaster that is. Read on for both how to paint and how not to glitter your own crystal ball DIY.

The ingredients to make your own affordable, family friendly orbs are surprisingly pedestrian – clear plastic ball ornaments from the dollar store, broken lamp bases for suave pedestals, and two of each to test two different mystical how-tos. One lamp turned orb stand had already been Painted Black and separated into smaller candle holders but now the reunited pieces are dry brushed with yellow ochre for a bronzed look while the second solid lamp base is painted with yellow and brown for an aged vintage. A glittery orange ball to go with the brown was the Pinterest attempt, however, the seemingly simple food dye for orange water, plenty of glitter, and cotton balls combined inside the ball were a complete failure. Although the shine and the color were great, there was either not enough cotton balls or too much water, maybe both because everything just sat there in one ugly clump. Once the soaked gunk was drained out again, I tried painting the outside of the ornament with a mix of yellow paint and coppery glitter, but this too was unsightly and unsuccessful.

Frustrated, I temporarily abandoned this orb in favor of the much more pleasant second attempt. This time blue, white, and purple acrylics were mixed together, varying the colors and brush strokes for a textured, marble effect followed by a glow in the dark paint topcoat. Once dry, the ornament was glued in place on its base – splendidly contrasting the dark bronze pedestal and vindicating my painting method. I went back to the disastrous ball and likewise painted it with a varied yellow and orange. This orange is not opaque like the Dark Shadows Candle Sconces, but a shiny vintage top with the dark brown base. Twine wrapped around the glue seams set everything off, and although it’s tough to photograph them glowing in the dark, they do!

While craft experimenting can be good wholesome fun, it can also lead to time, supply, and cost consumption that isn’t always a day well spent in tough times. Here, my first instinct was correct compared to a dreaded Pinterest fail – one in which discouraged kids, liquids, glitter, and supplies can end up a messy ruin. Fortunately, by reusing found objects and dollar store finds, anyone can paint their own colorful crystal ball orbs.

Visit Kbatz Krafts on Facebook for more photos!

Revisit More Krafts: 

Mini Coffin Tray

How Not to Make a Spell Book

Cardboard Tombstones Video How-To

Frightening Flix meets Kbatz Krafts: Decorating Like Dark Shadows Results!

Kristin Battestella aka Kbatz puts together the finishing touches in the Dark Shadows inspired basement including draperies, vintage artwork, and sconces with a focus on the multi purpose desk, workspace, and mobile sewing area. Bonus jewelry making storage, sewing machine tips, and notion organization!


With a creepy lenticular gallery, medieval tapestry switcharoo, glam lampshades, illuminating accessories, and an unimpressed cat, Kristin Battestella aka Kbatz completes the Dark Shadows redecoration journey with a little gothic fortitude and a new appreciation for tackling large room projects during a pandemic.

Revisit More Frightening Flix and Kbatz Krafts:

Decorating Like Dark Shadows Part 1

Dark Shadows Gothic Sconces

All Things Dracula Video Review

The Ghost and Mrs. Muir

For MANY more Project Photos, Follow Kbatz Krafts on Facebook  and THANK YOU for being part of Horror Addicts.net and enjoying our video, podcast, and media coverage!

Kbatz Kraft: A Gothic Gallery How-To

Ever wanted to create a spooky gothic gallery wall but held back over fears of it looking terrible and wrecking your walls in the attempt? Kbatz is here to help you organize and assemble an affordably morose statement piece!

1. Pick a unifying theme. Look at what you have or conceptualize what you have in mind and how your frames and accessories go together. Make a list or drawing or digital template with photos of your intended space. Be it all black frames, all-round frames, bats everywhere, black and white portraits, horror movie posters, decorative shelving for spooky knickknacks, or in my case, a lenticular photo series – something in either subject, style, or structure must visually glue the collection together. Without a purpose to the series, the gallery can get messy or cluttered, feeling catch-all rather than eye-catching. These are pieces that you have accumulated over time to display, not just things that have been put on the wall as they happen. The gallery can’t be so busy that the eye has nowhere to relax. These lentiuclars are a common subject in dark frames anchoring the visual flow.

2. Although that doesn’t mean everything has to be the same. Once you have a foundation to follow, then you can shake up your gallery with some personality. I have dark frames – mostly black, but a few dark brown and some with metallic trims. The shapes and sizes also vary between larger plain portraits and smaller ornate frames with accessories between each. When you succeed in having a soothing overall scheme, adding a few spots of something similar but different within the cohesive theme gives the eye a place to focus. Rather than a mental puzzle, witty standouts let guests notice the entire thing as well as the special composition of the whole, and an usual sconce or accessories that match make for fun and inviting conversation pieces even if they are slightly scary objects!

3. Groupings maximize both the overall and the statements. Even in a series of commonalities, items hung and displayed without rhyme or reason can be overwhelming. Make sure the scale of your items matches the space and place sets within the series. You don’t want items that look too big for the wall or pieces so small they are ignored. However, a lot of small together can make one grouping to balance a solo large accessory. Hanging like items together or creating invisible lines among the frames – such as making sure the tops or bottoms of frames are level across the wall – trick the mind into pleasing organization even if artwork is scattered high or low as in a stairwell for example. My gallery has three or four items in groups with a break between the vignettes so one can take in a section, visually rest, continue the set, and let the eye flow with the larger traffic pattern into the room.

4. Practice your layout. What if that painting should be higher or your straight row of accessories ends up crooked? You can’t wreck your walls with a lot of unsightly holes as well as making more work for yourself with the subsequent touch-ups and corrections – especially if you are a renter or can’t fix the paint. Physically test your vision by tracing the shapes of your items on newspaper or another handy scrap like cardboard or packing paper and use these placeholders to adjust your arrangement. Find out what pieces don’t fit, which go together, and what to place where. Be sure you have enough space and start in the center rather than an outside end. You don’t want to run out of room! When you are ready to hang your gallery, make sure you have the right tools on hand – the proper wall anchors for heavy medieval armor, adhesive strips for smaller frames, the right size nails for your structure. Hammers and levels go a long way, too!

5. Galleries don’t have to be expensive to look great. Black frames can be pricey or tough to find, so I had to find smaller frames from the dollar store, old fashioned thrift pictures for under five dollars, and unused frames from family members spray-painted black or touched up with dark acrylics. Consider your style and project time in what your budget allows and remember to calculate any tools or supply costs. Maybe you can buy all new matching frames or can have a special piece custom framed. If you are artistic or in no rush, you can browse thrift stores or yard sales for some alternative do it yourself materials. You aren’t being cheap by being resourceful – you decide where to compromise your vision or hold out for the style you want in accordance with what’s affordable to you. A formal family portrait gallery in my stairwell cost forty dollars, but my lenticulars cost less than ten and they certainly make people take notice!

These days many may not have the extra space or means for elaborate artwork, formal accessories, or large focal point displays. However, by carefully assembling a spooky wall gallery with themed, affordable finds and an eye for detail, any dark heart can find a blank spot to make your own.

Revisit more Gothic Crafts:

Decorating Like Dark Shadows

DIY Flower Pens

Re-Purposed Black Topiaries

For more Step by Step Gallery Photos, Follow Kbatz Krafts on Facebook

Kbatz Kraft: Spider Ball Topiaries

As seen in my Thrift Finds Alterations video, I picked up these holiday topiaries at Goodwill for $5 each – compared to $15 a piece on the original Marshalls and HomeGoods price tags. Although the all silver glitter urns, stems, and spikey balls scream December cheer, my little goth brain whispered black paint….

It only took a few hours to coat the stems and urns black. I worked with acrylics rather than spray paint in order to leave the balls silver, but glitter of course got everywhere. I had to make sure my paint coverage was true black and not….sparkly…but after a few touch ups it was time to break out the glue gun. It seemed fitting to put something black and morose on the balls to cover up some damaged, bald spots – tying the new dark sophistication to the glam silver with a few strategically placed dollar store plastic spiders. I was actually short as many black spiders as I wanted, for it’s tough to find Halloween accessories in June even without a pandemic. However, I still had some purple and green spiders from a dollar store ring assortment, so I just painted them black, too! Ironically, those painted spiders ended up as too many different types of spiders at once, and I went back to just a few for a less crowded scheme.

Voila! For less than the original sale price of one dated holiday topiary, I now have two statement pieces for Halloween or year round. A real holiday maven could continue the theme every month to coordinate or pop – black snowflakes, purple hearts, black four leaf clovers, red flowers, whatever your macabre little self desires. For pennies, anyone can personalize and enjoy a revitalized holiday find. Now, however, it’s time to wait for the first guest to recoil, oh yes.

Revisit more Kbatz Krafts including: 

Paint it Black

Re-purposed Black Topiaries

How to Make Stuffed Pumpkins Video

For more step by step Project Photos, Follow Kbatz Krafts on Facebook! 
Frightening Flix meets Kbatz Krafts: Decorating Like Dark Shadows!

Kristin Battestella aka Kbatz details the inspirations, budget, logistics, and compromises in outfitting a basement studio with a Dark Shadows theme. From carpet and painting to walls and storage, come along for the pros and cons of taking on a redecoration during a pandemic lockdown.


Next Kbatz defines the vintage seating and multipurpose work zones in the re-envisioned Dark Shadows inspired basement studio – complete with maximizing spaces, aesthetic heating options, and craft organization tips. There’s also a not so intrusive cat and one pesky basement pole.


It’s heaps of orange for the Dark Shadows inspired basement with unique furniture, thrift finds, pumpkin crafts, retro refreshed lamps, and textile accessories as the studio starts coming together into a cohesive room despite bugs, ugly fluorescent lighting, and the struggle to stay motivated in difficult times.


Stay tuned for the finished results!


For More Kbatz Krafts as well as Frightening Flix, revisit:

DIY Cardboard Tombstones

Dark Shadows Video Review

Dracula (2020)

For more Project Photos, Follow Kbatz Krafts on Facebook  and  thank you for being part of Horror Addicts.net and enjoying our video, podcast, and media coverage!

Kbatz Kraft: Paint it Black

Like The Rolling Stones said, sometimes when you want a little morose, all you need is a hefty coat of black paint. A $4 grab bag of bowl filler from our trusty Mr. Goodwill helped me prove this theory as traditional balls and gourds became rustic orbs and goth glam. Shiny brass or holiday gold candlesticks and sconces likewise become sophisticated, useful pieces year-round, and Dollar Store frames turned into expensive-looking conversation pieces.

As discussed in my Re-purposed Black Topiaries project, painting floral items black is more involved, but worth the spooky look. When I picked up another holiday vase filled with pine and poinsettia greenery for $3, out came the flowers and everything else was spray painted black – tacky gold base, leaves, stems, and all. Touch-ups were needed for some of the smaller needles, but now I have a black floral base that can change with the season. After some cream and blush color flowers on the empty picks for the summer, it’s all black flowers for Halloween, red for the holidays, purple for winter, and white for spring. Customizing fake flora displays at the craft store can get pricey, but for $5 including spray paint, I have not just one one of kind centerpiece, but five.

Perhaps everything all black all the time would be too much for some, but one or two black accent pieces can be classic or rustic to suit your décor without being expensive. After last year’s Spooky Bottles and Tea Stained Labels, black paint came to rescue when I wanted to add more creepy jars to my shelf. Saving a few unique bottles from the recycling, painting them black, and wrapping rustic twine around the tops adds a touch of mystery to any apothecary. Have anything broken and useless lingering in your garage? I took apart the base of a damaged silver lamp, removed the wiring and painted the pieces black for a few more goth candle holders.

When my mom gave me this little lantern house – bought for pennies at the thrift store – I was tempted to keep the tin look. However, it felt a bit too country amid the rest of my décor. So I painted it all black for a fun light not just for Halloween, but something that can be used year-round. For those fearful of bigger crafts and projects or those hesitant to go bold and expensive with dark, sophisticated colors, painting smaller items black is a can’t go wrong, affordable touch for any room or season.

Revisit more Kbatz Krafts including:

How to Make Stuffed Pumpkins

Spooky Spellbooks

Tea Stained Labels and Spooky Bottles

Creepy Cloches

It’s a Pumpkin Cat House

Pumpkin Ottomans, Oh Yes

DIY Halloween Candle Clusters