Kbatz Krafts: Repairing Black Dresses with Black Lace!

What happens when your long black dress gets caught and ripped on the wheels of the grocery store shopping cart? Yes, that actually happened to me!


Kristin Battestella aka Kbatz fixes a damaged dress and repairs more unsightly alterations with black on black lace appliques for sustainable, affordable, gothic sophistication anyone can do!

Read More of Our Kbatz Krafts in the Horror Addicts Guide to Life Book 2 Workbook ON SALE NOW!

For More Photos, follow Kbatz Krafts on Facebook and Instagram. Thank you for watching!

More Kbatz Krafts:

Gothic Cardboard Window

Using Halloween Scene Setters Everyday

Pumpkin Ottomans, Oh Yes

Halloween T-Shirt Pillows

Kbatz Krafts: A Reversible Red Skirt!


Let’s travel back in time! What happens when you have a surplus of red curtains, red fabrics, and a plague-delayed holiday? Why one makes a festive ye olde skirt of course! This impromptu project only took about four days, coming together smoothly with a fun silhouette that fits a variety of seasons and stylings. Please enjoy this completely backward construction video of a December holiday made in January, edited in February, and now seeing the light of day in March. And no, I haven’t finished the matching vest – Yet! – but the skirt’s actually reversible in a pleasant two-for-one surprise!


Thank you for Watching!


For more project photos, visit Kbatz Krafts on Instagram or Facebook!


More Kbatz Krafts:

Holiday Bonnet and Cape

Halloween Mystery Sewing

Another Halloween Dress

Kbatz Krafts: Another Halloween Dress!


Yes, it’s November, Thanksgiving, Christmas! 🎃🦃🎄 However after my Halloween Mystery Project turned out to be such a delicious costume, I decided to repeat the process and make a more streamlined seasonal dress. Using leftover black materials from my stash and a thrifted $4 Halloween panel, materials that were once curtains and slipcovers can become an ensemble with sophistication and whimsy! Despite a few late hiccups, adjustments, and design changes on the fly – I won’t call them mistakes! – this unique ensemble came together quickly, is basically free, and feels good!


For more in progress project photos, visit Kbatz Krafts on Instagram or Facebook


Revisit More Kbatz Krafts:

Halloween Mystery Sewing

Halloween Scene Setters Every Day

Memento Mori Sewing

Carving and Baking with Real Pumpkin


Kbatz Krafts: Using Halloween Scene Setters Everyday? 🎃


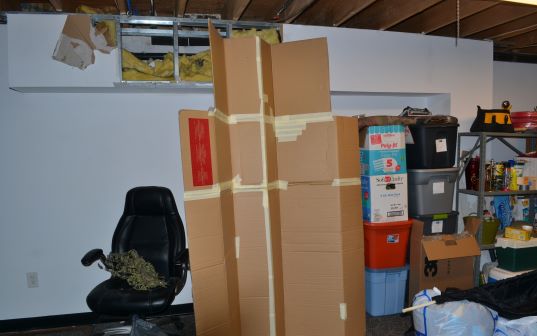
In true Poe fashion, when we moved to our a new home, our cat jumped behind the dry wall in the basement. Although the walls are finished, the ceiling is not, so he climbed inside the top and we bashed some holes in the wall and removed the sheet rock to free the totally nonchalant little devil!

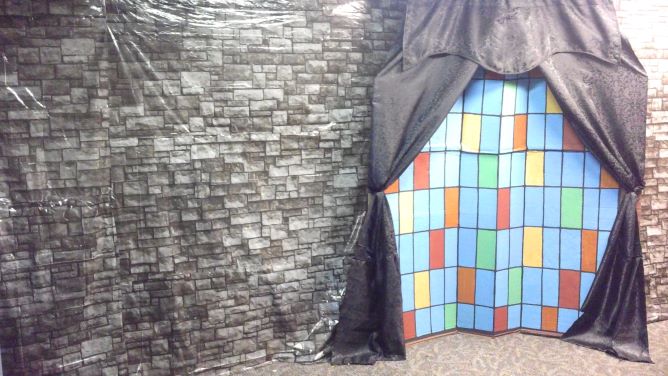
I’ve since rearranged my Decorating Like Dark Shadows basement craft space and put metal storage shelves under this ruined soffit. Once this year’s Christmas presents started piling up there, too, I wondered if there was a better way to conceal this problem area? Instead of cropping photos or shooting around everything, why not make complete use of the odd overhang and storage inlet? Hanging curtains to hide the tucked away shelving could be expensive for the right hardware, and so much fabric near the plumbing above could be an issue. Enclosing the area entirely in some kind of sliding panels or folding door system would likewise be costly and more intensive than a simple aesthetic fix to ideally match my Gothic Cardboard Window Backdrop. Fortunately, in perusing the Dollar Tree website (as one often does once their Halloween merchandise rolls out) I discovered Halloween “wall murals” in an “eerie stone wall” design. These sheets are about three feet by six feet, similar to printed plastic tablecloths, and probably only meant for one or two brief uses. Similar castle stone scene setters online looked smaller for twice as much money with negative reviews on their poor quality.

Before

Could decorative plastic be hung on a long-term basis? For $1 a sheet, I began hunting at several local dollar stores until I found the stone wall motif – the graveyard, cat, and cauldron, and skeleton styles also available weren’t the ones I wanted, as their designs couldn’t be taped together for one running pattern like stone could. Besides, it matched my Dark Shadows panache! To cover my problem wall, I calculated needing about six sheets, so when I finally found the stone version, I bought all nine in stock! Opening several and laying them out on the floor, I could see they had the width, but about two and a half were needed to cover the wall height. I taped them together and then taped the top across the soffit, letting the plastic drape all the way down to the floor. It looked so gosh darn spooky cute, I decide to continue with a sheet above my Cardboard Window backdrop and down over another ugly metal shelf. Here, however, there was no drywall but wood beams above, so I simply used thumb tacks and made sure there was enough slack for the slightly longer drape. I can lift up any part to access the storage, but by doing the entire area, it looks like I just happen to have a Halloween scene setter on my wall. You can’t tell there is a hidden space with tools, Christmas baking supplies, and holiday gifts – but no peeking!

After

It’s been over a month since putting up my “eerie stone wall” and there have been no problems yet. If the sheeting does begin to fall, fresh tape and thumbtacks should keep it secure – unless as my husband put it bluntly, the cat decides to do something about it! Thankfully, I only used five sheets, leaving four extra for any rips or replacements. Unless the camera catches a glare from the fluorescent lights, you can’t immediately tell this is just plastic. Was this $9 plus tax the absolutely cheapest way to cover a wall? Yep. Do I expect this to actually last long term? Probably not. Certainly, there are better, proper solutions for this odd soffit, but for a few months of multi-tasking decoration and secret storage, why the heck not?

Visit our Kbatz Krafts Instagram or Facebook for more photos!

See more Kbatz Krafts:

Gothic Gallery How-To

Halloween Cat Shelter

Cardboard Tombstones

DIY Halloween Candle Clusters


Kbatz Krafts: Halloween Sewing Vlog 5 Reveal 🎃🧵


It’s time to put on the curtains – yes curtains! – beads, tulle, draping, tassels, and bells together to accessorize the Halloween Mystery project! Find out why Kristin Battestella aka Kbatz has been calling this a mystery as the final product is revealed! Not that there isn’t some doubt, mistakes, and craft regrets. Only $7.50 for new ribbon and trim went into this project, which still comes in under $55 in legacy stash and prior thrift finds. When forced to think outside the box and dig deep in your craft closet for patchwork surprises on Halloween, something magical is possible! Roller skates are also involved in full disclosure. Thank you for Watching!


Visit Kbatz Krafts on Facebook and Instagram for more project photos, and don’t forget to show us YOUR Halloween DIY on our Horror Addicts Facebook Group!

Check out More Kbatz Krafts:

Halloween Candle Clusters

Upgrading Masquerade Masks

Pumpkin Cat House

DIY Cardboard Coffin

Spider Ball Topiaries

Halloween Canvas Art

Halloween Pillows

Pumpkin Ottomans

Dark Hallway by Kevin MacLeod is licensed under a Creative Commons Attribution 4.0 license. https://creativecommons.org/licenses/by/4.0/ Source: http://incompetech.com/music/royalty-free/?keywords=Hallway&Search=Search Artist: http://incompetech.com/

Hot Swing by Kevin MacLeod is licensed under a Creative Commons Attribution 4.0 license. https://creativecommons.org/licenses/by/4.0/ Source: http://incompetech.com/music/royalty-free/index.html?isrc=USUAN1100202 Artist: http://incompetech.com/

Spooky Ride by Twin Musicom is licensed under a Creative Commons Attribution 4.0 license. https://creativecommons.org/licenses/by/4.0/ Source: http://www.twinmusicom.org/song/250/spooky-ride Artist: http://www.twinmusicom.org

Kbatz Krafts: Halloween Sewing Vlog 3 🎃🧵

It’s seams, more seams, and seam some more before ruffles, ruffles, and more ruffles as the tulle hem comes together on the striped orange panels! It’s almost time to find out what this mystery sewing project is thanks to heaps of gathering, questions about making do with short trim or spending for embellishments, and draped Halloween scarves! There are cats involved, too.


For more project photos, follow Kbatz Krafts on Instagram and Facebook!

Revisit More Kbatz Krafts:

Halloween Canvas Art

Mystical Spooky Orbs

Pumpkin Cat House

Yogurt Ghost Candlesticks

Thank you for Watching!

Cinematic (Sting) by Twin Musicom is licensed under a Creative Commons Attribution 4.0 license. https://creativecommons.org/licenses/by/4.0/ Artist: http://www.twinmusicom.org/

Danse Macabre – Busy Strings by Kevin MacLeod is licensed under a Creative Commons Attribution 4.0 license. https://creativecommons.org/licenses/by/4.0/ Source: http://incompetech.com/music/royalty-free/index.html?isrc=USUAN1100556 Artist: http://incompetech.com/

Bad Ideas Distressed by Kevin MacLeod is licensed under a Creative Commons Attribution 4.0 license. https://creativecommons.org/licenses/by/4.0/ Source: http://incompetech.com/music/royalty-free/index.html?isrc=USUAN1100488 Artist: http://incompetech.com/

Kbatz Krafts: Halloween Sewing Vlog 2 🎃🧵

Kristin Battestella aka Kbatz continues to utilize every inch of Halloween printed scraps and remnants, sewing some finite areas by hand before a lot and did I say a lot of ironing on the lengthy striped orange panels. Basting, measuring, and math actually lead to a surplus of materials, but a leaky iron and daunting, fraying seams are making a lot more work! Any ideas yet what will this mystery sewing will be?

For In Progress Photos, visit Kbatz Krafts on Facebook or Instagram!

Visit more Kbatz Krafts:

Halloween Mystery Sewing Vlog 1

Halloween Pillows

Skeleton Love Wreath

How NOT to make Mystical Orbs

Amazing Plan – Distressed by Kevin MacLeod is licensed under a Creative Commons Attribution 4.0 license. https://creativecommons.org/licenses/by/4.0/ Source: http://incompetech.com/music/royalty-free/index.html?isrc=USUAN1100738 Artist: http://incompetech.com/

Thank you for watching!

Kbatz Krafts: Halloween Haul 2021! 🎃🛒


Kristin Battestella aka Kbatz is ringing in “Haulloween 2021” with a collection of dollar store raids, Goodwill shopping, and thrift hauls! Costumes? Check! Skeletons? Check! French maid accessories and potential for a laurel wreath tiara? Why the heck not?! Put on your spiderweb hats for everyday wear and dive in to these seasonal finds!


For those interested in more Dollar Store Craft Finds and Thrift Sewing Hacks:

https://www.youtube.com/watch?v=g5RzvL23iv

Don’t be shy about shopping cheap or letting people know your wish list wants and gift card needs! Kristin Battestella aka Kbatz shares some discount craft supplies and Dollar Store finds alongside sewing-related gifts and making good use of a hobby store gift card. What a haul!

Revisit More Kbatz Krafts:

Love Skeleton Wreath

DIY Cardboard Backdrop

Jewelry Making Basics

Halloween Haul 2020

Follow Kbatz Krafts on Instagram and Facebook for more Halloween Sewing, Crafts, and DIY or share your holiday escapades by joining Our Horror Addicts.net Facebook Group!

New HorrorAddicts.net Podcast Season 16 to Begin


Interview with Creator and Horror Hostess of HorrorAddicts.net, Emerian Rich. 

Interviewed by Kate Nox, Blog Editor

Nox: Emz, the new podcast season is about to begin. On April 24th we can all tune in and hear the show. I imagine this is an exciting time for you?

Emz: Exciting and busy. The staff and I are all working hard to collect information and create new content for the listeners.

Nox: And how many seasons have you been doing this?

Emz: This will be our 16th season.

Nox: Share with us the theme for this season and some of the reasons it was chosen

Emz: We wanted to really highlight POC voices this year, so we made a call to share with us horror in cultures from around the world. We’ve got some really great authors involved and we’ll be covering horror from all different countries. We made it a goal to populate our bookings with 50-75% POC voices and we ended up surpassing that with over 79%.

Nox: Can you let us in on any of the exciting items the season holds for our listeners?

Emz: We have three anthologies to highlight. SLAY from Mocha Memoirs Press, Haunts and Hellions coming out in May from HorrorAddicts.net Press, and ON TIME from Transmundane Press. We’ll have readings from the authors of those books. We’ll also be hosting a Wicked Women Writer’s All-Star competition for our 200th episode, so the listeners will get to hear from the winners of our contests over the years.

Nox: I’ve heard rumors you have new theme music this year?

Emz: Yes! Our favorite band, Valentine Wolfe, has returned to theme our show with their song, “I Felt a Funeral”

Nox: What will the audio drama be this year?

Emz: The Deadbringer, an audio dramatization of E.M. Markoff’s novel. It’s sure to be exciting!

Nox: Remind our listeners when they’ll be able to tune in for the first episode.

Emz: The first episode premieres April 24th and we’ll start with the black vampire theme. Authors from Mocha Memoirs’ SLAY will be reading their work for us. A full list of themes and guests can be found at: HorrorAddicts.net and you can also listen on all the podcasty things including iTunes, I❤Radio, Stitcher, and more. I can’t wait to talk to my addicts again!

Kbatz Krafts: DIY Cardboard Stained Glass Window

Thanks to the faux stained glass windows on the Halloween Cat Shelter and a serendipitous black drapery seen in my Halloween Thrift Haul video, my ideas for a fake window room divider can now come to fruition! Can cardboard be painted like stained glass of olde? Will a Goodwill curtain create the perfect backdrop? Can Kbatz work on the floor without the cat stepping in paint? Yes, yes, yes!

After not saving much cardboard over plague fears, I finally kept two large boxes that were too good not to re-purpose – cutting the flaps open and taping the folds with masking tape to create an accordion style divider that can stand on its own. This is both tall enough to hold the thrift valance above me as a photo backdrop (a black curtain behind black clothes wouldn’t help very much!) yet short enough to move under the rafters in my Dark Shadows Basement Studio. I laid the cardboard on the floor, using a thrift yardstick and an old school protractor to measure and draw grid lines for the window panes. Working with the cardboard folds created window squares or rectangles either eight or ten inches – a simple pattern in that Dark Shadows spirit mimicking both the stained glass windows at the top of the Collinwood foyer stairs as well as the fake studio window of the drawing room. Did you expect anything else from me? 🙂 The pencil line panes were retraced in black marker and then a coat of black paint, but the perimeter cardboard will be brown to match my wall color. Before committing to painting the window directly on the cardboard, however, I practiced in Photoshop with some random but symmetrical color patterns of red, green, yellow, and orange panes to compliment the majority faux glass blue. Once I was certain on my template, I marked each pane color before multiple, darkening coats of the red, yellow, and orange – mixing each with brown for a deep but faded hue a la ye olde. New Spring Green and Caribbean Blue paint colors were mixed with a darker Cobalt Blue for their depth, and after a day of drying time, it felt like forever touching up all the black grid lines, but it was really only two days.  

Now it was time for the black valance, which was too short for my tall divider so two similar dollar store table runners were cut in threes and sew back together to match the panel widths before being sewn to the bottom of the curtains themselves. The runner lengths didn’t quite match either, but when drawn back with simple black ties, their tiered length creates a fine layered drape. While these fabrics are not durable quality for a real curtain in an active area – and the seam fraying, jammed threads, and bobbin breaks might discouraged beginning sewers – they work perfectly for a backdrop facade. The valance was loosely gathered and glued to the top edge of the cardboard using my preferred hot glue. Rather than a tougher adhesive or stapling, hot glue makes for an easier removal if needed, and the curtain sides are simply taped in the back so they can remain adjustable. The fabric can flip behind the cardboard if it needs to be out of the way, and tassels or faux vines or other ~aesthetics can be added as needed. While not everyone may need a large divider like this, the faux window painting technique is perfect for adding a gothic frame anywhere in your space and the kids can have some cardboard fun, too. Thanks to a $4 curtain, $25 in paints, $1 masking tape, $2 table runners, and free cardboard, a gothic vision came together with a clutter-hiding chef’s kiss.

Click for More Trash to Treasures:

DIY Cardboard Tombstones Video

DIY Cardboard Coffin

DIY Halloween Repairs


Visit Kbatz Krafts on Facebook or Instagram for more Project Photos!


Manga Review: Doors of Chaos by Ryoko Mitsuki

doorsofchaosI happened upon Doors of Chaos by accident while on vacation in Los Angeles, visiting a store called Anime Love. This manga by Ryoko Mitsuki is about twin sisters who control the four doors that protect their world from descending into chaos. Clarissa is the key to open the doors. Mizeria is the key to close the doors. On their “coming of age” day, their guardian and teacher, Rikhter, kidnaps Clarissa and begins to open all the doors through which demons pour through. Mizeria, the sister left behind, is suddenly introduced to a race of people who have been sent to protect her. She is completely confused. She thought she was the less powerful sister and that Rikhter was noble. She soon finds he is using her sister Clarissa for his own gains and that Mizeria is the only one who can stop the destruction of her world.

This manga’s art stays true to the intricate goth-loli style. The girls are clad in multiple petticoats and long hair in ribbons with elaborate tattoos trailing all over their pale skin. The men of this world are clothed in a mix of traditional Victorian frock coats with ascots and French Renaissance breeches with knee boots. The other worldly creature that comes to protect Mizeria is more of an anime waif with bandages like Rei Ayanami from Neon Genesis Evangelion. He wears what looks to be animal skins, chains, and sports the same sort of tattooing the girls do. There’s also a freaky guy cloaked in what can only be called a trenchcoat length straightjacket.

The art in this manga is top shelf. If for no other reason, pick this up to stare at the excellent artistic style of this manga. It doesn’t have much of those annoying reiterations that some anime books have when the chapters switch. The story is good and the dialog makes sense. There is a touch of the slave fetish in this book as well as very mild nudity. Demons are a touch gorier that normal, but violence is nothing out of the common way.
I recommend this manga for any anime reader and one of the few I would read a traditional novel about.

Clocks, keys, demons, and an excellent story, what more can you ask for in a manga?

Kbatz Kraft: Jewelry Making Basics


It’s your put earrings in your ears reminder! Kristin Battestella aka Kbatz is breaking out the tacky and gaudy orange bling for a little chat about jewelry making basics, where to get affordable beading supplies, cheats for those of us with dexterity issues, and the endless possibilities of making your own earrings, necklaces, or bracelets to coordinate with your style. You don’t have to spend a lot of money to add personality to your wardrobe – even if that’s just orange and black beads to go with Halloween pajamas in December! Terrible camera angles and talking Italian hands that spill the bead tray are included free of charge. 


Thank you for being part of Horror Addicts.net and enjoying our video, podcast, and media coverage! Tell Kbatz what you’d like to see with our Online Survey or join the conversation on our Facebook Group!

Visit the Horror Addicts.net Online Writers Conference to brush up on your writing skills and stay tuned from more Live Literary Events in February 2021!

Peruse More Kbatz Krafts:

Halloween Canvas Art

How NOT to make Mystical Orbs

Victorian Bonnets and Capes

Goth Parasol Upgrade

Visit Kbatz Krafts on Facebook or Instagram for more Jewelry photos and step-by-step pictures!


Kbatz Kraft Banner by Emerian Rich

Kbatz Krafts: Playhouse Turned Halloween Cat Shelter!

Kristin Battestella aka Kbatz discusses the tools required and $200 budget for the initial plans in outfitting a curbside playhouse as a Halloween cat shelter before assessing the on hand hardware, pallets, and assorted plywood. After a garage clean up and power washing of the playhouse, it’s time for the interior insulation installation (say that three times fast!) The design, however, changes on the go as doubts and deadlines mount – removing plans for interior cleats, dividers, and platforms in favor of possible multi-use as a garden shed. After all, the cats may not appreciate the labor intensive assembly!

Now that the windows are weatherproofed, the base floor is attached, the insulation is installed, and some seemingly daunting setbacks are overcome; Kristin Battestella aka Kbatz works on the playhouse’s Halloween exterior in time for October 31. New color schemes, multiple acrylic coats, and hand painted trim turn the old plastic shutters into faux stain glass spooky to be preserved with a clear top coat finish. House cat inspection and approval required! Next, it’s time to spray paint the roof gloss dark gray and the walls with satin granite to create a tomb-esque look, coming in at $70 for an online order of spray paint and $5 for a comfort grip nozzle. Six cans of each color should be enough, right?

Rather than the initial notion to completely close the interior with a fixed replacement door on the playhouse turned Halloween Cat Shelter, Kristin Battestella aka Kbatz uses found pallets and plywood to make a new working door thanks to a crowbar and reciprocating saw. A smaller cat door is cut out with a jigsaw, and $15 worth of rustic hinges, a door pull, and a lion knocker provide interior access as well as Dark Shadows motifs to match the mausoleum design. With touch ups, trim work, and a total cost coming to exactly $100; it’s time wrap up and add catnip for a feline guest or two! (Unless there’s a rain delay!)

Enjoy the spooky sounds and shadows of the night in this All Hallow’s Eve Eve reveal of our curbside playhouse turned Halloween cat shelter!

Thank you for being part of Horror Addicts.net and enjoying our video, podcast, and media coverage! Show us YOUR Halloween DIY on Our Horror Addicts.net Facebook Group!

Follow more Kbatz Krafts at HorrorAddicts.net including:

How to Make Cardboard Tombstones

Goth Parasol Makeover

Halloween Thrift Haul

Halloween DIY Repairs

Decorating Like Dark Shadows

Follow Kbatz Krafts on Instagram or Facebook for more project photos!

Kbatz Kraft: Pot O’ Bones Tower

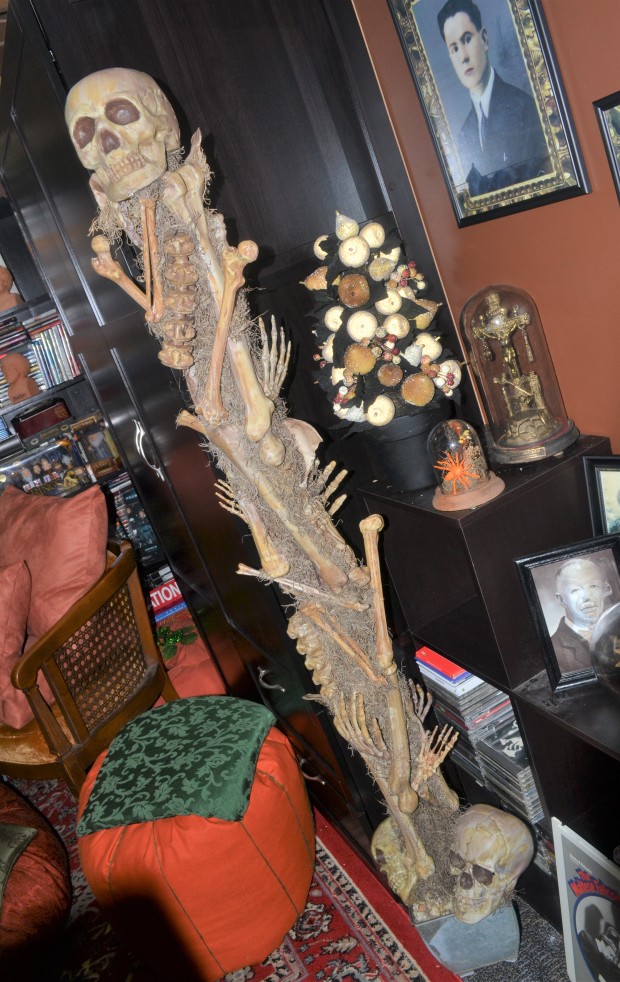
When one spots a bag of loose Halloween skeleton bones at Goodwill for $5, one snatches it before anyone else! Like an archaeologist on a discovery, opening the bag revealed large femurs, skulls, spines, and bony hands perfect for a towering Pot O’ Bones!

These odd, incomplete skeletons, however, were two different colors, and a brown paint dry brushed gave the bones a cohesive color before a second coat of a yellow and brown muddy added to the dug up and weathered theme. An unused skull meant to go with the collapsed Shakespeare Cardboard Tombstone and a pair of skeleton arm tongs from the dollar store were also doctored with aging paint and tossed into the collection. Initially, a found terracotta pot served as the tower base, but it was too big, requiring more backyard stones to secure the inner cardboard tower roll re-purposed from an upholstery fabric sale. The hole in the bottom of the pot meant a stabilizing stake could run through the pole, but since this isn’t weather proof anyway, the stake and the increasingly heavy terracotta were swapped for a smaller rusted metal pot.

With the stand fixed, the bones were strategically set using semi-adjustable hot glue rather than a mega strong adhesive that doesn’t allow maneuvering. Once the large femurs were in place, the cardboard base was painted brown just in case any gaps showed. More leaves, sticks, or stones as fillers between the angular bones were an option, but two bags of dollar store moss completed the decrepit look. Although one could paint the post and even moss the entire tower before adding the bones, that also creates unnecessary work in spots that might not show. This assembly could be done quickly in a day, but I did the bones and moss in stages and made adjustments. Like a Christmas tree, I keep seeing gaps were there should be less moss or another bone and wasn’t quite pleased. Fortunately, the discarded bottom halves from my 3D Skeleton Frames project provided more bones.

Obviously, long term outdoor use requires different materials, but with on hand paint supplies, found materials, $5 for the bones and $2 for the moss, this was much cheaper than the luxury skull towers online. Bags of bones themselves run between $15 and $30! This same model can be applied to family friendly leaves and pumpkins or more birds and bats morose, and a Pot O’ Bones Tower is perfect for a foyer statement, autumn porch, or cemetery sentry.

Revisit more Kbatz Krafts including:

Spider Ball Topiaries

DIY Flower Pens

Re-Purposed Black Topiaries

How to Make Stuffed Pumpkins Video

For more Project Photos, Follow Kbatz Krafts on Facebook! 

Kbatz Kraft: Mini Macabre Bone Wreath

It’s the Autumn of Bones for Kbatz Krafts! What’s one to do with the smaller bones left over from my Pot O’ Bones Tower? Why make a morbid little wreath of course!

A dollar store metal frame was wrapped in brown yarn for the base, as I intended to finish off the glued on bones with some twine ties for a rusted look. However, this fourteen inch wreath seemed too big for the angular bones. Unlike more traditional wreath items like leaves or pine cones, the bones didn’t seem to fit with too much yarn and twine showing gaps between the bones. Fortunately, switching to a smaller diameter wreath frame meant the bones could be the star of the design, going off the edges of the round. Gluing onto the smaller wire frame, however, proved difficult with bones teetering on too few glue spots. Thankfully, switching to a nine inch willow wreath finally did the trick! This natural base that didn’t have to be hidden opened up the possibility for more raffia ties and small black branches sourced from more dollar store florals.

An additional bag of dollar store mini bones were tossed into the mix, too – again painted with the same dry brush brown technique as the Pot O’ Bones Tower to take off the new plastic edge while creating a cohesive, rustic look. After trying the bones in different positions and doubting if this wreath was meant to be because none of the arrangements looked right, I realized it was the largest bones that were the most troublesome. Without them, the smaller femurs and mini bones created a much nicer jointed and angular shape. Now that the placement was at last settled, each was hot glued on to the wreath with the black branches adding macabre but natural pop as well as hiding some of the glue globs. The slightly darker raffia loosely wrapped in symmetrically asymmetrical spots also hid the assembly. This bony wreath looks like the branches and ties are what’s holding it together, and a twine hanging loop sets off the natural motif.

Unlike a traditional wreath where any arrangement comes out complimentary, these morbid materials took some trial and error addition, subtraction, and experimentation. Fortunately, this afternoon project packs a demented little punch for a modest under $8 for supplies that were already in the craft closet – except for those extra Halloween season only mini bones! Compared to expensive skulls and florals, this macabre bone wreath is much more fun and affordable.

Revisit more Kbatz Krafts including:

Decorating Like Dark Shadows Video Series

Goth Parasol Upgrade

Mini Coffin Tray

DIY Cardboard Coffin

For more Project Photos, Follow Kbatz Krafts on Facebook! 

Kbatz Kraft: Halloween Canvas Art

I’m not a painter, but spotting assorted size canvases at the Dollar Store inspired me to get my spooky art on with a little multi-dimensional Halloween décor! Often shadow boxes or keepsake frames are designed inward with elaborate motifs and objects that you can’t see unless you’re up close. These, however, are certainly noticeable, oh yes.

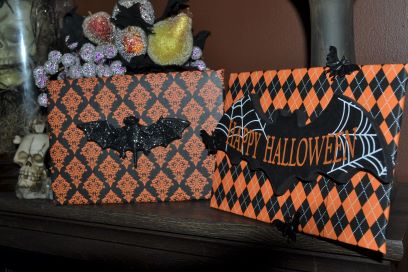
A $2 Goodwill Halloween craft paper block became the canvas backdrops – assorted patterns with damask skulls, spider webs, orange harlequins, and purple owls fittingly named “Dark Shadows.” Clearance Halloween paper placements also backing the 3D Skeleton Frames provided bats and candy corn designs for the larger canvases, and rummaging through my craft stash provided plastic lizards and scorpions, mini pumpkins, bone parts, weird looking potpourri pieces, and small holiday signs tossed into the potential pile as three dimensional art. Laying out my canvases, creepy papers, and morose objects helped match the right designs, bugs, and canvas sizes – eliminating patterns and items that clashed or didn’t fit while creating stand alones or series themes. Using papers and canvases both horizontally or vertically added variety, and now it was finally time to wrap each canvas like a present, folding the corners around the edges and hot gluing the the paper directly on the plain backs. The medium size canvases were a little larger than the square craft paper, so two pieces were seamed together – tape tested to carefully match the paper’s pattern before gluing down the line.

The small signs were only painted on their fronts, so they received some matching black or orange paint around the sides before being centered and glued on the large canvas fronts. The hangers on the back of these signs were removed, too – reused on the backs of the medium canvases now likewise redressed in proper batty fashion. When folding my wrapping too tight, the paper ripped on one, but Kbatz can roll with the punches and glue on more bat bling to fix anything! Not all the canvases nor patterns were perfectly square, however, and some uneven corners or abstract crooked have to be gotten over quickly. The square paper just came to the end of the smallest canvases, so their edges were painted black and the inside rim of the papers were lined with black marker to match the black and white backgrounds. Two red coats gave the bugs a unifying pop, and that foam mini pumpkin was cut in half and touched up around the edges before they were all mounted. Although the larger canvases can be hung themselves, the smaller ones are flat pieces probably meant for a tabletop easel display. A fitting orange yarn could anchor this small trio in a rustic, ladder style banner; but after taping the yarn on the backs, adjusting the placements, gluing the yarn in place, and securing it all with more masking tape, this attempt at hanging art looked totally terrible!

Between the weight of the canvases and the forward leaning objects, the series was no longer uniform as one leaned one way or titled the other. Recovering these canvases in fun prints and using zinger toppers is a family friendly project, but this looked like bad child art that mom has to stick on the refrigerator nonetheless. After getting some aggression out tearing off the yarn, necessity took over in the form of cardboard plucked right out of the recycling. I hadn’t yet used the last place mat pattern, a fun geometric Halloween design, and now it wrapped the cardboard as a new backer to a row of canvases. Though cute, it felt plain. Looking about my craft studio again for more trash to make treasure, I found the black frames removed from the new pictures for my Lenticular Gallery. They weren’t quite the right size for this wide series, so I cut the frames and re-squared them around the new artwork, again taping and gluing the surround in place. You can see the seams of this frame if you look closely enough, and I’m not sure if I totally like it. More creepy crawlies or traditional Halloween webs and creepy cloth drapes would hide these flaws, but all that seemed too busy. Fortunately, this canvas turned cardboard art does hang nicely with its orange yarn swag.

This Halloween Canvas Art was a lot of fun thanks to the craft inspirations and found affordability. For $7 I have five new Halloween displays – even if they didn’t all go as I expected. It also seems like a lot of materials and steps went into these, but having the craft basics to do this makes it wonderfully easy for a fall family night or an at home classroom project. Have a newspaper, special gift wrap, or small memento mori you want to save? Sentimental items or morose shockers make you an artist here!

Revisit more Kbatz Krafts including:

Gothic Gallery How-To

Goth Parasol Upgrade

DIY Flower Pens

How Not to Make a Spooky Spell Book

For more Project Photos, Follow Kbatz Krafts on Facebook! 

Kbatz Krafts: Love is Love Skeleton Wreath

I was going to wait and do this project as a morose February Valentine, but after my His and Hers Three Dimensional Skeleton Frames, I was too excited about this Love is Love Skeleton Wreath!

Despite dollar store skeletons in hand, part of the delay here was originally seeking an oval frame – two skeletons, a few roses, an ornate black surround, goth splendor, fin. However, new thrift frames went to the latest additions in the Lenticular Gallery, and the large wreath frame dismissed from the Mini Skeleton Wreath now took center stage. The floral stash provided red flowers, purple pop, and black leaves, but when I came upon my feathers drawer, I knew this was destined for rainbow flair! The black elements were ditched in favor of green leaves and green feathers stolen from a St. Patrick’s Day boa to go with the abundant orange, yellow, blue, and light purple feathers. Wrapping the frame in red tulle also found in the craft stash provided a solid base for hot gluing the red flowers and green leaves around the top half of the frame. Next came the skeleton couple, who were surprisingly cumbersome folks! The legs were removed, but an arm on either one was also displaced so their rib cages and skulls could be glued together. Without so much surface area on their little bones, it took a lot of hot glue pressed and held in place until the skeletons set. Rather than distinct hair or hat, this hugging, universal, eternal couple was glued as is to the bottom of the wreath with their arms bent and glued in place for more love and support.

The rainbow spread was arraigned and laid out before the purple flowers were glued along the bottom to finish the frame coverage and hide the skeletal ends. Working from their center across helped keep the assorted blooms semi-symmetrical before the orange, yellow, blue, green, and light purple feathers filled in the gaps. The red flowers already stood out with goth glam, leaving no need for red feathers, but the two different purplish shades became the requisite indigo and violet. Being one who prefers black or dark aesthetics, I didn’t have more colorful rainbow motifs, but that’s okay. Using what was in the craft stash required more outside the box thinking, and by eliminating black accents that would scream Halloween, this colorful goth décor can be hung up for fall, February, or Pride. At $3 for the frame and skeletons and maybe $7 worth counting flowers and feathers cost, this done in a day whimsical wreath is affordable, unique, sentimental, and fabulous!

Revisit more Kbatz Krafts including:

Re-Purposed Black Topiaries

Drab to Glam Lampshades

DIY Flower Pens

Upgrading Masquerade Masks

For more Project Photos, Follow Kbatz Krafts on Facebook! 

Kbatz Kraft: Halloween T-Shirt Pillows and Masks

Who doesn’t love a Halloween T-shirt? But what’s one to do once your frightful favorite gets too small, stained, stretched out, or ruined? Never fear Kbatz is here to help you turn discarded October shirts into fresh Fall pillows!

1) Be brave and snip snip! Once you’ve selected your T-shirt retirees, cut off the sleeves and necklines, leaving the front and back of the shirt as your new pillow fabric. If there are out of the way soiled spots or extra bottom length, consider cutting those, too. We want to save the fun Halloween designs, so the prints we’re preserving dictate the size or shapes of the pillows. Many will be straightforward squares, but others with wide across designs can be smaller, lumbar sized pillows or a left logo becomes a memorable mini. Go with what your facade allows. Do remember though, that the pillow fabric may seem big when ironed flat, but consider how much room there will be once it is a stuffed three dimensional object. Give yourself a few inches of room or seam allowance to keep your Halloween swag centered. You don’t want any fun phrasing running off the side!

2) Turn your fabric inside out and get sewing! Your two “good sides” should face each other, pinned or basted in place with a quick stitch. Go around your material perimeter and sew three sides closed. The biggest mistake you can make here is getting carried away and sewing the whole pillow closed, but that’s totally fixable! If you are going to use a pre-made pillow form to stuff your new Halloween cover, leave the bottom completely open. If you are using other stuffing means, then you can sew the bottom partway if you desire – just leave enough for your arm to do the fillings. Matching thread works best on your final stitching, but if you need help seeing your basting stitches and want to use a zany color, well that’s fine, too. Try using pins or chalk marks if you need guidelines while you stitch. When hand sewing, a basic running stitch will suffice, the smaller the stitch the better. There is, however, no formal or right way to do it! This is just a pillow. It doesn’t have to be perfect. It’s okay to make mistakes. That’s no cheat, either – this is basic sewing for you and the kids to practice and have a good time. When you’ve done your three sides, turn the pillow right side out, make sure your design isn’t off the edge, unsightly, or crooked. If you have to break in a seam ripper and do a side again, that’s no problem.

3) Know your T-shirt or tool needs. T-shirt materials are often stretchy knits, so if you are sewing on a machine, check your thread, tension, or stitch, for a zig zag setting may be better on some fabrics than a straight line. If you intend to use your Halloween pillow year round or expect it to earn a lot of bed or pet rough and tumble, reinforcing your seams with more than one machine pass provides strength compared to a quick hand stitch line for an October occasional. As your handling your fabric – especially if it is already something older, stretched, or delicate, be careful not to tug and pull against the machine and create any uneven bunching. Knowing my machine gets tension issues with thicker fabrics, I sewed a former Halloween sweatshirt turned pillow by hand, first with a basting stitch and then going back around with a nicer, straight line finish. If you have trouble hand sewing, use a thimble or consider your needle size or thread weight if your thread keeps breaking or you poke your fingers. Remember this is a great way to learn some sewing basics if you’re interested in advancing to more ambitious projects.

4) It’s stuffing time! How you stuff your pillow is entirely up to you – soft, firm, overstuffed, whatever your comfort needs. A tired throw pillow can be revitalized as new Halloween innards, store bought pillow forms come in a variety of sizes, and natural or organic alternatives are available, however Poly-Fil is probably the most fun. A seasonal pillow that isn’t for sleeping or bedding use can be stuffed firm with plastic bags, disused towels, or fabric scraps, especially if you are light on real Poly-Fil or want to spread it around in combination with other materials. Heck, even dryer lint! My Halloween pillows were for decoration, so an outer layer of Poly-Fil smoothed the shape but within the interior of the pillow were plastic bags and recycled denim insulation from food deliveries. Don’t want to admit you are cheap and calling it recycling (like me)? As a pillow flattens with use or as you purchase proper stuffing, one can always refill or change a pillow later. The more advanced seamstress might even add a zipper closure to the pillow bottom so it can be continually stuffed with more fabric cabbage. Who’s going to know what’s inside the pillow anyway?

5) Don’t toss the leftovers! Remember those cut collars and excised sleeves? Use ’em for that stuffing! The sleeves from the T-shirt pillows on our game room bean bag became Stuffed Pumpkins, and long sleeves can become arm warmers. That extra shirt bottom can become its own plain practice pillow or be folded over to make a mask. Two of my Halloween shirts had small vampish designs, so I made these masks instead of pillows. Initially, they were way too big for my face, but I went around the edges again and folded the sides to make a channel for the ear elastics. I think I was overcompensating in trying to preserve the Halloween statement by trying to shape the mask to the design, which turned out to be unnecessary. Maximize every inch of your materials when possible. Get into outside the box thinking habits and ask yourself, “What else could this be? How else can this be useful?” Use these scrap materials to practice more easy sewing projects!

Halloween pillows are one of the most popular October items today. Toss one in any room and your decorating is done! Even when they aren’t super elaborate, however, designer seasonal pillows are pretty expensive. If we don’t even spend $25 on a bed pillow used every day, why are we spending just as much on some kind of beaded burlap decoration? For the same price, you can buy the Poly-Fil for two or three homemade Halloween pillows – and you get to control the comfort, use, style, and sentiment. Preserve a bemusing T-shirt as a Halloween pillow and get the whole family involved in the sewing skills and stuffing fun.

Revisit more Kbatz Krafts including: 

Pumpkin Ottomans, Oh yes

Decorating Like Dark Shadows

Gothic Thrift Alterations

Victorian Bonnets and Capes

For more Step by Step Project Photos, Follow Kbatz Krafts on Facebook! 

Kbatz Krafts: Halloween Thrift Haul Video!

 ‘Tis the Autumn Season! Kristin Battestella aka Kbatz shares a recent Halloween Thrift Haul aka a “Haulloween” because that’s what I get for filming on October 1 Harvest Moon 2020 at 2 a.m. when the pumpkin brain turns to mush. This show and tell includes Halloween clothing, pajama bargains, and affordable name brand baby costumes that can be re-purposed when the child grows as well as supplemental gothic shoes and accessories.


Fashionable gloves don’t have to be expensive, and fun items like tiaras and veils add to the craft stash mayhem! Second Hand shopping is an affordable necessity for alternative year round finds to be altered or to suit retro, vintage, or sophisticated needs. It takes a little luck and getting to know your local shops, but the second half of this video features bargain corset analysis, weighing the pros and cons of cheap costume quality, taking in larger lingerie styles, problematic zippers versus proper closures, and taking apart $5 corsets for the learning what not to do examination guilt free. The cat gets involved in the shenanigans, too.

Thank you for being part of Horror Addicts.net and enjoying our video, podcast, and media coverage. Share your Halloween adventures with us on our HorrorAddicts.net Facebook Group!

Visit More Kbatz Krafts:

Glam Lampshades

Decorating Like Dark Shadows Results

Unfinished Regency Sewing

Gothic Thrift Alterations

For more project photos, visit Kbatz Kraft on Facebook and Instagram!

Kbatz Kraft: How *Not* to Make Mystical Orbs!

Cast a spell and make some magic any time of year with your very own mystical orbs! Except when you attempt a Pinterest method that results in disaster that is. Read on for both how to paint and how not to glitter your own crystal ball DIY.

The ingredients to make your own affordable, family friendly orbs are surprisingly pedestrian – clear plastic ball ornaments from the dollar store, broken lamp bases for suave pedestals, and two of each to test two different mystical how-tos. One lamp turned orb stand had already been Painted Black and separated into smaller candle holders but now the reunited pieces are dry brushed with yellow ochre for a bronzed look while the second solid lamp base is painted with yellow and brown for an aged vintage. A glittery orange ball to go with the brown was the Pinterest attempt, however, the seemingly simple food dye for orange water, plenty of glitter, and cotton balls combined inside the ball were a complete failure. Although the shine and the color were great, there was either not enough cotton balls or too much water, maybe both because everything just sat there in one ugly clump. Once the soaked gunk was drained out again, I tried painting the outside of the ornament with a mix of yellow paint and coppery glitter, but this too was unsightly and unsuccessful.

Frustrated, I temporarily abandoned this orb in favor of the much more pleasant second attempt. This time blue, white, and purple acrylics were mixed together, varying the colors and brush strokes for a textured, marble effect followed by a glow in the dark paint topcoat. Once dry, the ornament was glued in place on its base – splendidly contrasting the dark bronze pedestal and vindicating my painting method. I went back to the disastrous ball and likewise painted it with a varied yellow and orange. This orange is not opaque like the Dark Shadows Candle Sconces, but a shiny vintage top with the dark brown base. Twine wrapped around the glue seams set everything off, and although it’s tough to photograph them glowing in the dark, they do!

While craft experimenting can be good wholesome fun, it can also lead to time, supply, and cost consumption that isn’t always a day well spent in tough times. Here, my first instinct was correct compared to a dreaded Pinterest fail – one in which discouraged kids, liquids, glitter, and supplies can end up a messy ruin. Fortunately, by reusing found objects and dollar store finds, anyone can paint their own colorful crystal ball orbs.

Visit Kbatz Krafts on Facebook for more photos!

Revisit More Krafts: 

Mini Coffin Tray

How Not to Make a Spell Book

Cardboard Tombstones Video How-To

Kbatz Kraft: DIY Halloween Repairs!

Is DIY Decoration and Halloween How-To really worth it compared to the expensive store-bought accessories? Does your project hold up compared to “the real thing”? Can you fix what’s broken in a weekend? Kristin Battestella aka Kbatz makes minor repairs on a DIY Cardboard Coffin alongside therapeutic painting techniques and positive Halloween philosophy.

Day Two of the Halloween DIY repairs continues for Kristin Battestella aka Kbatz with hot glue guns and some Frankenstein sewing to fix an Oversize Pumpkin Ottoman before the finishing touches on the DIY Cardboard Coffin and the reconstruction of the fallen Shakespeare Cardboard Tombstone. Not everybody can go and purchase everything new, new, new all the time – especially with recycled, unique projects like this!

Is masking tape good enough? In today’s buy, buy, buy mentality we often forget a lot of things need regular cost saving tune ups. Minor, expected maintenance on Halloween DIY Projects is realistic, affordable, and just as fun the second time as Kristin Battestella aka Kbatz waxes on morbid reading recommendations and faux stone painting tricks as the repaired Shakespeare Tombstone is finished.

Thank you for being part of Horror Addicts.net and enjoying our video, podcast, and media coverage! Show us YOUR Halloween Craft Projects on our HorrorAddicts.net Facebook Group!


For our Original Kbatz Kraft How-Tos or More Halloween DIY:

How to Make Stuffed Pumpkins Video

DIY Cardboard Coffin How-To

Yogurt Ghost Candlesticks

How to Make Cardboard Tombstones Video

Cardboard Tombstones  Photo Shoot

Pumpkin Ottomans, Oh Yes.

Follow Kbatz on Instagram or visit Kbatz Krafts on Facebook for more step by step photos! 

Kbatz Kraft: Drab to Glam Lampshades

After picking up some sweet candelabra lamps at the Habitat for Humanity Restore for $15 each – as seen in my Dark Shadows Inspired Studio videosthe search began for retro shades to match. Unfortunately, big barrel shades of yore are few, far between, and expensive. Modern cut shades are too small, but two contemporary barrel shades from Goodwill for $5 almost fit the scale, and with some glam doctoring, these swanky lamps can once again zing!

These pure white shades aren’t old school mood, but painting the canvas would dim bright task use, so trimmings must handle the transformation. Compared to goth black ribbon or heavy brown elements often seen on mid-century shades, here golden swag matches the candelabra’s leafy metalwork and vintage glow – marrying the present shade with the classic warmth. A $2 roll of yellow ribbon with delicate scroll edging softens and elongates the top of the shades when hot glued around the perimeter. Unlike an oversize vintage barrel, these contemporary cuts are slightly short, however a delicious gold fringe at $8 for enough yardage can be glued along the bottom edge for maximum length dangle, oh yes.

Even without pandemic lockdowns, it takes a little luck perusing local thrift haunts to find the right classic lamps or shades to match as well as shopping online or at the craft store for the right trims and accessories to fit one’s sophisticated aesthetic. Fortunately, an illuminating hunt and a few hours’ glue gun cost far less the expensive made to look old lamps. Rather than considering how such a common object can make a statement – I myself kept delaying this glam because it was something decorative and unnecessary compared to other larger projects – we often accept lighting for it’s cheap, plain, and utilitarian musts. However, for $40 these dynamic pieces shine in personality and purpose. How many bland, generic lamps in your home could use a little embellishment? Go wild, child!

For More Before and After Photos, visit Kbatz Krafts on Facebook!

Try More Kbatz Krafts:

Goth Parasol Upgrade

DIY Flower Pens

Masquerade Masks

Frightening Flix meets Kbatz Krafts: Decorating Like Dark Shadows Results!

Kristin Battestella aka Kbatz puts together the finishing touches in the Dark Shadows inspired basement including draperies, vintage artwork, and sconces with a focus on the multi purpose desk, workspace, and mobile sewing area. Bonus jewelry making storage, sewing machine tips, and notion organization!


With a creepy lenticular gallery, medieval tapestry switcharoo, glam lampshades, illuminating accessories, and an unimpressed cat, Kristin Battestella aka Kbatz completes the Dark Shadows redecoration journey with a little gothic fortitude and a new appreciation for tackling large room projects during a pandemic.

Revisit More Frightening Flix and Kbatz Krafts:

Decorating Like Dark Shadows Part 1

Dark Shadows Gothic Sconces

All Things Dracula Video Review

The Ghost and Mrs. Muir

For MANY more Project Photos, Follow Kbatz Krafts on Facebook  and THANK YOU for being part of Horror Addicts.net and enjoying our video, podcast, and media coverage!

Kbatz Kraft: A Gothic Gallery How-To

Ever wanted to create a spooky gothic gallery wall but held back over fears of it looking terrible and wrecking your walls in the attempt? Kbatz is here to help you organize and assemble an affordably morose statement piece!

1. Pick a unifying theme. Look at what you have or conceptualize what you have in mind and how your frames and accessories go together. Make a list or drawing or digital template with photos of your intended space. Be it all black frames, all-round frames, bats everywhere, black and white portraits, horror movie posters, decorative shelving for spooky knickknacks, or in my case, a lenticular photo series – something in either subject, style, or structure must visually glue the collection together. Without a purpose to the series, the gallery can get messy or cluttered, feeling catch-all rather than eye-catching. These are pieces that you have accumulated over time to display, not just things that have been put on the wall as they happen. The gallery can’t be so busy that the eye has nowhere to relax. These lentiuclars are a common subject in dark frames anchoring the visual flow.

2. Although that doesn’t mean everything has to be the same. Once you have a foundation to follow, then you can shake up your gallery with some personality. I have dark frames – mostly black, but a few dark brown and some with metallic trims. The shapes and sizes also vary between larger plain portraits and smaller ornate frames with accessories between each. When you succeed in having a soothing overall scheme, adding a few spots of something similar but different within the cohesive theme gives the eye a place to focus. Rather than a mental puzzle, witty standouts let guests notice the entire thing as well as the special composition of the whole, and an usual sconce or accessories that match make for fun and inviting conversation pieces even if they are slightly scary objects!

3. Groupings maximize both the overall and the statements. Even in a series of commonalities, items hung and displayed without rhyme or reason can be overwhelming. Make sure the scale of your items matches the space and place sets within the series. You don’t want items that look too big for the wall or pieces so small they are ignored. However, a lot of small together can make one grouping to balance a solo large accessory. Hanging like items together or creating invisible lines among the frames – such as making sure the tops or bottoms of frames are level across the wall – trick the mind into pleasing organization even if artwork is scattered high or low as in a stairwell for example. My gallery has three or four items in groups with a break between the vignettes so one can take in a section, visually rest, continue the set, and let the eye flow with the larger traffic pattern into the room.

4. Practice your layout. What if that painting should be higher or your straight row of accessories ends up crooked? You can’t wreck your walls with a lot of unsightly holes as well as making more work for yourself with the subsequent touch-ups and corrections – especially if you are a renter or can’t fix the paint. Physically test your vision by tracing the shapes of your items on newspaper or another handy scrap like cardboard or packing paper and use these placeholders to adjust your arrangement. Find out what pieces don’t fit, which go together, and what to place where. Be sure you have enough space and start in the center rather than an outside end. You don’t want to run out of room! When you are ready to hang your gallery, make sure you have the right tools on hand – the proper wall anchors for heavy medieval armor, adhesive strips for smaller frames, the right size nails for your structure. Hammers and levels go a long way, too!

5. Galleries don’t have to be expensive to look great. Black frames can be pricey or tough to find, so I had to find smaller frames from the dollar store, old fashioned thrift pictures for under five dollars, and unused frames from family members spray-painted black or touched up with dark acrylics. Consider your style and project time in what your budget allows and remember to calculate any tools or supply costs. Maybe you can buy all new matching frames or can have a special piece custom framed. If you are artistic or in no rush, you can browse thrift stores or yard sales for some alternative do it yourself materials. You aren’t being cheap by being resourceful – you decide where to compromise your vision or hold out for the style you want in accordance with what’s affordable to you. A formal family portrait gallery in my stairwell cost forty dollars, but my lenticulars cost less than ten and they certainly make people take notice!

These days many may not have the extra space or means for elaborate artwork, formal accessories, or large focal point displays. However, by carefully assembling a spooky wall gallery with themed, affordable finds and an eye for detail, any dark heart can find a blank spot to make your own.

Revisit more Gothic Crafts:

Decorating Like Dark Shadows

DIY Flower Pens

Re-Purposed Black Topiaries

For more Step by Step Gallery Photos, Follow Kbatz Krafts on Facebook

Kbatz Kraft: Unfinished Regency Sewing

Are you understandably unmotivated with your hobbies and style these days?

Kristin Battestella aka Kbatz discusses the pros and cons of commercial and altered patterns in tackling this purple Regency meets seventies styled empire dress in progress alongside sewing for yourself versus sewing for others, sewing properly instead of just winging it, adding choice color to a black wardrobe, the lack of motivation to complete seasonal goals during the pandemic, unfinished projects placed on the back burner, and future ideas for accessories to match.


For more Gothic Sewing revisit:

Gothic Parasol Upgrade

Gothic Thrift Alterations

Victorian Bonnets and Capes

To see more unfinished in progress pictures visit Kbatz Krafts on Facebook

Thank you for being part of Horror Addicts.net and enjoying our video, podcast, and media coverage!

Kbatz Kraft: Spider Ball Topiaries

As seen in my Thrift Finds Alterations video, I picked up these holiday topiaries at Goodwill for $5 each – compared to $15 a piece on the original Marshalls and HomeGoods price tags. Although the all silver glitter urns, stems, and spikey balls scream December cheer, my little goth brain whispered black paint….

It only took a few hours to coat the stems and urns black. I worked with acrylics rather than spray paint in order to leave the balls silver, but glitter of course got everywhere. I had to make sure my paint coverage was true black and not….sparkly…but after a few touch ups it was time to break out the glue gun. It seemed fitting to put something black and morose on the balls to cover up some damaged, bald spots – tying the new dark sophistication to the glam silver with a few strategically placed dollar store plastic spiders. I was actually short as many black spiders as I wanted, for it’s tough to find Halloween accessories in June even without a pandemic. However, I still had some purple and green spiders from a dollar store ring assortment, so I just painted them black, too! Ironically, those painted spiders ended up as too many different types of spiders at once, and I went back to just a few for a less crowded scheme.

Voila! For less than the original sale price of one dated holiday topiary, I now have two statement pieces for Halloween or year round. A real holiday maven could continue the theme every month to coordinate or pop – black snowflakes, purple hearts, black four leaf clovers, red flowers, whatever your macabre little self desires. For pennies, anyone can personalize and enjoy a revitalized holiday find. Now, however, it’s time to wait for the first guest to recoil, oh yes.

Revisit more Kbatz Krafts including: 

Paint it Black

Re-purposed Black Topiaries

How to Make Stuffed Pumpkins Video

For more step by step Project Photos, Follow Kbatz Krafts on Facebook! 

Frightening Flix meets Kbatz Krafts: Decorating Like Dark Shadows!

Kristin Battestella aka Kbatz details the inspirations, budget, logistics, and compromises in outfitting a basement studio with a Dark Shadows theme. From carpet and painting to walls and storage, come along for the pros and cons of taking on a redecoration during a pandemic lockdown.


Next Kbatz defines the vintage seating and multipurpose work zones in the re-envisioned Dark Shadows inspired basement studio – complete with maximizing spaces, aesthetic heating options, and craft organization tips. There’s also a not so intrusive cat and one pesky basement pole.


It’s heaps of orange for the Dark Shadows inspired basement with unique furniture, thrift finds, pumpkin crafts, retro refreshed lamps, and textile accessories as the studio starts coming together into a cohesive room despite bugs, ugly fluorescent lighting, and the struggle to stay motivated in difficult times.


Stay tuned for the finished results!


For More Kbatz Krafts as well as Frightening Flix, revisit:

DIY Cardboard Tombstones

Dark Shadows Video Review

Dracula (2020)

For more Project Photos, Follow Kbatz Krafts on Facebook  and  thank you for being part of Horror Addicts.net and enjoying our video, podcast, and media coverage!

Kbatz Kraft: Goth Parasol Upgrade

Last year I picked up an old cane umbrella at the Salvation Army Thrift Store for half the $1 sticker price. Yes, fifty cents! Though functioning, this decades-old umbrella feels delicate. Areas on the black canvas are faded and there are a few pinprick holes in the fabric. However, with the right details, this for pennies find can become the perfect goth parasol!

While the honey-colored wood handle and point are superior to modern plastic, the color doesn’t match any of my summer straw hats and bags. Fortunately, a day’s work with 80 grit sandpaper, a generous coat of Jacobean stain, and a semi-gloss topcoat create a fresh, dark finish. Rather than a recognizable bamboo or cherry, this wood smelled sweet when sanded – perhaps a good old hickory. For walking, this all-black exterior cane is sophisticated, but I left the interior stem its original warm wood color. When opened, the vintage shaft advertises old fashioned craftsmanship compared to cold contemporary metal, and inside the canopy where the notch locks there’s a piece of tape with the previous owner’s name. Instead of destroying such unexpected history, I stuck the price tag next to it, embracing a fifty-cent, fifty-year conversation piece with a story to tell. Thanks, Joseph!

After the rough stuff comes the expected parasol lace. Gathered straight lace from that three dollar cumbersome clearance roll last seen on my Victorian Bonnet became a delicious flounce sewn around the end point easily enough, but this was not going to become multiple tiers of bridal shower ruffles or baby bows and cutesy swag. More time-consuming lace both hand-gathered and machine sewed on a black ribbon was glued down to cover the faded canvas edge – just enough romanticism without being twee or too heavy. Although I couldn’t do much about the overall faded fabric, those pinprick holes could be disguised with sequin ribbon from my stash. Trails of sequins were glued over the imperfections, which when open, reflect some sunshine for a final ooh la la. Did I forget to mention this has a cute little button closure instead of lame modern Velcro? Oh yes!

With on hand craft supplies, $4 stain, and sandpaper found in the garage, for under $12 I have a priceless looking parasol with history and craftsmanship that can’t be found in those tiny yet expensive and not made to last Halloween knockoffs. Certainly, there are much more involved ways to do a complete parasol retrofit, but with the right affordable materials and glam vision, anyone can ritz up an umbrella for a sunny day in dark times. The most difficult thing here was waiting on fair weather to work outdoors. I’m too superstitious!

Revisit more Kbatz Krafts or Frightening Flix including:

Gothic Thrift Alterations

Upgrading Masquerade Masks

Gothic Romance Video Review

For more detailed Project Photos, Follow Kbatz Krafts on Facebook! 

Instagram: https://www.instagram.com/kbatzkrafts/

Kbatz Kraft: Gothic Dark Shadows Sconces

Anyone else love those giant candelabras in the Collinwood foyer on Dark Shadows? Over the years I’ve collected some fine iron stands and hefty glam candlesticks, but such tall electric faux mood is obviously tough to find. This past holiday season, however, inspiration in creating my own imitation struck thanks to wrapping paper rolls and Christmas tree ornaments. Yes!

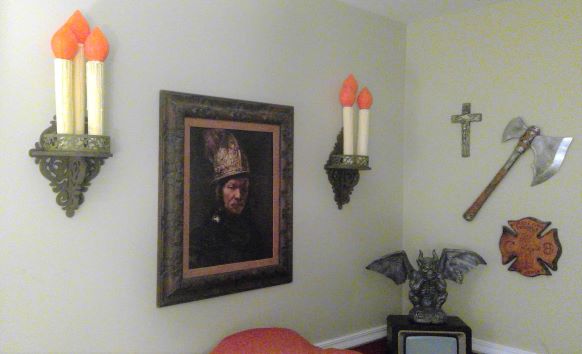
Upon finishing the wrapping paper, I swished the empty cardboard roll like a lightsaber as you do, but could these large tubes become a supersized Halloween Candle Cluster? Tea light toppers seemed too small, but eureka the Dollar Store came through once again with oversized light bulb shaped ornaments! Of course, they’re supposed to hang upside down, however sitting upright on top the cardboard rolls they’re perfect for that mid-century mood. A few hours and mixed coats of orange, red, and gold paint later, that bold flame faux was in full Dark Shadows effect. The location in mind for these candle imitations, unfortunately, is a small spot with little floor room for any ornate base – perhaps a re-purposed tall lamp or plant stand. On what then could I set my faux candle rolls? I spent the winter browsing ugly brass and plastic sconce shelves in the thrift store yet none were the right size, shape, or material for this old fashioned Dark Shadows look. Sconces would keep the floor free, but perusing home improvement stores didn’t yield any kind of affordable corbel or ye olde wooden plaque, either. Then, #stayathome forced my search online, and after a late night scouring on Amazon, I finally found a set of reasonably sized sconce shelves with an ornate scroll motif in the spirit of those big old candelabras. My black heart could see passed their white finish thanks to some handy burnt umber paint! The interior scrolls were painted black for dark definition, and after two umber coats, a yellow ochre dry brush added a bronzed patina.

Initially, the cardboard rolls were cut into four twelve-inch and two fourteen-inch candle pillars. Glue drips around the top created that faux melting wax, and the painted bulbs were glued on top. The bulb height, however, made the candles too tall for the shelves, so they were cut down to two ten-inch and one twelve-inch pillar per sconce. After a white base coat, more yellow ochre mixed with a dash of brown added dimension to the glue drips before mixing the white with the yellow ochre for a creamy, antique finish. The completed candles with bulbs were glued to the sconce, though the candle base felt bare compared to the Dark Shadows lamps with metal foliage accents. A $5 roll of metal craft trim from Amazon worked splendidly once painted with black and ochre for an aged look and glued in place (and I used the remaining piece to make an impromptu tiara, as you do in a pandemic amirite?) Although I spent more than usual for the sconce shelves at $20 for a set of four, the “only a few left” and delayed shipping fears are what really kick-started this three-day project into action. With $2 for wrapping paper, $6 for the bulbs, and $5 for paint and glue sticks already in stash, $38 total is an affordable, fun homage compared to a much more complex electrical redesign or antique purchase.

These gothic mock sconces were a case of working with what I had, finding inexpensive items to use in new ways, and paying more for a completed vision. It’s difficult to hold out for the right pieces or even see creative value in these tough times, but ideas and inspirations can still become a reality! There is however, a certain irony to making fake Dark Shadows candles imitating a real electric lamp that was fake candles – “vampires pretending to be humans pretending to be vampires.”

Revisit more Kbatz Krafts and Frightening Flix including:

Dark Shadows Video Review

DIY Cardboard Coffin

Painting it Black

For more step by step Project Photos, Follow Kbatz Krafts on Facebook

Instagram: https://www.instagram.com/kbatzkrafts/

Kbatz Kraft: DIY Flower Pens

I love zany pens – especially goofy or oversize flower pens and buy a bunch at a time whenever I see them in the Dollar Store so I have a back up when one runs out of ink. Yes, the bane of these fun conversation pieces (that no one can nonchalantly steal from us overprotective pen lovers) is that eventually, the ink ceases to flow. Occasionally I’ll leave a cool one in the pen cup, but then you inevitably end up grasping for that one working pen among the pretty but useless accumulation. Bulk pen options online look to be only cutesy daisies or rose wedding favors that feel cheap – a bud topped on a pen wrapped in ribbon. Well then, I can do that my tacky self!

Our on hand ingredients are simple:
*back to school clearance stick pens
*assorted thrift store flowers
*dollar store floral tape.

1.) After cutting single stems from the floral bunches to the length of the pen without its cap, hold the stem and pen firmly together and start wrapping the tape at the bottom of the pen.

2.) Once it is tightly started, continue winding the tape around the pen and stem – the green tape sticks to itself and any rough spots can be smoothed.

3.) At the top of the pen – just beneath the flower – the tape edge can be folded to cover the pen top.

OPTIONAL: On a few flower pens, I hot glued extra leaves from the floral bunches beneath the flower to hide any troublesome gaps.

Mine are red flowers with just the green floral tape stem, but for more dramatic looks one can use a longer flower length, feathers for faux quills, or go totally goth garden with black flowers and a black wrapped ribbon finish. My bunch inside a reused dark candle jar looks misleadingly real, and my husband said, “So THAT’S where you’ve been hiding the pens!”

This craft feels deceptively simple and almost not even worth sharing. However, during these stay at home initiatives, it’s the perfect time to revitalize old artificial flowers as something both summer vase decorative and useful fresh for that new at-home office or classroom. The kids can ritz up their writing utensils with bemusing toppers with this spare change fun, and the best part is that when the pen runs out of ink, you can remove the flowers for another project and make more themed pens per season.

Halloween pen bouquets, oh yes!

Revisit more Kbatz Krafts including:

Repurposed Black Topiaries

Creepy Cloches

How to Make Stuffed Pumpkins Video

For more Project Photos, Follow Kbatz Krafts on Facebook! 

Instagram: https://www.instagram.com/kbatzkrafts/

Kbatz Kraft: Gothic Thrift Alterations

For those looking to build a vintage wardrobe or add sophisticated pieces to your closet, second-hand shopping such as Goodwill or thrift stores is a great way to find unique styles at affordable prices. Occasionally, however, a great outfit may have one or two problems – a missing button, hemming, or other size adjustments. Even if you are new to sewing or fearful of minor tailoring, this kind of customized alteration can really make a thrift find zing.

In this video, Kristin Battestella aka Kbatz shows you easy fixes, quick stitches and taking in tricks as well as what to look for such as detailed handwork or designer extras. For a few dollars and some sewing practice, altering thrift finds can lead to unique trendsetting and fashion that makes you feel good.


Thank you for being part of Horror Addicts.net and enjoying our video, podcast, and media coverage!

Our Horror Addicts.net Facebook Group: https://www.facebook.com/groups/horroraddicts.net

Horror Addicts.net Online Writers Conference: http://horroraddictswriters.freeforums.net/

Tell Kbatz what you’d like to see with our Online Survey: https://forms.gle/3CE4LjFTLLxxyedK6


Revisit more Kbatz Krafts including: 

Upgrading Masquerade Masks

Victorian Bonnets and Capes

Gothic Romance Video Review

For More pictures, Follow Kbatz Krafts on Instagram! 


Kbatz Kraft: Upgrading Masquerade Masks

It’s that time of year when masks pepper the stores – ritzy but cheap playthings for an evening masquerade or Mardi Gras. I picked up a few at the Dollar Store and found another at the thrift shop, and although these are a little flimsy or faux plain, that just means they can be properly jazzed up with more feathers, glam, and accessories.

Of course, one can immediately tell the difference between the slightly more expensive three dollar thrift mask compared to the two different Dollar Store styles thanks to the central red plumes and structured mask. The sequin trim had come undone in a few places, but outside of those glue gun repairs, this didn’t need anything else. I actually found another small red and black mask in my stash – clearance from Joann’s with lace designs and a solid shape but otherwise plain. Adding red and black feathers anchored with a black flower jazz up one side, and although I am tempted to ritz it up further, it’s feminine and petite style creates a his and hers bargain with its thrift mate. The purple Dollar Store mask is embellished and sturdy, but one measly flower is hardly a worthy accessory! Contrasting yellow feathers from a feather assortment add immediate pop alongside purple ones while white feathers match the silver and white trim already on the mask. With hot glue on the stems, I layered and arranged the feathers behind the flower, and beneath it I glued some dangling, glittery purple berry picks invoking grapes and bacchanal flavor. Also from the Dollar Store, these little balls chip or break off easily, so I secured trouble spots with purple glitter hot glue sticks. These accessories have visual weight but aren’t heavy on the mask, and a dash more feathers on the left corner create festive balance to complete the look.

More holiday picks and swirly clips from my craft stash certainly look party-ready, but they are much too heavy for the black Dollar Store mask. It has a lot of moody black feathers on its right, however, the mask itself is flat and flimsy. Unlike the others, this also has a holding stick rather than a tie around the head. In need of heft in glam without weight, long black leaves from Dollar Store bunches did the trick – creating height and three-dimensional shape for the flat facade. A new gray and silver flower also cut from a cheap floral bunch anchored the leaves while silver glitter branches become lightweight but eye-catching sprigs. At this point, I went overboard adding shiny branches around the top and bottom of the mask for more dimension and trim before anchoring the left side with a sparkly little bat. This did make the mask feel heavy – I probably should have backed it with some sturdy materials before I decorated it – but I couldn’t resist something a little, you know, Kbatz. To compensate for the heft, I added a tassel and ribbon tie at the bottom of the stick, so one could let the mask dangle at the wrist while one dances, as you do.

Outside of eight dollars for four masks, costs here mainly come in hot glue, feathers, and florals if you don’t have already have a craft stash. Even when calculating those crafting essentials likewise found affordably at the dollar or hobby stores, upgrading cheaper masks for a night or two of revelry costs far less than the elaborate but expensive and not necessarily better quality masks found at the Halloween shops or party chains. These Dollar Store upgrades are an affordable way for anyone to get creative with something customized and unique at the masquerade. Why not? Go wild! There’s always room for another feather!


Revisit more Kbatz Krafts including:

Re-purposed Black Topiaries

Creepy Cloches

Victorian Bonnets and Capes


Thank you for being part of Horror Addicts.net and enjoying our video, podcast, and media coverage! Join the Costuming Conversations on our HorrorAddicts.net Facebook Group or tell Kbatz what you’d like to see with our Online Survey


For Additional Photos, visit Kbatz Krafts on Instagram!

Kbatz Kraft: Mini Coffin Tray

Have you ever hung a table picture frame and been so annoyed by the little stand in the back interfering against the wall that you’ve ripped it off? No? That’s just me?

I looked at these little picture backs with my cheap and spooky mind and thought, “Gee, they look like coffins!” But what could I do with them to show off their unusual shape? Some kind of cemetery diorama like the ones we used to make in school would be decorative but not necessarily useful. Would it be more efficient if this little cemetery was displayed openly on a serving tray? Kooky yet functional! Rather than cheap plastic or a Halloween themed platter that would be flimsy or too cutesy, I found a great old fashioned tray at Goodwill for $2. This chipped and worn cream with gold scroll work was going to become brown for that earthen look – the paint known as ‘nutmeg’ strikes again!

Obviously I could not repaint the entire intricate scroll design but went over some of the vine motifs on the corners in lime green paint for a creepy brier look. Of course, this lucked upon step was time consuming and took a few coats of both the green paint as well as the surrounding brown. I am not an artist, but I am a perfectionist, and some of the brush strokes are apparent if you take a closer look. After three or four coats, I could convince myself real creepy vines and cemetery dirt would have imperfections, however there are probably better stencils, brushes, and skills if you are intentionally going for an elaborate Halloween design. Although this paint doesn’t specifically say it glows in the dark, the lime is bright enough to do so – another fun bonus!

Despite already being dark, I painted the frame stands turned coffins black, hiding lingering sticker marks on the back while the brush strokes became fitting faux wood grain. I wanted a simple ‘R.I.P.’ in white to emphasis them as coffins, but the white paint picked up the marker tracings, leaving the phrase, well, peach. Maybe one could excuse it as a touch of Halloween orange, but I didn’t like it. When I started to go over the letter again with the brush I used for the black paint, I ended up with another ‘happy accident’ just like Bob Ross says. The darker dry brush picked up some of the surface texture – aging my peachy R.I.P. Like vintage erosion. Whew!

At last, my little coffin family was ready to go on the tray, staying upright with some basic glue and tape. After touching up the bottoms of the coffins with more black and covering the rest of the tape lines with my trusty nutmeg, I glued some green moss around the bases. This covered my imperfections and base support with a final spooky mound, and if you look closely, I used green glitter glue sticks in case any of the glue shows. Naturally, one should not put food directly on this kind of painted tray nor use it for a lot of grabby trick or treater hands. True artists would probably also use some sort of glossy sealant to protect their designs, but for me, a shiny top coat didn’t go with the graveyard mood.

Of course, one doesn’t have to make a three dimensional cemetery tray. Kids can spend a fun October weekend painting much simpler platters and gluing on an array of bugs, spiders, fake fingers, toy eyeballs, or anything that fits your Halloween theme. This idea works perfectly as a fun centerpiece whatever your inspiration and style, obnoxious picture backs or not.

Revisit more Kbatz Krafts including:

How to Make Stuffed Pumpkins

Spooky Spellbooks

Tea Stained Labels and Spooky Bottles

Creepy Cloches

It’s a Pumpkin Cat House

Kbatz Kraft: Paint it Black

Like The Rolling Stones said, sometimes when you want a little morose, all you need is a hefty coat of black paint. A $4 grab bag of bowl filler from our trusty Mr. Goodwill helped me prove this theory as traditional balls and gourds became rustic orbs and goth glam. Shiny brass or holiday gold candlesticks and sconces likewise become sophisticated, useful pieces year-round, and Dollar Store frames turned into expensive-looking conversation pieces.

As discussed in my Re-purposed Black Topiaries project, painting floral items black is more involved, but worth the spooky look. When I picked up another holiday vase filled with pine and poinsettia greenery for $3, out came the flowers and everything else was spray painted black – tacky gold base, leaves, stems, and all. Touch-ups were needed for some of the smaller needles, but now I have a black floral base that can change with the season. After some cream and blush color flowers on the empty picks for the summer, it’s all black flowers for Halloween, red for the holidays, purple for winter, and white for spring. Customizing fake flora displays at the craft store can get pricey, but for $5 including spray paint, I have not just one one of kind centerpiece, but five.

Perhaps everything all black all the time would be too much for some, but one or two black accent pieces can be classic or rustic to suit your décor without being expensive. After last year’s Spooky Bottles and Tea Stained Labels, black paint came to rescue when I wanted to add more creepy jars to my shelf. Saving a few unique bottles from the recycling, painting them black, and wrapping rustic twine around the tops adds a touch of mystery to any apothecary. Have anything broken and useless lingering in your garage? I took apart the base of a damaged silver lamp, removed the wiring and painted the pieces black for a few more goth candle holders.

When my mom gave me this little lantern house – bought for pennies at the thrift store – I was tempted to keep the tin look. However, it felt a bit too country amid the rest of my décor. So I painted it all black for a fun light not just for Halloween, but something that can be used year-round. For those fearful of bigger crafts and projects or those hesitant to go bold and expensive with dark, sophisticated colors, painting smaller items black is a can’t go wrong, affordable touch for any room or season.

Revisit more Kbatz Krafts including:

How to Make Stuffed Pumpkins

Spooky Spellbooks

Tea Stained Labels and Spooky Bottles

Creepy Cloches

It’s a Pumpkin Cat House

Pumpkin Ottomans, Oh Yes

DIY Halloween Candle Clusters

Kbatz Kraft: Cardboard Tombstones Video How-To!

Why paint just one box gray when you can make use of all your cardboard boxes for an entire DIY Graveyard?

Check out Yours Truly Kbatz in My Latest Video for details on the pros and cons of making your own Cardboard Cemetery!

Kristin Battestella aka Kbatz gets a little BATTY in showing how you, yes YOU can make your very own Customized Cardboard Tombstones for the BEST Halloween Haunt in YOUR Neighborhood! Also featuring Giant Pumpkins, Scary Basements, and One Pesky Feline.

Thank you for being part of Horror Addicts.net and enjoying our Video, Podcast, and Media Coverage!

Revisit more Kbatz Krafts including:

How to Make Stuffed Pumpkins

Spooky Spellbooks

Tea Stained Labels and Spooky Bottles

Creepy Cloches

It’s a Pumpkin Cat House

Pumpkin Ottomans, Oh yes

THE CROW Twitter Watch Party – Tonight

RFBANNER

Horror Addicts, in honor of the new book release, Requiem in Frost, HorrorAddicts.net and Jonathan Fortin would like to invite you to a Twitter Watch Party! We’ll be watching the dark and brooding beauty of 1994’s The Crow, beginning at 8 pm PST tonight.  So, pop your popcorn, take a seat, and get your tweet on.

WHO: Jonathan Fortin and HorrorAddicts.net

WHAT: THE CROW Twitter Watch Party

WHERE: Twitter

WHEN: Tonight at 8:00 PST

Stay Spooky!

THE CROW Twitter Watch Party

RFBANNER

Horror Addicts, in honor of the new book release, Requiem in Frost, HorrorAddicts.net and Jonathan Fortin would like to invite you to a Twitter Watch Party! We’ll be watching the dark and brooding beauty of 1994’s The Crow, beginning at 8 pm PST on Tuesday, October 1st.  So, pop your popcorn, take a seat, and get your tweet on.

WHO: Jonathan Fortin and HorrorAddicts.net

WHAT: THE CROW Twitter Watch Party

WHERE: Twitter

WHEN: Tuesday, October 1, 8:00 PST

Stay Spooky!

Kbatz Kraft: Re-Purposed Black Topiaries

When macabre aficionados such as ourselves are looking for unique wares, it pays to shop at your local thrift stores, Goodwill, and charity shops. One of a kind donated items and inventory rotate regardless of season – meaning not only can you get Halloween items in June, but you can also find other holiday items to take from trash to sophisticated treasure.

I’m always looking out for florals, wreaths, or other stems to cut up and Kraft, and I stared at these Christmas style fruit bowls and toparies for quite some time wondering how I could Halloween ’em up, so to speak. Spray painting the fake, dated brass bases was an obvious choice, but the glittery fake waxy fruits of yore were not paintable. For $2 a piece thanks to the Goodwill half off tag, however, I could go with the gothic glam of red apples, purple grapes, and gold pineapples.

At home, I took the bowls and trees apart, sorting the fruits in bags to assure I was putting the right stems back into their correct topiary. Yes, the bases would be gloss black, but I decided to spray paint the leaves black also to further contrast the fruits. It took multiple coats for as much full coverage of the leaves as possible. Of course, the styrofoam core absorbs a lot of spray paint, and the fabric leaves certainly needed touch ups after drying for a few days. Fortunately, regular black acrylic craft paint did the trick for any of the green undersides remaining, although when totally dried, some of the leaves looked more gray than true black. Rather than more coats that may not have any better result, however, that touch of gray adds a black, but old, aged, memento mori style.

There was actually a full size fake tree in the store as well, the kind that retails for $100 green and more for autumn or black tree varieties. Even for $8, the based was damaged and there were just too many leaves to spray paint once, twice, three times, or touch up every single one. After seeing how these leaves took to the black paint and touch ups, I’m glad I passed on that big, leafy tree!

Certainly nothing was going to be in the exact same place when it came time to put the assorted fruit arrangements back in their rightful spots. It took a bit of sticking here, having to remove a pick there and arranging to make sure there weren’t too many pears or apples in a row. All this pick and play, however, did get a little messy. Glittery bits and bobs got everywhere! Be sure to line your table or floor with some paper or plastic and keep the vacuum or broom handy.

This isn’t a family friendly project, more something for the Victorian florist indeed. It also takes a bit of luck in finding the right floral nothing to make into gothic something. However always keep an eye out for holiday greenery you can take for a Halloween spin. For two toparies, two fruit bowls, and a few cans of paint, I paid under $12. My cheap self was ecstatic to see the original price of the tall toparies when I peeled the Goodwill sticker off the bottoms: $24.95 each!

Initially these pieces looked old, sentimental, and eighties faux expensive. There was a time when this kind of artificial style was everywhere each December. Store bought autumn topiaries, Halloween trees, and festive fall bowls today are often very expensive, too – a luxury item not easy to find or cost effective to make. By shopping alternatively for older seasonal items with an October eye, you can save heaps of time and money without sacrificing on the dark, sophisticated décor.

Revisit more Kbatz Krafts including:

How to Make Stuffed Pumpkins

Spooky Spellbooks

Tea Stained Labels and Spooky Bottles

Creepy Cloches

It’s a Pumpkin Cat House

Kbatz Kraft: Cardboard Tombstones Video How-To!

Why paint just one box gray when you can make use of all your cardboard boxes for an entire DIY Graveyard?

Check out Yours Truly Kbatz in My Latest Video for details on the pros and cons of making your own Cardboard Cemetery!


Kristin Battestella aka Kbatz gets a little BATTY in showing how you, yes YOU can make your very own Customized Cardboard Tombstones for the BEST Halloween Haunt in YOUR Neighborhood! Also featuring Giant Pumpkins, Scary Basements, and One Pesky Feline.


Thank you for being part of Horror Addicts.net and enjoying our Video, Podcast, and Media Coverage!

Revisit more Kbatz Krafts including:

How to Make Stuffed Pumpkins

Spooky Spellbooks

Tea Stained Labels and Spooky Bottles

Creepy Cloches

It’s a Pumpkin Cat House

Pumpkin Ottomans, Oh yes

Terror Trax: I Ya Toyah

Band Name: I Ya Toyah

I am One Woman Army, Ania Tarnowska:
lyrics/composition, recording, production, vocals, guitar, keyboards

Website: iyatoyah.com

What singers or bands inspired you growing up?

Opeth, Iron Maiden, Nine Inch Nails

Who are your favorite artists today?

I have a lot of favorite artists, varying in styles and it’s impossible to state just one as it’s endless list of talent I admire every day.

What non-musical things inspire your music?

Observation, conversation, nature

Is there a place where you go to be inspired?

It is a Forest with a Bit of the Light- a spot in the woods not far from where I live. I named it myself but it’s my to-go place when I seek mental relaxation and peace.

What’s been the greatest achievement of your band?

I’ve been honored to share the stage with Mortiis during his North American Tour, as well as with Grendel. I had a pleasure working with Rhys Fulber and have him remix one of my songs, “Flashback.” Mostly though, I feel the greatest achievement is to be a part of the amazing industrial electronic scene – it is a priceless experience.

Where was the coolest place to play? Where did you enjoy yourselves the most?

I love playing at Crucible, Madison WI. I adore their stage, sound and green room plus hospitality and vibes of everyone…I love Reggies rock club in Chicago and really enjoyed playing at The Forge, Joliet. Another amazing place I cannot wait to return to is Club Anything, Milwaukee WI. Owner Todd is a sweetheart and the place has a certain magic that feeds you with very positive energy.

What are your favorite horror movies?

I love Strangers. It is more of a thriller but I like the authenticity of the plot. Psycho is another good one. Anything Hitchcock and David Lynch.

What was the scariest night of your life?

I was 12 and was on my way back from music school ( I studied guitar, piano, and vocal performance). My dad drove the car and we got into an accident. I remember being terrified that he will die…I ended up being the one that almost did- but I don’t remember it as I was already in a coma. The fear of losing my dad and having to tell my mom about it was paralyzing.

If you could play anywhere in the world, where would it be and who would be your opening band?

I’d love to play at the venue called Dalhalla in Sweden. It is built on the rocks and shaped like an amphitheater. The setting in nature is absolutely magic and so is the sound. It is on my bucket list and as far as an opener/lineup goes, I don’t even know as there are many logistics involved, some of which would probably be out of my control.

What are you working on now for future release?

Currently, I’m working on releasing the remix of Puppet song done by Adoration Destroyed. Together with Lumbra Records we are filming and putting a dark-themed video for that song. I’m very excited as the remix is amazing!

Final thoughts.

I want to thank you for your support! You coming out to my live shows and supporting my releases makes what I do possible. I love you! ♥

Kbatz Kraft: DIY Halloween Candle Clusters

Why spend heaps on battery operated candle sets when you can save your paper towel and toilet paper rolls to make your own DIY Halloween candle clusters? Recycle, craft, and help the planet!

Of course, the reason it took me so long to do this project was because I thought there was a technical aspect to the candles – running wires from each light to a bottom base or arduino breadboard with a smartphone remote or toggle switch. To the at home computer hobbyist such advanced lighting schemes are no problem, but regular ole me had no idea how you could glue drips around a tea light yet be able to use its on off switch. Fortunately, our own illustrious horror hostess Emerian Rich made the simplest observation that there must be a shelf inside the roll to hold the candle. Huzzah!

Armed with such wisdom, I traced circles onto a piece of cardboard, cutting them out and trimming each to fit a roll before taping and gluing them inside at the tea light depth. Next I bunched my two clusters together with ten tiered rolls cum candles each, varying the designs so they are symmetrically asymmetrical rather than matched or mirror images. By stacking or cutting rolls, I could make the tiers taller or smaller, taping and gluing the rolls as needed. Rather than spray painting everything Halloween black, I chose red paint for year round décor. I debated painting all my rolls and going around their rims with the glue drops a la wax motif before gathering them together. However, I suspect that would mean I was painting in unnecessary hidden spots or stuck with glue in places that didn’t fit.

On to my trusty glue gun, I added globs of glue drips around my rolls – long drips, short lumps, globby pieces in all the nooks and crannies. Obviously, this is part of the candle look, but once hardened, the glue also added stability to the bunch and the rolls became quite sturdy. This is a time consuming detail that took a day to dry before touch ups, and in addition to clear, I used red and silver glitter glue sticks, hoping they might add a sparkly touch. For more realistic attention to detail, I also did a glue ripple around the bottom of the bunch. After Round One, I could see spots that needed more waxy drip effects, so I did another layer of glue globs to conceal any problem spots. At first, these looked really bad, obviously cheap, and barely held together. It’s not as simple as it looks – oh Etsy, glue drips and toilet paper rolls make tea lights look like big candles, yeah Pinterest!

Indeed, with different textures, thin cardboard, glue, and tape, these clusters needed several coats of paint. The more I painted and glued, fortunately, the more they really started to look like candles. The tea lights themselves also needed several paint coats. Rather than buying red that had a red light, I chose the white tea lights for their realistic glow. Originally, I wanted to do these bunches in an aged off white or creamy color. After seeing how many coats it took of red, however, I’m super glad I didn’t choose a light paint where all the tea lights could illumine every T.P. imperfection. For my final coat, I added a drop of darker paint called ‘Berry’ – last used in my Spooky Spellbook DIY – to the red base. I painted both clusters in this slightly darker hue, not worrying about every little crevice, resulting in an antique, realistic look. Now instead of obvious recycled materials, that a la wax dimension is what you see first.

For something more substantial than a plastic tray or no base at all, I picked up two silver plated trays at Goodwill for $2 each. Both clusters actually fit on one larger tray – a classy centerpiece that fits in right through all the holidays. Overall, this project took about four days with the drying time between coats as the biggest hurdle. One should also make sure the tea lights still fit as you add your gobblely glue trim. Some became snug and need to be wedge in gently. After the ins and out to turn them off and on, a few have chipped, so expect touch ups if you are going to repeatedly poke and prod at the candle lights. The 8 ounce red acrylic paint was $4 and a pack of 24 tea lights was $8, both from Amazon. So for around $16, I have two stylish, unique candle clusters compared to at least $20 for one from Spirit or gasp $80 at Pier 1 – neither of which appear to be available online this season. Of course, with store bought battery candles, once one burns out or there is a remote timer problem, they often don’t work anymore. When one of these goes bad, I can just change the tea light!

Though not necessary a family friendly project, one can customize these faux candle clusters – creepy face designs, blood drips on white candles, go huge by using tubes or piping instead of towel rolls, or dozens of individual rolls can become an entire room of Harry Potter floating ceiling candles. We all certainly use enough T.P.!

Revisit more Kbatz Krafts including:

How to Make Stuffed Pumpkins

Spooky Spellbooks

Tea Stained Labels and Spooky Bottles

Creepy Cloches

It’s a Pumpkin Cat House

Pumpkin Ottomans, Oh Yes

Terror Trax: CADAVERIA

CADAVERIA

Cadaveria, vocals
Marçelo Santos, drums
Peter Dayton, bass
Live guitarist: Enrico Toselli
CONTACT:
http://www.cadaveria.com
https://www.facebook.com/cadaveria
Twitter: @cadaveriaofficial
Album/Song/Tour
We are excited about right now Far Away From Conformity, remixed and remastered:
http://www.cadaveria.com/web/shop/far-away-from-conformity-cd-digipack-2017/

What singers or bands inspired you growing up?

Venom, Mercyful Fate, Sepultura.

Who are your favorite artists today?

Tool

What non-musical things inspire your music?

Cinema, poetry, life.

Is there a place where you go to be inspired?

My soul.

What’s been the greatest achievement of your band?

To release five studio albums, a double DVD and many music videos, to play lots of gigs all around the world and to be 100% independent.

Where was the coolest place to play? Where did you enjoy yourselves the most?

Mexico always welcomes CADAVERIA with a great enthusiasm and we love Mexico back.

What are your favorite horror movies?

Profondo Rosso, Nosferatu, Das Cabinet des Dr. Caligari

What was the scariest night of your life?

When I discovered I have a cancer.

If you could play anywhere in the world, where would it be and who would be your opening band?

I would like to tour the US.

What are you working on now for future release?

I’m writing some lyrics for CADAVERIA sixth album.

Final thoughts / Anything you want to tell the listeners?

Enjoy every single moment of your life.


FRIGHTENING FLIX: Revisiting Poe Video Review

Kristin Battestella aka Kbatz (and a special feline guest) discusses new appreciations in revisiting the short fiction of Edgar Allan Poe including The Fall of the House of Usher and The Tell Tale Heart in addition to comparing and contrasting the Vincent Price and Roger Corman Poe Film Adaptations.


Thank you for being part of Horror Addicts.net and enjoying our video, podcast, and media coverage!

Horror Addicts.net – By Addicts, for Addicts!


Get involved: https://www.facebook.com/groups/208379245861499/

HorrorAddicts.net Online Writers Conference: http://horroraddictswriters.freeforums.net/

FRIGHTENING FLIX BY KBATZ: Penny Dreadful Season 3

Penny Dreadful Season Three a Disappointing Finale

by Kristin Battestella

I loved me some Penny Dreadful. Previously, I watched the First Two seasons twice or more before writing my reviews a few months after I had simmered in the immersion of all things sophisticated Victorian macabre. I re-watched the entire series again when finishing this obviously late review, but Season Three’s still blindsiding finale and haphazard resolution of the series undermines the glorious potential that was yet to be found in Penny Dreadful.

Year Three hits the ground running with some delightful circumstances in “The Day Tennyson Died.” Our quirky little family of evil fighters – Vanessa Ives (Eva Green), Sir Malcolm Murray (Timothy Dalton), Ethan Chandler (Josh Hartnett), Victor Frankenstein (Harry Treadaway), and His Monster (Rory Kinnear) – is scattered about the globe from London to the Old West and Africa to the frozen north. Their townhouse base is shabby with covered furniture and piled mail before the titular solemn and lovely poetic references reconnect old friends with tenderness and sympathy. After all they’ve been through, those in London are allowed to stew and cry – unlike the unforgiving railroad and lawless land of the New Mexico Territory. Though blindingly bright compared to the British bleak, there’s an underlying ominous to the witches and werewolves among the lawmen. Letters from Africa with burials made right also find Chiricahua Indians in the most unlikely Zanzibar alley while faraway frozen trawlers debate cannibalism and melodies remind monsters of when they were men. Famous names face racism at Bedlam as pale minions with anemia excuses lurk. Penny Dreadful has a lot to do but does it with superb conversations, new allies, and bloody vignettes. “Predators Far and Near” adds vintage photography, jurisdiction technicalities, a modified barber’s chair for experimenting on patients, and fear of the gramophone cylinders recording one’s sin. Therapy confessions recount prior indiscretions, but the prescription for godless loneliness is doing something innocent and happy no matter how small. Women debate on light and dark souls while men bond over their love of daughters and a son not birthed to them but bound with their suffering. Talbot family history, ritual chanting, and colorful vision quests counter the sophisticated Victorian science lectures and whimsical memories of adventures the likes of 20,000 Leagues under the Sea. Unfortunately, our dreadfuls are more familiar with lunatics and monsters rather than childhood heroes, with Jekyll and Hyde-esque transformations on crazed victims, deceptively charming courtships, a wise Apache woman reminiscent of the fortune teller in The Wolf Man, and a desert full moon to aide one’s bone cracking escape.

Unholy alliances between witches and the Wolf of God continue in “Good and Evil Braided Be.” Is it the beast or angel, good or evil that’s the real persona? Does the mind create phantoms and demons to explain the darkness and pain? Do you bury the animal inside or unleash it? Between the werewolf curse, divided locales, tug and pull father figures, and hints of Hyde, Penny Dreadful creates superb dual themes alongside several racial moments and of the time derogatory Native American comments. Sophisticated light and dark visuals and good and evil motifs are interwoven against crudeness, triumphing over those who define what’s black and white or right and wrong solely based upon skin tone rather than soul. The audience isn’t hit on the head with the social commentary, but one scene beautifully addresses the sadly still lingering attitudes upfront. New, risky hypnosis techniques further retrace past darkness and despair in Episode Four “A Blade of Grass.” Memories and present offices blur in a dreamy act with current doctors and familiar faces in unexpected places uncovering new revelations of a forgotten padded white room. In camera foregrounds and backgrounds accent the confined or expanded four walls as needed with overhead views, zooms, face to face close ups, and wide angle warped. Finite descriptions of precious few details, amplified sounds, and demon shadows match the kindness of an orderly or the evils that await. Precious blankets are taken away amid growling, crying, straight jackets, and water torture. Can God find you in a place like this or are you alone? Our patient fears the evil within and wants to die over the betrayals and sins committed, yet the tender bonding with her jailer turned poetic advocate provides an unlikely compassion. Whether you can face yourself in the mirror or not, these fugue state manifestations overcome evil with the truth at Christmas in one excellent parable. The least amount of effects, minimal characters, and few locales leave nothing but the emotion and anguish upon their faces. It’s divine, just everything television should be and perhaps the best episode of the entire series.

And then, somehow, Penny Dreadful went to shit.

Series writer and creator John Logan hands Penny Dreadful over to new writers mid season – a maneuver suggesting a viable transition rather than leaving unknowns to resolve your planned finale with rushed characters and compressed stories. Andrew Hinderaker (Pure Genius) pens “This World Is Our Hell” with The West as a barren purgatory full of symbolic multi-layered pursuits on who the righteous should save or whom the evil would kill. Water is scarce among the grave sins and shame worn as redemption; forgiveness versus temptation comes in revealing fireside chats recounting past ambushes and the difficulty of serving multiple masters – fathers, duty, Lucifer. Unfortunately, these lofty topics are undone by nonsensical mysticism. Witches can summon snakes to conveniently wipe out pursuers but cannot heal injured mounts or conjure water and dying people somehow have enough energy for awkward evil sex after days of thirst. The Victorian mad science and desert shootouts jar in an anchor-less back and forth when the confrontations between our converging father figures are more interesting. Lengthy exposition on past horrors feels odd in a series that often shows rather than tells. Why not have an entire Talbot past hour the way “Closer than Sisters” showed us how Penny Dreadful really began? Otherwise the audience is left confused over who’s really at fault for the faithful turning evil. It was Ethan’s dad’s fault for making it the army’s fault who made the Apaches to blame??? Penny Dreadful always had pacing issues and uneven characters, but this Old West excursion could have ditched the dead weight characters and been back to London in half the time. I don’t think it is necessarily Hinderaker and newcomer Krysty Wilson-Cairns’ fault, but “No Beast So Fierce” throws even more at the screen with too many threads regarding who’s evil or who’s the law amid busy shootouts, vampire minions, Bedlam serums, how to kill a man tutorials, Egyptian wonders unrealized, and new steampunk introductions. What’s supposed to be important – monsters being kind to sick children or sassy sword wielding new characters? If the key to defeating evil is holding fast to loved ones, why has our family been apart all season? Perhaps one writer should have been responsible for one set of characters the entire year, as Dracula’s apparently content to wait out the cowboy adventure while other isolated and aimless immortal plans go round and round and pull Penny Dreadful apart at the seams.

Penny Dreadful has an innate melancholy – cemeteries, grave digging, mourning shrouds – but the dark romance is used for unnecessary preachy in “Ebb Tide.” Separated characters finally meet, but one knock on the door and a brief scene reconciling the past and present is not enough. Friends that could fill this empty manor and fight the bloodshed are pushed away while our team in the West doesn’t heed ancestral warnings. Despite insisting London is home, characters remain obstinate just for the sake of creating drama, leading to contrived betrayals and more speeches begging for the fast forward button. Touching conversations on who will bury whom are interwoven with weaker plots, straying from the core and repeating exposition we already know. Visions unite players who have been apart but such mystic conversations and wisdom on rescuing one another from darkness should have happened much sooner – two episodes ago, nobody cared. Krysty Wilson-Cairns writes the quick at forty-three minutes “Perpetual Night,” and it’s the shortest episode of Penny Dreadful when the series desperately needed more time. The boys rush back to Londontown amid foggy cityscapes, morbid voiceovers, tasty frogs multiplying, and rats amok. Dead wolves and toothy minions everywhere require swift blade work and fireplace pokers to stave off vampire infections – but no one thought to call Dr. Frankenstein away from Bedlam’s dungeon when people are said to be dying by the thousands? Penny Dreadful bites off more than it can chew, takes too long to achieve what matters, and spits out the excess when there’s no time left. Ironically, the “The Blessed Dark” finale also delays, saving choice moments with its stars rather than going full tilt with the dream hazy, bodies on hooks, and bats as sad lullabies over the special credits recap the sad state of our separate characters. It’s very exciting to see the reunions and werewolves fighting vampires in true monster mash up fashion as it should be – Dr. Jekyll passes by as Dr. Seward hypnotizes Renfield! As a season finale, this hour provides closing moments on some toiling plots. However, as a series finale, it barely resolves anything. Brief mentions on her destiny, his destiny, and previous prophecies don’t make sense anymore, and Victor literally bumps into the gang at Bedlam. The team is together again by accident! Major moments with his monsters earn one scene each, and none of those super strong immortals join the End of the DaysTM battle. Instead, bad ass walking down the street filler and a few ridiculously outnumbered pistols struggle with conveniently confusing action choreography. Bitter ties to the First Season become unrealized tangents, and new characters are inexplicably more steadfast than our original crew. Four episodes ago, life was worth fighting for but now isolated characters give up because the script says they should in a one hundred and eighty degree turn that’s painful to see end this way.

Vanessa Ives begins alone, a recluse living in squalor before rising thanks to words and wits with her therapist. Eva Green’s heroine cleans up and humbly restores the manor. Despite losing her faith, Vanessa is inspired by Joan of Arc’s confidence and says she will remain resolute. Oddly, she doesn’t seem as psychic or intuitive anymore and fails to recognize evil tendencies she previously pegged so astutely. It’s sad to see Vanessa open herself, revisiting innocent things that make her happy or having a man’s company once again end in terror. She’s willingly hypnotized to face her repressed psychiatry treatment, addressing her past doubts, regrets, and battles with Lucifer. “A Blade of Grass” shows her at rock bottom before a ray of hope and renewed prayers – if you believe in evil, then you must believe God is there to defeat it. Unfortunately, Penny Dreadful squanders the Lucifer issues, fast tracks Dracula, and circumvents Vanessa’s body and soul versus the fallen brothers with a past event cheating viewers out of a current victory. Vanessa can sense and see Kaetenay when the plot says so, but her lack of psychosexual possession and failed insights inexplicably have her give up despite knowing overdue help is on the way. Green saves this sloppy writing and deserved more hardware for Penny Dreadful. I don’t blame her if she recognized the tone had changed and was ready to depart. The series could have continued in searching for an evil Vanessa as an absent lead a la Blake’s 7 rather than two scenes with bad girl red eye shadow trying to make up for rushing to resolve Vanessa’s story. Josh Hartnett’s Ethan “Lawrence Talbot” Chandler is also not only reluctant to see his real father, but he’s angry at being adopted as Kaetenay’s Apache son. Ethan knows there is blood on his teeth and his soul deserving of punishment and wears his guilt on his sleeve. Unfortunately, his history comes from three different sources – so for all this New Mexico excursion, we don’t get a clear picture. The Wolf of God also spends about fifteen minutes being evil, standing up for Hecate over Malcolm because he won’t repent and belongs in hell. Ethan speaks evil prayers at the dinner table, but isn’t this the guy who’s Latin single-handedly exorcised Vanessa? His reciting of the Lord’s Prayer in the finale feels hollow thanks to his satanic reversal just a few episodes earlier. Was Ethan’s western escapade and Vanessa’s evil each meant to be it’s own season storyline? They both have a scene or two of darkness, and one moment in the finale doesn’t make up for Ethan’s back and forth. Meanwhile, Sarah Greene as Hecate travels in white, an unassuming Gibson girl who loves horses and animals but loathes people. She wants to be evil beside Ethan, but her powers are both handy or nonsense as needed. Hecate kills unnecessary to teach him a lesson and lingers too long in this uneven capacity – crowding an already busy Penny Dreadful while not being a character in her own right. The English Sean Glider (Hornblower) may be an unusual choice as a U.S. Marshall, but his crusty ways balance the British tidiness of Douglas Hodge as Inspector Rusk as they pursue Our Mr. Talbot. Rusk may ask for tea in the bar car and insist Scotland Yard Inspectors do not carry firearms, but he doesn’t underestimate the ruthless West. He begins to believe the Occult upon his case and does take up more violence as the blood on their path increases – before a thankless end, of course.

The beard is back for Timothy Dalton as Sir Malcolm, and even if he doesn’t know all the details, he’s ready to respect Wes Studi’s (Geronimo: An American Legend) Chiricahua Kaetenay if it will help save Ethan. Like an oasis in white in the mostly unlikely place, it’s wonderful when Malcolm and Ethan finally meet up for some shootout action. However, Malcolm really doesn’t have a whole lot to do this season beyond listening to Kaetenay. Most of his dialogue is responsive filler, and even before the surprise series finale, I suspected Dalton would not be returning for Season Four. You don’t keep a talented name without giving him quality writing, and Malcolm ends up repeating the same plot. Chasing after lost lamb Ethan, fighting a vampire to rescue Vanessa – he’s again saving his family even as his travels keep him from his home and any relationship with Victor. Malcolm could have returned to London post-Africa, maybe to meet Catriona sooner or dislike Dr. Sweet, as it’s a disservice to reduce him to little more than Kaetenay’s sidekick. That said, yes please to more of Studi’s set in his ways Apache. He still scalps because old habits die hard, but he doesn’t drink and believes one can’t die until his purpose is served. Granted, Penny Dreadful is trading the mystical negro trope for the mystical Apache stereotype, but the moonlight visions and enigmatic destiny talk tie the blood, suffering, and wolves together. Kaetenay pushes on after Ethan no matter what – he and his people have endured much but he’s prepared to face this darkness over London. There should have been more time for his revelations, and Penny Dreadful only makes use of Kaetenay when needed. It takes seven episodes for Ethan to heed his warnings about what is to come, and he should have mystically connected with Vanessa from the start. As Ethan’s father, Brian Cox (Coriolanus) also has some great one on one’s with Malcolm. They are wonderfully alike, right down to the conquest map on Jared Talbot’s wall, the mountains named after him, and an empty home as the cost. However, a boat load of family history that Ethan already knows is repeatedly told rather than seen, leaving Talbot Senior unevenly written with sorrowful or crazed exposition amid one gunshot and stand off after another. Had we seen the first terrible shootout that has him so angry, then this second battle in his ranch chapel would have had much more meaning. Kaetenay provided connecting visions when necessary, so why not have some kind of mystic Talbot dream that showed the betrayals and horrors causing all this pain?

Fortunately, Rory Kinnear’s Creature aka Caliban aka John Clare has some superb redemption on Penny Dreadful. He won’t harm a dying cabin boy, recalls more about who he was, and realizes who he may yet be after touching moments in the Fourth and Fifth episodes showing his life before his death and resurrection. He is again at the window or in the eaves, on the outside peering in on those that think he is dead. The Creature risks rejection and reaches out despite the pain, blossoming from being an angry violent child to almost the man he used to be. His resurrection allows Caliban to find his family – only to loose it again thanks to innocence versus the unnatural. This season, Clare is almost totally separate from everyone else, alone on this sympathetic journey beyond too brief moments with Vanessa, erroneously on the fringe without even seeing Dr. Frankenstein. He may piece together his past, but not enough was done with the connection between Vanessa and the Creature. She recognizes him, but not him her, and Penny Dreadful cops out by resolving their past in a flashback. Again, just because we the audience saw it does not mean the characters themselves received any current resolution. Why didn’t Caliban ever knock on Malcolm’s door? He would have been welcome in this misfit family dang nabbit! Reeve Carney’s Dorian Gray and Billie Piper’s Brona cum Lily Frankenstein, however, should have stayed home. By his very nature, Dorian is a supporting character that never changes. They aren’t missed when absent but Penny Dreadful uses him and Lily to shoehorn in some kind of modern feminism vengeance that goes nowhere fast with repetitive, ad nauseam speeches. Whether it is justified man hate or not, the appearance of Jessica Barden (The End of the F***ing World) as Justine perhaps a la the de Sade wastes time with back alley torture, nudity, and bloody threesomes. The warped justice is all over the place with even less to do Dorian getting stabbed for funsies before he gets bored from having seen such depravity already. Episodes grind to a halt with their round and round male behavior psychoanalysis, briefly tossing in suffragettes and violence that makes them just as bad as the abusers from who they claim to rescue women. Penny Dreadful has done better psychosexual themes, and compared to Caliban’s soul searching, Lily realizes her humanity too late in one great soliloquy that should happened the moment she was reborn, and Ethan never finds out Brona has been resurrected!!!!

Harry Treadaway’s junkie Victor Frankenstein becomes a mopey little piss ant bent on proving his superior science can conquer death, and he arrogantly thinks he can perfect on Jekyll’s methods. Maybe there’s a parallel between his wanting to create angels instead of monsters and Lily’s superior woman army, but their uneven storylines barely intersect beyond a few redundant stalker scenes and never factor into other plots. Victor goes about getting Lily back in the worst way possible, becoming like his originally angry Creature in a fitting poetic justice. He’s deluded in thinking Lily owes him anything, and it should be a great destructive character arc. However, rather than having him freaking call on Vanessa while they are both in London twiddling their thumbs, Penny Dreadful treats Frankenstein as an afterthought before one last lesson on how to be a human rather than the monster. One poetic voiceover from Victor such as, “Sir Malcolm, I hesitate to confess it now, but I must inform you I have a singular talent for defeating death as we know it…” could have ended Penny Dreadful in a uniquely twisted vein. Sadder still is that Shazad Latif (Mi-5) as Dr. Jekyll somehow turns into a handing Victor the scalpel lackey. He has history with Dr. F. – roommates and dare I say something more – and faces much “half breed” Victorian racism. Jekyll despises his white father but wants his acclaim and title to help prove his serum on anger and duality. Simply put, there is no way he was intended as a throwaway character and we deserved to know him more. Although scheduling conflicts necessitated the departure of Simon Russell Beale as Mr. Lyle, his being written off as going on assignment to Egypt just begs to be told! Did everyone forget all the prophecies on Amunet and Lucifer or the hieroglyphics carved onto the vampire bodies? Of all the friends still about London who never bother to visit, it’s Lyle who draws Vanessa out and into therapy because thanks to his closeted sexuality, he understands what it is like to be unique and alone. Of course, he might have mentioned Perdita Weeks’ (The Tudors) thanatologist Catriona Hartdegen when they were studying all that Fallen Angel and Mother of Evil stuff. She’s a woman of occult science fencing and wearing pants who doesn’t blink at the thought of Dracula being in London. Her one on one scenes with Vanessa are well done with possible replacement or lover vibes, “It’s ‘Cat’ for you, as in cat o’ nine tails.’” Wink! She calls Malcolm “Sir M” and I would have liked to see more of them together, but Catriona’s style provides a steampunk cum The Time Machine and albeit meaningless potential. Her cool fighting skills are ultimately convenient and inexplicable – if we weren’t going to learn more then all these superfluous characters should have never been introduced.

We are however given some divine new characters with Patti LuPone returning to Penny Dreadful as Dr. Florence Seward – an alienist said to have distant Clayton ancestry due to her resemblance to LuPone’s previous cut-wife role. Though rigid and progressive, Seward is there to heal the ill, who aren’t bad or unworthy, just ill. She calls out every politeness or mannerism, pegging Vanessa’s loss, isolation, and depression in delicious two-hander scenes with award worthy dialogue and delivery. A moving session recounting Vanessa’s tale, however, makes the doctor strike up a cigarette. She refuses to believe the paranormal causes or that vampires are after her patient, but she does understand pain and has some murderous history of her own. Samuel Barnett’s (Dirk Gently’s Holistic Detective Agency) seemingly innocent Renfield is Dr. Seward’s secretary, but his red light district cruising leads to bloody encounters and insect snacks. Where Penny Dreadful initially had to dance around the Stoker limitations, these superb character interpretations deserved more than this season’s rushed attention. Christian Camargo (Dexter) as zoologist and charming widower Alexander Sweet is a man smitten using rapid fire science references to woo Vanessa, but his reveal as Dracula is too darn early. This romance seemed so happy and Sweet is almost empathetic, but evil lurks in the House of Mirrors of all places! He doesn’t want Vanessa’s submission, just to be seduced by she, the Mother of Evil and serve her. Sadly, unraveling toppers instead go unresolved. After admitting he was directly responsible for Mina’s demise and all of Season One, Penny Dreadful lets Dracula exit stage right and we aren’t supposed to notice? What is worth noticing are the trains, dime western action, and steampunky flair alongside our usual penny blood, gore, buzzing flies, broken necks, and bat silhouettes. The cobwebbed and boarded manor opens the windows and clears the dust as the camera focuses on the period touches – vintage motion picture cameras, spectacles, brandy decanters, nibs, and ledgers contrast the hay, canteens, wagons, saw dust, and Native American motifs. The fashions are a little more modern, but the museums, taxidermy, skeletons, and specimens in jars invoke Victorian sciences amid the carriages, cobblestone, and tolling bells. Although some CGI backgrounds are apparent with a foreground actor and fakery behind, the desert vistas, mountains, and ranch compounds create bright lighting schemes to contrast the British grays, developing a unique style like nothing else on television.

Unfortunately, with NBC’s Dracula long gone, Crimson Peak’s less than stellar box office, and Penny lost too soon, the promise of more Victorian horror and a new dark romanticism appears short-lived. Whether the cast or Logan wanted to depart or Showtime disliked the production expenses, something behind the scenes was the final nail in Penny Dreadful‘s coffin. The two hour finale burned off the last episodes yet advertising promoting the event as a season finale later backtracked with the series’ fate. More merchandising opportunities never seemed capitalized upon, and there was little award campaigning. Having had Season One available on other streaming platforms might have helped the show find more audiences, however Penny Dreadful wasn’t available on Netflix until after its cancellation in a tidy Three Season binge package. The series’ props have been auctioned off, so it appears no one shopped Penny Dreadful to any other networks. Call me a conspiracy theorist, but in late 2015 while this Third Year was filming was also when Tom Cruise swept in to take over The Mummy and start Universal’s highly anticipated but ultimately D.O.A. Dark Universe monster revival. Did somebody squash the competition? Maybe it isn’t as simple as that, but I will always be skeptical of Logan and Showtime’s he said/she said claiming that this was always how Penny Dreadful was supposed to end. With new locales and more colorful literary characters among our beloved team, why couldn’t Penny Dreadful sustain itself? Previously, one could overlook any small inconsistencies because the sophisticated scares and morose design far outweighed any negatives. This season, however, becomes a chore to continue and is best left at Episode Four. After finishing Dexter and losing interest in Homeland and Ray Donovan, we’ve canceled our Showtime subscription since Penny is no more. There were other ways to do Penny Dreadful justice than this, well, what seems like internal sabotage, but gothic viewers shouldn’t let this rushed Season Three dampen what has otherwise been a stellar and macabre program.

GOTH: The Game of Horror Trivia Video Review

Hello, Addicts! Kristin Battestella aka Kbatz here with a special Video Review of my awesome Thrift Find Goth: The Game of Horror Trivia!


In Addition to Goth: The Game of Horror Trivia, briefly I also mention some Lovecraftian and atmospheric games including Arkham Horror, Pandemic: Reign of Cthulhu, Betrayal at the House on the Hill, and The Grimm Forest.

Be sure to check out more of our Game Reviews at Horror Addicts.net, and don’t forget you can get interactive, answer trivia questions, and tell us what kinds of Horror Media you would like to see – by Horror Addicts for Horror Addicts! – on our Facebook Group.


Book Review: Violent Violet by Tara Vanflower

Violent Violet is the most authentic snapshot of young goth/club life that I’ve read to date. If you want a look in to the drama, mood, and world view revolving around young, broken, baby bats, this is your look in.

Violet is an angry, jaded, tormented goth whose friendships and atmosphere cause her to spin out of control. Drug abuse, sexual violence, and drunken fights infect her world. Her savior could be a mysterious stranger she meets one night, but I was never quite sure if she wanted to be saved or not.

Roman is a man with his own damaged past. He’s quiet and mysterious, but when Violet gets into trouble with her abusive ex-boyfriend, he jumps into the fray and protects her as best he can. Usually a man that stays out of the drama, something pulls him into Violet’s despite his general distaste for her lifestyle in general.

Later in the book we meet Lux and his sensual companion Mylori, who are my favorite characters. As a vampire fan, I really want to read more about them as they hold the most interest in the story for me.

Violet is a deeply flawed and damaged character. While reading, I kept thinking how I wanted to smack her out of it, but being an elder goth, I suppose I have just outgrown her drama. She’s self-involved and self-destructs by making bad choices. Does her genetic makeup guide her, or is it a symptom of abuse that has created this world she lives in? Her drama with men can be explained in a simple line from the book, “No man she had ever been with had been kind to her.” A sad state, but one that she seems to crave as she keeps returning to this sort of man.

For those of you interested in this type of atmosphere: club life, drama, relationship train wrecks, you will love it. For those of you of the elder goth set, you might find the constant drama tedious. I have to say, whatever you feel about Violet while reading, this is a really good character sketch of a girl who does not comprehend herself. I think we’ve all known girls like this—or perhaps have been one—and all we can hope is that she realizes her worth before she self-destructs.

While this book does contain vampires, it is not inherently a vampire novel. The vampires do not show up until late in the game and while they are intriguing, they are not what drive this tale. This is a tale of a girl lost to her own faults and (I hope) going to learn some big lessons in the sequels.

Violent Violet is part of a three book series. All of these book can be found at Amazon.com.

Submission Call for Guest Blog

This is a site FOR HorrorAddicts, BY HorrorAddicts.

Deadline: Ongoing

Guest Blog is your chance to share just a little bit of your work with the HorrorAddicts.net readers.

*200-1000 words flash
*Must be horror or fit in one of our **Approved Themes below.
*This is for free posting on our HorrorAddicts.net blog, exposure only, with link back to your work.
*At the end of the submission, please include your bio (100 word max), url, and attach a cover pic or author pic.
*Send all submissions to: horroraddicts@gmail.com, SUBJ: Guest Blog

************************************

**APPROVED THEMES: Dark Fantasy, Monster, Steampunk, Cyberpunk, Clockpunk, Alternative, Goth, Metal, Industrial, Avant-garde themes. Erotica only if it tastefully falls into horror / goth / fetish culture. If your submission is in the Science Fiction / Fantasy / Thriller / Suspense or any other genre, please email before submitting with a 2-3 line query. If it seems like it fits, we might make an exception.

For full submission requirements, go to: SUBMISSIONS

Finale Guest: The Count

For the finale, coming October 22nd, we will have several guests. Our Horror Host guest is… The Count.

countThe Count is the owner and proprietor of The Belfry Network as well as the Cemetery Confessions podcast and The Requiem podcast. He’s been a goth for sixteen years, a podcaster for nine and a father for three. His first claim to fame came as a live DJ for goth and industrial events, and since then he has pursued his passion of cultural studies by writing articles, creating podcasts, and interviewing academics and musicians alike.

Listen to #136, the finale for this season, and hear a great interview conducted by Emz in which The Count shares with us his thoughts on goth culture, musical influences, and what it’s like to be a goth dad in our age.

blefry2Download The Belfry Network app where you can listen to goth and horror podcasts produced by the best goth/horror podcasters including The Count’s Cemetery Confessions and The Requiem, as well as HorrorAddicts.net. Listen, download, and favorite your casts. The app also holds your place so that you can pause and return without missing anything. The best goth/horror cast app ever, tailored specifically for you and your dark little heart!

An Interview With Goth Drag King Jean Batt

Ever wonder what its like to perform in a burlesque show or dress up in drag. Recently I was able to interview Jean Batt about what its like to be a Drag King:

How did you find out there was such a thing as drag kings?

13956969_10153706521041560_1665133699_nI guess I always knew they where around in many different forms. I watched a lot of 30s and 40s movies when I was younger and a lot of the movie starlets of the time would wear drag for different movies and magazines. The real kickers that this was and is an art form where the films Victor/Victoria and Just One of The Guys.

What made you want to get into it?

I was a kid when I started out. But I was a tomboy or a gender non-conforming kid who played heavily with gender. It was a way of expressing my male side openly. I never had to hide it, but this let me be a boy when my mind felt male.

When did you start performing as a drag king?13937028_10153706522181560_1512938405_n

I was a baby by drag standards when I stared out. I was only 13, in junior high, the very first time I went on stage a king. By high school I was doing impersonations of male rock stars mostly. And in a school of all girls, I would be cast in a few school plays as a boy because I was comfortable doing it.

A lot of people don’t even know that Drag Kings exist, how do you battle stereotypes?

For the most part I have been lucky and not had to deal with much stereotyping. Usually just the explanation of kings being the flip side to queens works. Even had a comedian MC one time explain it and it really clicked. Also with being a performer that skirts the line of trans so closely, the trans community sees me 13937045_10153706526306560_1281609788_nas a part of them and one of their representatives.

Do you get any flack from others in the Drag community for being a woman?

In all the years I have done drag, I have never gotten flack. If anything, I have been given a lot of respect for being born female, gender fluid and close to trans. This has been celebrated by some of the drag powerhouses, including the Queen Mother of Drag herself, Sondra St. James.

I have actually had more flack from being a goth, furry, kinkster, nerd and burlesque dancer and crossing these into my drag than my gender identity. Some welcome it, but many of the old school glam queens have been fighting the changes that I represent. I have been actually threatened with violence (yes, this was dealt with.) I have had so many try to change what I do and what I represent so I “can get more gigs”. But I am doing way more shows and events by being who I am than trying to fit in a mold someone else made.13941097_10153706525141560_1625326624_n

What’s the hardest thing about being a Drag King?

It’s literally a pain in the breasts. Binding can be very painful. As a woman, I am more than top heavy and when I bind my breasts down fully to do burlesque (I dance as a man or trans man and I’m one of the only if not the only transman in burlesque out there). I wear four layers of binding at times to make the male body line. I have been asked if I’m going to have top surgery to make this easier, but I have no intention of that.

What is your favorite thing about being a Drag King?

Oh gods, there is a lot. I love a lot of the people. I have people who I see as my family in the drag community. And I met my best friend doing it too.
I have been able to do shows all over the place and have competed even at the national level doing drag.
The people I have preformed for have been mind blowing too. Anyone from NASA scientists to members 13989437_10153706523971560_488282619_nof The US Congress (both doing drag and trans burlesque).

Who influenced you?

I have been doing my own thing for the most part. But if I had to pick a few they would be John Belushi, Rozz Williams, Dave Vanain, Gary Oldman, Jim Morrison and the cast of Interview With A Vampire (save for Tom Cruse).


How long does it take for you to get ready for a performance?

It used to take me three hours to get ready, but now it takes me about an hour to get into my usual costumes and full gothboy makeup. Naturally the crazier stuff takes longer to do. And on really hot nights, I have a very simple eye, lip and foundation I do that takes maybe ten minutes at most. It looks good on stage but not for photos.
13989675_10153706523686560_330973992_n


What is it like for you backstage at a performance?

There is a joke with a number of promoters that it’s a given that I’m the first performer to show up and actually help get things set up. It may be a joke, but there is a lot of truth to it. I’m the performer that is texting if I’m even running five minutes late. I usually show up close to ready to hit the stage so organizers turn to me to help herd cats or to do the check in with other kings and queens or dancers.

14011969_10153706525616560_1856003706_nSome shows run like clockwork, on time and perfectly. Others, it’s totally crazy and unorganized.
Most of the time, everyone is helping each other backstage to get into gear and face. But there is sometimes the one diva that doesn’t want to play with the rest of the group or has to much of an ego to mix with everyone else.

How do you choose what music you will use and what the act will be about?

First off, I chose songs I actually love. Even if there is a theme to the show, I try to pick songs I love that fit in. Passed that, it’s playing with costumes, props and makeup that fit the theme and who I am.

Do you make your own costumes?

I try to. I used to do film costuming a while back so I know a lot about building costumes.14017575_10153706524716560_515702538_n

However, I do turn to artist friends when it comes to national competition. These costumes have to be beyond what you see at most shows. This is the best in the country so things have to be perfect. And it puts my friends artwork on the national stage and helps get their names out there.

Do you create your own choreography?

Yes, even my burlesque dancing is all mine. Once in a while I am lucky enough to learn a few things from other dancers, such as how to do a death drop safely at my age.

What is the process for making costumes and how long does it take you?

It depends on things. Some of my costumes are just out of my closet. Part of the joy of being a gender fluid goth. I have a trans burlesque piece that has crystal incrusted boxers that took me about ten hours of hand work to do.

For more information on Jean check her out on facebook:

https://www.facebook.com/djneshamah

14017689_10153706683171560_1738649129_n

14017959_10153706521541560_660965731_n

14031154_10153706522996560_1469047654_n

My Melancholy Life: CONTROVERSY ISN’T BEAUTIFUL

MyMelancholyLife

So…CONTROVERSY.

Does it seem like some kind of fussing is just everywhere this summer? I mean more than usual even?

It’s the hottest part of the summer here and people are bored so they talk. (and talk and talk). Online, at the coffee shop, in line at the store, at the PokéStop.

controversyoutline2

When the temperatures climb, it seems tempers get shorter and among the wonderments that the internet has brought us in its bag of the cheaper techno-tricks is much more immediate and free access to global gossip.

A 24 hour Entertainment Weekly style of gossip-mongering inundates YouTube and everyone will agree at least to an extent that Tumblr is a mess. Kat von D (and others) called out Jeffree Star who had called out Kylie Jenner earlier in the month. It’s really been a smorgasbord at the Celebrity Circus this July (even leaving OUT the politics!)…

Shots are fired with call-outs, then everyone responds, and then replies to the responses. I have not seen this much kerfuffle since the Lime Crime/Doe Deere scandals.

Behavior, makeup quality, CONTROVERSY! I follow some beauty vloggers but most of the people I like are too busy hauling new products, reviewing summer goodies and anticipating the fall and holiday 2016 collections to get involved in the gossip. My current faves are Lisa Eldridge (professionalism and technique), Tarababyz (for epic hauls). But there are ALSO the entire channels that have popped up to just dish the gossip, spill the tea, read people so harshly and throw a bunch of shade in every direction in the form of ‘having an opinion’.

When did that happen and why are we watching them? Epic views for nothing really more than…mean gossip dished daily? No, I draw the line at this. Maybe you will too after you think about it.

It hit the Gothic community too this month, over a video “40 Years of Goth Style (in under 4 minutes)”, and the responses and replies to replies. Yes, I also have my opinion about it but no, I really don’t think it merits a video response for people to watch me reacting to it. I’d rather people formed their own opinions from the source, and then discuss them with me. I have toyed with starting a makeup review and alt lifestyle YouTube channel but I really question the content when videos are actually reactions to the source of anything and nothing more than opinion. Possibly helpful when choosing a lipstick or a salad recipe, deadly when forming our actual opinions, views and outlooks about anything very important simply because it IS second hand news, filtered through the reaction of another person first. I can’t get behind that.

If there is anything I have personally learned from seeing these controversies, opinions and reactions come and go is that what I sometimes take away from it has an effect on me. On my mood, on my outlook and on my general way of seeing things. Garbage in, garbage out, so they say.

I DO think it is important to be informed about many things, including being a well-informed consumer and supporting (or not) those people and businesses whose belief and values align with our own to a certain extent but I also feel there is a point when watching this ‘window on the world’ has become just another time-wasting bad habit to somehow get sucked into. It can seem too vivid and sometimes commands too much attention that it really doesn’t deserve when the things in our own lives really can benefit more from our attention. So I say, “Watch but watch wisely and in a limited and aware fashion, be choosey and think for yourself”. Do not just give your attention to these ‘controversies’ for the sake of the latest little tidbit of juicy gossip. It can steal your time and focus!

Mimielle sig, orange

**Some final words of caution for my fellow makeup mavens: Cheap Chinese products, the Ali Express and Ebay “dupes” for more expensive makeup like the Lime Crime Velvetines, many higher end eye shadow and face palettes and popular items like the Kylie Jenner Lip Kits can be tempting, it’s true. But they may or may NOT even be safe to use at all and there is really no way to tell since they are not governed by any cosmetic review board or agencies like the FDA in the US or the European Commission so please be cautious rather than sorry and search for your less expensive dupes at the drugstore or from trusted online companies. Indie brands and lesser known companies like Sugarpill, Notoriously Morbid, Violet Voss and Makeup Monster are amazing lately and Colorpop is fast becoming a trusted budget brand as well, with many great reviews on Temptalia.com.  NYX is a favorite around here, and they have amazing colors and good sales at Ulta. Ingredient labels on products from Ali Express and similar selling agencies may or may NOT even be truthful since they just copy a photo of the packaging so there is no guarantee those cosmetic copy ingredients are even safe to use on your skin, especially on your lips and eyes. Not worth the risk.