Kbatz Krafts: Repairing Black Dresses with Black Lace!

What happens when your long black dress gets caught and ripped on the wheels of the grocery store shopping cart? Yes, that actually happened to me!


Kristin Battestella aka Kbatz fixes a damaged dress and repairs more unsightly alterations with black on black lace appliques for sustainable, affordable, gothic sophistication anyone can do!

Read More of Our Kbatz Krafts in the Horror Addicts Guide to Life Book 2 Workbook ON SALE NOW!

For More Photos, follow Kbatz Krafts on Facebook and Instagram. Thank you for watching!

More Kbatz Krafts:

Gothic Cardboard Window

Using Halloween Scene Setters Everyday

Pumpkin Ottomans, Oh Yes

Halloween T-Shirt Pillows

Kbatz Krafts : A Gothic Litter Box Disguise!

The litter box is a necessity for every cat lover, but it doesn’t have to be so unsightly! Inspired by expensive faux planter litter box designs, Kristin Battestella aka Kbatz breaks out the gloss black spray paint and re-purposes a free fake plant for a unique gothic privy!  

The cut, paint, and plant – easy peasy in a weekend concept, however, took a lot of caulk and elbow grease to make this litter box look so glam! The weather had to cooperate, too. After $40 original cost for the hooded box itself; $12 in spray paint, caulk, plant foam, fake moss, and decorative stone supplies; the final cost here is still less than those lux terracotta litter box designs. A few dramatic side projects also came along for the ride, but in the end, the cat could care less anyway. 😸

More Kbatz Krafts:

Paint It Black

Repurposing Black Topiaries

Glam Spider Balls

Gothic Cardboard Window

Using Halloween Scene Setters Everyday

Mystical Orbs

For more Project Photos, follow Kbatz Krafts on Instagram and Facebook!

Circus Waltz – Silent Film Light by Kevin MacLeod is licensed under a Creative Commons Attribution 4.0 license. https://creativecommons.org/licenses/by/4.0/ Source: http://incompetech.com/music/royalty-free/index.html?isrc=USUAN1100291 Artist: http://incompetech.com/

Kbatz Krafts: A Reversible Red Skirt!


Let’s travel back in time! What happens when you have a surplus of red curtains, red fabrics, and a plague-delayed holiday? Why one makes a festive ye olde skirt of course! This impromptu project only took about four days, coming together smoothly with a fun silhouette that fits a variety of seasons and stylings. Please enjoy this completely backward construction video of a December holiday made in January, edited in February, and now seeing the light of day in March. And no, I haven’t finished the matching vest – Yet! – but the skirt’s actually reversible in a pleasant two-for-one surprise!


Thank you for Watching!


For more project photos, visit Kbatz Krafts on Instagram or Facebook!


More Kbatz Krafts:

Holiday Bonnet and Cape

Halloween Mystery Sewing

Another Halloween Dress

Kbatz Krafts: DIY Cardboard Stained Glass Window

Thanks to the faux stained glass windows on the Halloween Cat Shelter and a serendipitous black drapery seen in my Halloween Thrift Haul video, my ideas for a fake window room divider can now come to fruition! Can cardboard be painted like stained glass of olde? Will a Goodwill curtain create the perfect backdrop? Can Kbatz work on the floor without the cat stepping in paint? Yes, yes, yes!

After not saving much cardboard over plague fears, I finally kept two large boxes that were too good not to re-purpose – cutting the flaps open and taping the folds with masking tape to create an accordion style divider that can stand on its own. This is both tall enough to hold the thrift valance above me as a photo backdrop (a black curtain behind black clothes wouldn’t help very much!) yet short enough to move under the rafters in my Dark Shadows Basement Studio. I laid the cardboard on the floor, using a thrift yardstick and an old school protractor to measure and draw grid lines for the window panes. Working with the cardboard folds created window squares or rectangles either eight or ten inches – a simple pattern in that Dark Shadows spirit mimicking both the stained glass windows at the top of the Collinwood foyer stairs as well as the fake studio window of the drawing room. Did you expect anything else from me? 🙂 The pencil line panes were retraced in black marker and then a coat of black paint, but the perimeter cardboard will be brown to match my wall color. Before committing to painting the window directly on the cardboard, however, I practiced in Photoshop with some random but symmetrical color patterns of red, green, yellow, and orange panes to compliment the majority faux glass blue. Once I was certain on my template, I marked each pane color before multiple, darkening coats of the red, yellow, and orange – mixing each with brown for a deep but faded hue a la ye olde. New Spring Green and Caribbean Blue paint colors were mixed with a darker Cobalt Blue for their depth, and after a day of drying time, it felt like forever touching up all the black grid lines, but it was really only two days.  

Now it was time for the black valance, which was too short for my tall divider so two similar dollar store table runners were cut in threes and sew back together to match the panel widths before being sewn to the bottom of the curtains themselves. The runner lengths didn’t quite match either, but when drawn back with simple black ties, their tiered length creates a fine layered drape. While these fabrics are not durable quality for a real curtain in an active area – and the seam fraying, jammed threads, and bobbin breaks might discouraged beginning sewers – they work perfectly for a backdrop facade. The valance was loosely gathered and glued to the top edge of the cardboard using my preferred hot glue. Rather than a tougher adhesive or stapling, hot glue makes for an easier removal if needed, and the curtain sides are simply taped in the back so they can remain adjustable. The fabric can flip behind the cardboard if it needs to be out of the way, and tassels or faux vines or other ~aesthetics can be added as needed. While not everyone may need a large divider like this, the faux window painting technique is perfect for adding a gothic frame anywhere in your space and the kids can have some cardboard fun, too. Thanks to a $4 curtain, $25 in paints, $1 masking tape, $2 table runners, and free cardboard, a gothic vision came together with a clutter-hiding chef’s kiss.

Click for More Trash to Treasures:

DIY Cardboard Tombstones Video

DIY Cardboard Coffin

DIY Halloween Repairs


Visit Kbatz Krafts on Facebook or Instagram for more Project Photos!


Kbatz Kraft: Pot O’ Bones Tower

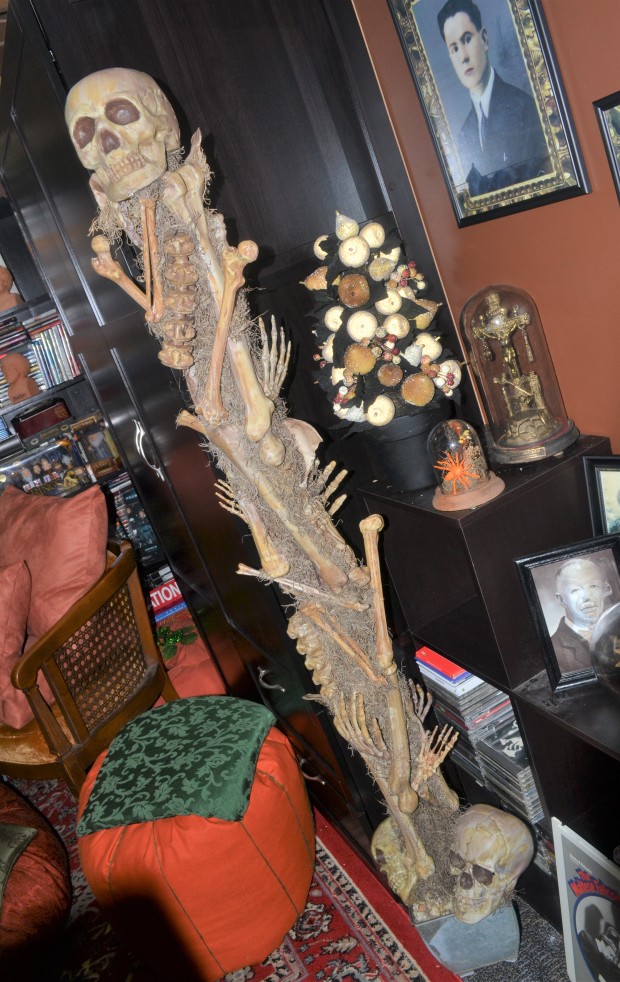
When one spots a bag of loose Halloween skeleton bones at Goodwill for $5, one snatches it before anyone else! Like an archaeologist on a discovery, opening the bag revealed large femurs, skulls, spines, and bony hands perfect for a towering Pot O’ Bones!

These odd, incomplete skeletons, however, were two different colors, and a brown paint dry brushed gave the bones a cohesive color before a second coat of a yellow and brown muddy added to the dug up and weathered theme. An unused skull meant to go with the collapsed Shakespeare Cardboard Tombstone and a pair of skeleton arm tongs from the dollar store were also doctored with aging paint and tossed into the collection. Initially, a found terracotta pot served as the tower base, but it was too big, requiring more backyard stones to secure the inner cardboard tower roll re-purposed from an upholstery fabric sale. The hole in the bottom of the pot meant a stabilizing stake could run through the pole, but since this isn’t weather proof anyway, the stake and the increasingly heavy terracotta were swapped for a smaller rusted metal pot.

With the stand fixed, the bones were strategically set using semi-adjustable hot glue rather than a mega strong adhesive that doesn’t allow maneuvering. Once the large femurs were in place, the cardboard base was painted brown just in case any gaps showed. More leaves, sticks, or stones as fillers between the angular bones were an option, but two bags of dollar store moss completed the decrepit look. Although one could paint the post and even moss the entire tower before adding the bones, that also creates unnecessary work in spots that might not show. This assembly could be done quickly in a day, but I did the bones and moss in stages and made adjustments. Like a Christmas tree, I keep seeing gaps were there should be less moss or another bone and wasn’t quite pleased. Fortunately, the discarded bottom halves from my 3D Skeleton Frames project provided more bones.

Obviously, long term outdoor use requires different materials, but with on hand paint supplies, found materials, $5 for the bones and $2 for the moss, this was much cheaper than the luxury skull towers online. Bags of bones themselves run between $15 and $30! This same model can be applied to family friendly leaves and pumpkins or more birds and bats morose, and a Pot O’ Bones Tower is perfect for a foyer statement, autumn porch, or cemetery sentry.

Revisit more Kbatz Krafts including:

Spider Ball Topiaries

DIY Flower Pens

Re-Purposed Black Topiaries

How to Make Stuffed Pumpkins Video

For more Project Photos, Follow Kbatz Krafts on Facebook! 

Kbatz Kraft: Mini Macabre Bone Wreath

It’s the Autumn of Bones for Kbatz Krafts! What’s one to do with the smaller bones left over from my Pot O’ Bones Tower? Why make a morbid little wreath of course!

A dollar store metal frame was wrapped in brown yarn for the base, as I intended to finish off the glued on bones with some twine ties for a rusted look. However, this fourteen inch wreath seemed too big for the angular bones. Unlike more traditional wreath items like leaves or pine cones, the bones didn’t seem to fit with too much yarn and twine showing gaps between the bones. Fortunately, switching to a smaller diameter wreath frame meant the bones could be the star of the design, going off the edges of the round. Gluing onto the smaller wire frame, however, proved difficult with bones teetering on too few glue spots. Thankfully, switching to a nine inch willow wreath finally did the trick! This natural base that didn’t have to be hidden opened up the possibility for more raffia ties and small black branches sourced from more dollar store florals.

An additional bag of dollar store mini bones were tossed into the mix, too – again painted with the same dry brush brown technique as the Pot O’ Bones Tower to take off the new plastic edge while creating a cohesive, rustic look. After trying the bones in different positions and doubting if this wreath was meant to be because none of the arrangements looked right, I realized it was the largest bones that were the most troublesome. Without them, the smaller femurs and mini bones created a much nicer jointed and angular shape. Now that the placement was at last settled, each was hot glued on to the wreath with the black branches adding macabre but natural pop as well as hiding some of the glue globs. The slightly darker raffia loosely wrapped in symmetrically asymmetrical spots also hid the assembly. This bony wreath looks like the branches and ties are what’s holding it together, and a twine hanging loop sets off the natural motif.

Unlike a traditional wreath where any arrangement comes out complimentary, these morbid materials took some trial and error addition, subtraction, and experimentation. Fortunately, this afternoon project packs a demented little punch for a modest under $8 for supplies that were already in the craft closet – except for those extra Halloween season only mini bones! Compared to expensive skulls and florals, this macabre bone wreath is much more fun and affordable.

Revisit more Kbatz Krafts including:

Decorating Like Dark Shadows Video Series

Goth Parasol Upgrade

Mini Coffin Tray

DIY Cardboard Coffin

For more Project Photos, Follow Kbatz Krafts on Facebook! 

Kbatz Kraft: 3D Skeleton Frames!

Way back in February 2019, I posted about a Goodwill Halloween boon on our Horror Addicts.net Facebook group – two lenticulars stuck together! That Mr. and Mrs. were cut out and placed in traditional frames for my Lenticular Gallery, leaving two spooky, empty frames ideal for some breakout three dimensional skeletons!

Unfortunately, these frames had to wait until skeletons the right size were found. An expensive often $60 or more full size skeleton would be too big, I needed two, and was only going to use the upper torso anyway. Dollar Store twelve or sixteen inch skeletons or mini skeletons garlands were cheap, but entirely too small. Eventually, two three foot skeletons found at Big Lots for $30 fit the bill, and their bottom halves went toward the Pot O’ Bones Tower and a small Bone Wreath – maximizing the price in multiple projects. As backers for the frames, purple damask Halloween paper place mats from a clearance ream with a variety of creepy styles were glued onto cardboard cut to size and hot glued in place, creating a sturdy structure to anchor the skeleton toppers.

Of course, these His and Hers Bones needed some flair! A red rose from the floral stash and a stringy Dollar Store princess hair headband were perfect for her, and a $2 clip on boys tie from the Salvation Army Thrift Store worked for him. These accessories were red to match the DIY candles to be in their skeletal hands – tall paper towel rolls done again like the T.P. Candle Bunches. A mini top hat for my bony fellow, however, was easier said then done. To buy one seemed more costly then it was worth, so the shapes needed for a mini hat were cut out of black scrap fabric and sewn together. A matching band cut from a piece of the adjustable neck on the boy’s clip-on tie set the hat off, and stuffing the top with some plastic bags gave it some padded structure. This jaunty skelly hat didn’t have to be perfect, but the brim, unfortunately didn’t sit right on the skull. Despite double fabric layers, it flopped on his face and bunched in the back, both limp and stiff in all the wrong places! Fed up, I cut the brim off the main top, resorting to a protractor and a cardboard piece painted black so the brim could stand at a firm angle. After all, “A hat’s not a hat ’til it’s tilted!”

At last with the accessories hot glued in place, it was time to likewise set the torsos in the frames and position their arms and candles for a fun leaning display above the mantle. Though inspired by $3 Goodwill luck, the total cost here was under $40 for both pieces, which is still cheaper than most of the breakout Halloween wall art seen at exclusive online retailers. Not just for Halloween, these skeletons work with year round bone décor or as a Day of the Dead buffet backdrop and can be customized by the whole family with other holiday themes and interchangeable accessories. I may just put some Santa hats, a beard, and spectacles on mine come December!

Revisit more Kbatz Krafts including:

Gothic Dark Shadows Sconces

Upgrading Masquerade Masks

Cardboard Tombstones Video How-To

For more Project Photos, Follow Kbatz Krafts on Facebook! 

Kbatz Kraft: Halloween Canvas Art

I’m not a painter, but spotting assorted size canvases at the Dollar Store inspired me to get my spooky art on with a little multi-dimensional Halloween décor! Often shadow boxes or keepsake frames are designed inward with elaborate motifs and objects that you can’t see unless you’re up close. These, however, are certainly noticeable, oh yes.

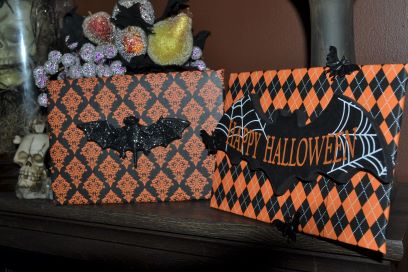
A $2 Goodwill Halloween craft paper block became the canvas backdrops – assorted patterns with damask skulls, spider webs, orange harlequins, and purple owls fittingly named “Dark Shadows.” Clearance Halloween paper placements also backing the 3D Skeleton Frames provided bats and candy corn designs for the larger canvases, and rummaging through my craft stash provided plastic lizards and scorpions, mini pumpkins, bone parts, weird looking potpourri pieces, and small holiday signs tossed into the potential pile as three dimensional art. Laying out my canvases, creepy papers, and morose objects helped match the right designs, bugs, and canvas sizes – eliminating patterns and items that clashed or didn’t fit while creating stand alones or series themes. Using papers and canvases both horizontally or vertically added variety, and now it was finally time to wrap each canvas like a present, folding the corners around the edges and hot gluing the the paper directly on the plain backs. The medium size canvases were a little larger than the square craft paper, so two pieces were seamed together – tape tested to carefully match the paper’s pattern before gluing down the line.

The small signs were only painted on their fronts, so they received some matching black or orange paint around the sides before being centered and glued on the large canvas fronts. The hangers on the back of these signs were removed, too – reused on the backs of the medium canvases now likewise redressed in proper batty fashion. When folding my wrapping too tight, the paper ripped on one, but Kbatz can roll with the punches and glue on more bat bling to fix anything! Not all the canvases nor patterns were perfectly square, however, and some uneven corners or abstract crooked have to be gotten over quickly. The square paper just came to the end of the smallest canvases, so their edges were painted black and the inside rim of the papers were lined with black marker to match the black and white backgrounds. Two red coats gave the bugs a unifying pop, and that foam mini pumpkin was cut in half and touched up around the edges before they were all mounted. Although the larger canvases can be hung themselves, the smaller ones are flat pieces probably meant for a tabletop easel display. A fitting orange yarn could anchor this small trio in a rustic, ladder style banner; but after taping the yarn on the backs, adjusting the placements, gluing the yarn in place, and securing it all with more masking tape, this attempt at hanging art looked totally terrible!

Between the weight of the canvases and the forward leaning objects, the series was no longer uniform as one leaned one way or titled the other. Recovering these canvases in fun prints and using zinger toppers is a family friendly project, but this looked like bad child art that mom has to stick on the refrigerator nonetheless. After getting some aggression out tearing off the yarn, necessity took over in the form of cardboard plucked right out of the recycling. I hadn’t yet used the last place mat pattern, a fun geometric Halloween design, and now it wrapped the cardboard as a new backer to a row of canvases. Though cute, it felt plain. Looking about my craft studio again for more trash to make treasure, I found the black frames removed from the new pictures for my Lenticular Gallery. They weren’t quite the right size for this wide series, so I cut the frames and re-squared them around the new artwork, again taping and gluing the surround in place. You can see the seams of this frame if you look closely enough, and I’m not sure if I totally like it. More creepy crawlies or traditional Halloween webs and creepy cloth drapes would hide these flaws, but all that seemed too busy. Fortunately, this canvas turned cardboard art does hang nicely with its orange yarn swag.

This Halloween Canvas Art was a lot of fun thanks to the craft inspirations and found affordability. For $7 I have five new Halloween displays – even if they didn’t all go as I expected. It also seems like a lot of materials and steps went into these, but having the craft basics to do this makes it wonderfully easy for a fall family night or an at home classroom project. Have a newspaper, special gift wrap, or small memento mori you want to save? Sentimental items or morose shockers make you an artist here!

Revisit more Kbatz Krafts including:

Gothic Gallery How-To

Goth Parasol Upgrade

DIY Flower Pens

How Not to Make a Spooky Spell Book

For more Project Photos, Follow Kbatz Krafts on Facebook! 

Kbatz Krafts: Love is Love Skeleton Wreath

I was going to wait and do this project as a morose February Valentine, but after my His and Hers Three Dimensional Skeleton Frames, I was too excited about this Love is Love Skeleton Wreath!

Despite dollar store skeletons in hand, part of the delay here was originally seeking an oval frame – two skeletons, a few roses, an ornate black surround, goth splendor, fin. However, new thrift frames went to the latest additions in the Lenticular Gallery, and the large wreath frame dismissed from the Mini Skeleton Wreath now took center stage. The floral stash provided red flowers, purple pop, and black leaves, but when I came upon my feathers drawer, I knew this was destined for rainbow flair! The black elements were ditched in favor of green leaves and green feathers stolen from a St. Patrick’s Day boa to go with the abundant orange, yellow, blue, and light purple feathers. Wrapping the frame in red tulle also found in the craft stash provided a solid base for hot gluing the red flowers and green leaves around the top half of the frame. Next came the skeleton couple, who were surprisingly cumbersome folks! The legs were removed, but an arm on either one was also displaced so their rib cages and skulls could be glued together. Without so much surface area on their little bones, it took a lot of hot glue pressed and held in place until the skeletons set. Rather than distinct hair or hat, this hugging, universal, eternal couple was glued as is to the bottom of the wreath with their arms bent and glued in place for more love and support.

The rainbow spread was arraigned and laid out before the purple flowers were glued along the bottom to finish the frame coverage and hide the skeletal ends. Working from their center across helped keep the assorted blooms semi-symmetrical before the orange, yellow, blue, green, and light purple feathers filled in the gaps. The red flowers already stood out with goth glam, leaving no need for red feathers, but the two different purplish shades became the requisite indigo and violet. Being one who prefers black or dark aesthetics, I didn’t have more colorful rainbow motifs, but that’s okay. Using what was in the craft stash required more outside the box thinking, and by eliminating black accents that would scream Halloween, this colorful goth décor can be hung up for fall, February, or Pride. At $3 for the frame and skeletons and maybe $7 worth counting flowers and feathers cost, this done in a day whimsical wreath is affordable, unique, sentimental, and fabulous!

Revisit more Kbatz Krafts including:

Re-Purposed Black Topiaries

Drab to Glam Lampshades

DIY Flower Pens

Upgrading Masquerade Masks

For more Project Photos, Follow Kbatz Krafts on Facebook! 

Kbatz Kraft: Halloween T-Shirt Pillows and Masks

Who doesn’t love a Halloween T-shirt? But what’s one to do once your frightful favorite gets too small, stained, stretched out, or ruined? Never fear Kbatz is here to help you turn discarded October shirts into fresh Fall pillows!

1) Be brave and snip snip! Once you’ve selected your T-shirt retirees, cut off the sleeves and necklines, leaving the front and back of the shirt as your new pillow fabric. If there are out of the way soiled spots or extra bottom length, consider cutting those, too. We want to save the fun Halloween designs, so the prints we’re preserving dictate the size or shapes of the pillows. Many will be straightforward squares, but others with wide across designs can be smaller, lumbar sized pillows or a left logo becomes a memorable mini. Go with what your facade allows. Do remember though, that the pillow fabric may seem big when ironed flat, but consider how much room there will be once it is a stuffed three dimensional object. Give yourself a few inches of room or seam allowance to keep your Halloween swag centered. You don’t want any fun phrasing running off the side!

2) Turn your fabric inside out and get sewing! Your two “good sides” should face each other, pinned or basted in place with a quick stitch. Go around your material perimeter and sew three sides closed. The biggest mistake you can make here is getting carried away and sewing the whole pillow closed, but that’s totally fixable! If you are going to use a pre-made pillow form to stuff your new Halloween cover, leave the bottom completely open. If you are using other stuffing means, then you can sew the bottom partway if you desire – just leave enough for your arm to do the fillings. Matching thread works best on your final stitching, but if you need help seeing your basting stitches and want to use a zany color, well that’s fine, too. Try using pins or chalk marks if you need guidelines while you stitch. When hand sewing, a basic running stitch will suffice, the smaller the stitch the better. There is, however, no formal or right way to do it! This is just a pillow. It doesn’t have to be perfect. It’s okay to make mistakes. That’s no cheat, either – this is basic sewing for you and the kids to practice and have a good time. When you’ve done your three sides, turn the pillow right side out, make sure your design isn’t off the edge, unsightly, or crooked. If you have to break in a seam ripper and do a side again, that’s no problem.

3) Know your T-shirt or tool needs. T-shirt materials are often stretchy knits, so if you are sewing on a machine, check your thread, tension, or stitch, for a zig zag setting may be better on some fabrics than a straight line. If you intend to use your Halloween pillow year round or expect it to earn a lot of bed or pet rough and tumble, reinforcing your seams with more than one machine pass provides strength compared to a quick hand stitch line for an October occasional. As your handling your fabric – especially if it is already something older, stretched, or delicate, be careful not to tug and pull against the machine and create any uneven bunching. Knowing my machine gets tension issues with thicker fabrics, I sewed a former Halloween sweatshirt turned pillow by hand, first with a basting stitch and then going back around with a nicer, straight line finish. If you have trouble hand sewing, use a thimble or consider your needle size or thread weight if your thread keeps breaking or you poke your fingers. Remember this is a great way to learn some sewing basics if you’re interested in advancing to more ambitious projects.

4) It’s stuffing time! How you stuff your pillow is entirely up to you – soft, firm, overstuffed, whatever your comfort needs. A tired throw pillow can be revitalized as new Halloween innards, store bought pillow forms come in a variety of sizes, and natural or organic alternatives are available, however Poly-Fil is probably the most fun. A seasonal pillow that isn’t for sleeping or bedding use can be stuffed firm with plastic bags, disused towels, or fabric scraps, especially if you are light on real Poly-Fil or want to spread it around in combination with other materials. Heck, even dryer lint! My Halloween pillows were for decoration, so an outer layer of Poly-Fil smoothed the shape but within the interior of the pillow were plastic bags and recycled denim insulation from food deliveries. Don’t want to admit you are cheap and calling it recycling (like me)? As a pillow flattens with use or as you purchase proper stuffing, one can always refill or change a pillow later. The more advanced seamstress might even add a zipper closure to the pillow bottom so it can be continually stuffed with more fabric cabbage. Who’s going to know what’s inside the pillow anyway?

5) Don’t toss the leftovers! Remember those cut collars and excised sleeves? Use ’em for that stuffing! The sleeves from the T-shirt pillows on our game room bean bag became Stuffed Pumpkins, and long sleeves can become arm warmers. That extra shirt bottom can become its own plain practice pillow or be folded over to make a mask. Two of my Halloween shirts had small vampish designs, so I made these masks instead of pillows. Initially, they were way too big for my face, but I went around the edges again and folded the sides to make a channel for the ear elastics. I think I was overcompensating in trying to preserve the Halloween statement by trying to shape the mask to the design, which turned out to be unnecessary. Maximize every inch of your materials when possible. Get into outside the box thinking habits and ask yourself, “What else could this be? How else can this be useful?” Use these scrap materials to practice more easy sewing projects!

Halloween pillows are one of the most popular October items today. Toss one in any room and your decorating is done! Even when they aren’t super elaborate, however, designer seasonal pillows are pretty expensive. If we don’t even spend $25 on a bed pillow used every day, why are we spending just as much on some kind of beaded burlap decoration? For the same price, you can buy the Poly-Fil for two or three homemade Halloween pillows – and you get to control the comfort, use, style, and sentiment. Preserve a bemusing T-shirt as a Halloween pillow and get the whole family involved in the sewing skills and stuffing fun.

Revisit more Kbatz Krafts including: 

Pumpkin Ottomans, Oh yes

Decorating Like Dark Shadows

Gothic Thrift Alterations

Victorian Bonnets and Capes

For more Step by Step Project Photos, Follow Kbatz Krafts on Facebook! 

Kbatz Kraft: How *Not* to Make Mystical Orbs!

Cast a spell and make some magic any time of year with your very own mystical orbs! Except when you attempt a Pinterest method that results in disaster that is. Read on for both how to paint and how not to glitter your own crystal ball DIY.

The ingredients to make your own affordable, family friendly orbs are surprisingly pedestrian – clear plastic ball ornaments from the dollar store, broken lamp bases for suave pedestals, and two of each to test two different mystical how-tos. One lamp turned orb stand had already been Painted Black and separated into smaller candle holders but now the reunited pieces are dry brushed with yellow ochre for a bronzed look while the second solid lamp base is painted with yellow and brown for an aged vintage. A glittery orange ball to go with the brown was the Pinterest attempt, however, the seemingly simple food dye for orange water, plenty of glitter, and cotton balls combined inside the ball were a complete failure. Although the shine and the color were great, there was either not enough cotton balls or too much water, maybe both because everything just sat there in one ugly clump. Once the soaked gunk was drained out again, I tried painting the outside of the ornament with a mix of yellow paint and coppery glitter, but this too was unsightly and unsuccessful.

Frustrated, I temporarily abandoned this orb in favor of the much more pleasant second attempt. This time blue, white, and purple acrylics were mixed together, varying the colors and brush strokes for a textured, marble effect followed by a glow in the dark paint topcoat. Once dry, the ornament was glued in place on its base – splendidly contrasting the dark bronze pedestal and vindicating my painting method. I went back to the disastrous ball and likewise painted it with a varied yellow and orange. This orange is not opaque like the Dark Shadows Candle Sconces, but a shiny vintage top with the dark brown base. Twine wrapped around the glue seams set everything off, and although it’s tough to photograph them glowing in the dark, they do!

While craft experimenting can be good wholesome fun, it can also lead to time, supply, and cost consumption that isn’t always a day well spent in tough times. Here, my first instinct was correct compared to a dreaded Pinterest fail – one in which discouraged kids, liquids, glitter, and supplies can end up a messy ruin. Fortunately, by reusing found objects and dollar store finds, anyone can paint their own colorful crystal ball orbs.

Visit Kbatz Krafts on Facebook for more photos!

Revisit More Krafts: 

Mini Coffin Tray

How Not to Make a Spell Book

Cardboard Tombstones Video How-To

Kbatz Kraft: DIY Halloween Repairs!

Is DIY Decoration and Halloween How-To really worth it compared to the expensive store-bought accessories? Does your project hold up compared to “the real thing”? Can you fix what’s broken in a weekend? Kristin Battestella aka Kbatz makes minor repairs on a DIY Cardboard Coffin alongside therapeutic painting techniques and positive Halloween philosophy.

Day Two of the Halloween DIY repairs continues for Kristin Battestella aka Kbatz with hot glue guns and some Frankenstein sewing to fix an Oversize Pumpkin Ottoman before the finishing touches on the DIY Cardboard Coffin and the reconstruction of the fallen Shakespeare Cardboard Tombstone. Not everybody can go and purchase everything new, new, new all the time – especially with recycled, unique projects like this!

Is masking tape good enough? In today’s buy, buy, buy mentality we often forget a lot of things need regular cost saving tune ups. Minor, expected maintenance on Halloween DIY Projects is realistic, affordable, and just as fun the second time as Kristin Battestella aka Kbatz waxes on morbid reading recommendations and faux stone painting tricks as the repaired Shakespeare Tombstone is finished.

Thank you for being part of Horror Addicts.net and enjoying our video, podcast, and media coverage! Show us YOUR Halloween Craft Projects on our HorrorAddicts.net Facebook Group!


For our Original Kbatz Kraft How-Tos or More Halloween DIY:

How to Make Stuffed Pumpkins Video

DIY Cardboard Coffin How-To

Yogurt Ghost Candlesticks

How to Make Cardboard Tombstones Video

Cardboard Tombstones  Photo Shoot

Pumpkin Ottomans, Oh Yes.

Follow Kbatz on Instagram or visit Kbatz Krafts on Facebook for more step by step photos! 

Frightening Flix meets Kbatz Krafts: Decorating Like Dark Shadows Results!

Kristin Battestella aka Kbatz puts together the finishing touches in the Dark Shadows inspired basement including draperies, vintage artwork, and sconces with a focus on the multi purpose desk, workspace, and mobile sewing area. Bonus jewelry making storage, sewing machine tips, and notion organization!


With a creepy lenticular gallery, medieval tapestry switcharoo, glam lampshades, illuminating accessories, and an unimpressed cat, Kristin Battestella aka Kbatz completes the Dark Shadows redecoration journey with a little gothic fortitude and a new appreciation for tackling large room projects during a pandemic.

Revisit More Frightening Flix and Kbatz Krafts:

Decorating Like Dark Shadows Part 1

Dark Shadows Gothic Sconces

All Things Dracula Video Review

The Ghost and Mrs. Muir

For MANY more Project Photos, Follow Kbatz Krafts on Facebook  and THANK YOU for being part of Horror Addicts.net and enjoying our video, podcast, and media coverage!

Kbatz Kraft: A Gothic Gallery How-To

Ever wanted to create a spooky gothic gallery wall but held back over fears of it looking terrible and wrecking your walls in the attempt? Kbatz is here to help you organize and assemble an affordably morose statement piece!

1. Pick a unifying theme. Look at what you have or conceptualize what you have in mind and how your frames and accessories go together. Make a list or drawing or digital template with photos of your intended space. Be it all black frames, all-round frames, bats everywhere, black and white portraits, horror movie posters, decorative shelving for spooky knickknacks, or in my case, a lenticular photo series – something in either subject, style, or structure must visually glue the collection together. Without a purpose to the series, the gallery can get messy or cluttered, feeling catch-all rather than eye-catching. These are pieces that you have accumulated over time to display, not just things that have been put on the wall as they happen. The gallery can’t be so busy that the eye has nowhere to relax. These lentiuclars are a common subject in dark frames anchoring the visual flow.

2. Although that doesn’t mean everything has to be the same. Once you have a foundation to follow, then you can shake up your gallery with some personality. I have dark frames – mostly black, but a few dark brown and some with metallic trims. The shapes and sizes also vary between larger plain portraits and smaller ornate frames with accessories between each. When you succeed in having a soothing overall scheme, adding a few spots of something similar but different within the cohesive theme gives the eye a place to focus. Rather than a mental puzzle, witty standouts let guests notice the entire thing as well as the special composition of the whole, and an usual sconce or accessories that match make for fun and inviting conversation pieces even if they are slightly scary objects!

3. Groupings maximize both the overall and the statements. Even in a series of commonalities, items hung and displayed without rhyme or reason can be overwhelming. Make sure the scale of your items matches the space and place sets within the series. You don’t want items that look too big for the wall or pieces so small they are ignored. However, a lot of small together can make one grouping to balance a solo large accessory. Hanging like items together or creating invisible lines among the frames – such as making sure the tops or bottoms of frames are level across the wall – trick the mind into pleasing organization even if artwork is scattered high or low as in a stairwell for example. My gallery has three or four items in groups with a break between the vignettes so one can take in a section, visually rest, continue the set, and let the eye flow with the larger traffic pattern into the room.

4. Practice your layout. What if that painting should be higher or your straight row of accessories ends up crooked? You can’t wreck your walls with a lot of unsightly holes as well as making more work for yourself with the subsequent touch-ups and corrections – especially if you are a renter or can’t fix the paint. Physically test your vision by tracing the shapes of your items on newspaper or another handy scrap like cardboard or packing paper and use these placeholders to adjust your arrangement. Find out what pieces don’t fit, which go together, and what to place where. Be sure you have enough space and start in the center rather than an outside end. You don’t want to run out of room! When you are ready to hang your gallery, make sure you have the right tools on hand – the proper wall anchors for heavy medieval armor, adhesive strips for smaller frames, the right size nails for your structure. Hammers and levels go a long way, too!

5. Galleries don’t have to be expensive to look great. Black frames can be pricey or tough to find, so I had to find smaller frames from the dollar store, old fashioned thrift pictures for under five dollars, and unused frames from family members spray-painted black or touched up with dark acrylics. Consider your style and project time in what your budget allows and remember to calculate any tools or supply costs. Maybe you can buy all new matching frames or can have a special piece custom framed. If you are artistic or in no rush, you can browse thrift stores or yard sales for some alternative do it yourself materials. You aren’t being cheap by being resourceful – you decide where to compromise your vision or hold out for the style you want in accordance with what’s affordable to you. A formal family portrait gallery in my stairwell cost forty dollars, but my lenticulars cost less than ten and they certainly make people take notice!

These days many may not have the extra space or means for elaborate artwork, formal accessories, or large focal point displays. However, by carefully assembling a spooky wall gallery with themed, affordable finds and an eye for detail, any dark heart can find a blank spot to make your own.

Revisit more Gothic Crafts:

Decorating Like Dark Shadows

DIY Flower Pens

Re-Purposed Black Topiaries

For more Step by Step Gallery Photos, Follow Kbatz Krafts on Facebook

Kbatz Kraft: Unfinished Regency Sewing

Are you understandably unmotivated with your hobbies and style these days?

Kristin Battestella aka Kbatz discusses the pros and cons of commercial and altered patterns in tackling this purple Regency meets seventies styled empire dress in progress alongside sewing for yourself versus sewing for others, sewing properly instead of just winging it, adding choice color to a black wardrobe, the lack of motivation to complete seasonal goals during the pandemic, unfinished projects placed on the back burner, and future ideas for accessories to match.


For more Gothic Sewing revisit:

Gothic Parasol Upgrade

Gothic Thrift Alterations

Victorian Bonnets and Capes

To see more unfinished in progress pictures visit Kbatz Krafts on Facebook

Thank you for being part of Horror Addicts.net and enjoying our video, podcast, and media coverage!

Kbatz Kraft: Spider Ball Topiaries

As seen in my Thrift Finds Alterations video, I picked up these holiday topiaries at Goodwill for $5 each – compared to $15 a piece on the original Marshalls and HomeGoods price tags. Although the all silver glitter urns, stems, and spikey balls scream December cheer, my little goth brain whispered black paint….

It only took a few hours to coat the stems and urns black. I worked with acrylics rather than spray paint in order to leave the balls silver, but glitter of course got everywhere. I had to make sure my paint coverage was true black and not….sparkly…but after a few touch ups it was time to break out the glue gun. It seemed fitting to put something black and morose on the balls to cover up some damaged, bald spots – tying the new dark sophistication to the glam silver with a few strategically placed dollar store plastic spiders. I was actually short as many black spiders as I wanted, for it’s tough to find Halloween accessories in June even without a pandemic. However, I still had some purple and green spiders from a dollar store ring assortment, so I just painted them black, too! Ironically, those painted spiders ended up as too many different types of spiders at once, and I went back to just a few for a less crowded scheme.

Voila! For less than the original sale price of one dated holiday topiary, I now have two statement pieces for Halloween or year round. A real holiday maven could continue the theme every month to coordinate or pop – black snowflakes, purple hearts, black four leaf clovers, red flowers, whatever your macabre little self desires. For pennies, anyone can personalize and enjoy a revitalized holiday find. Now, however, it’s time to wait for the first guest to recoil, oh yes.

Revisit more Kbatz Krafts including: 

Paint it Black

Re-purposed Black Topiaries

How to Make Stuffed Pumpkins Video

For more step by step Project Photos, Follow Kbatz Krafts on Facebook! 

Frightening Flix meets Kbatz Krafts: Decorating Like Dark Shadows!

Kristin Battestella aka Kbatz details the inspirations, budget, logistics, and compromises in outfitting a basement studio with a Dark Shadows theme. From carpet and painting to walls and storage, come along for the pros and cons of taking on a redecoration during a pandemic lockdown.


Next Kbatz defines the vintage seating and multipurpose work zones in the re-envisioned Dark Shadows inspired basement studio – complete with maximizing spaces, aesthetic heating options, and craft organization tips. There’s also a not so intrusive cat and one pesky basement pole.


It’s heaps of orange for the Dark Shadows inspired basement with unique furniture, thrift finds, pumpkin crafts, retro refreshed lamps, and textile accessories as the studio starts coming together into a cohesive room despite bugs, ugly fluorescent lighting, and the struggle to stay motivated in difficult times.


Stay tuned for the finished results!


For More Kbatz Krafts as well as Frightening Flix, revisit:

DIY Cardboard Tombstones

Dark Shadows Video Review

Dracula (2020)

For more Project Photos, Follow Kbatz Krafts on Facebook  and  thank you for being part of Horror Addicts.net and enjoying our video, podcast, and media coverage!

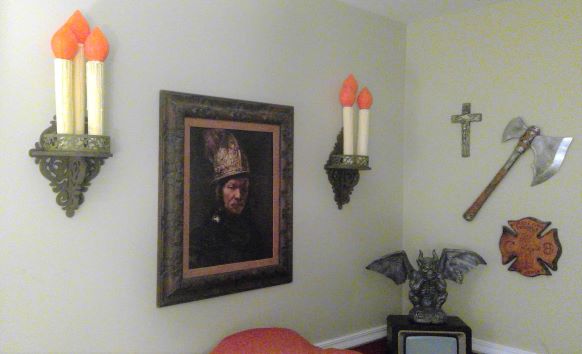
Kbatz Kraft: Gothic Dark Shadows Sconces

Anyone else love those giant candelabras in the Collinwood foyer on Dark Shadows? Over the years I’ve collected some fine iron stands and hefty glam candlesticks, but such tall electric faux mood is obviously tough to find. This past holiday season, however, inspiration in creating my own imitation struck thanks to wrapping paper rolls and Christmas tree ornaments. Yes!

Upon finishing the wrapping paper, I swished the empty cardboard roll like a lightsaber as you do, but could these large tubes become a supersized Halloween Candle Cluster? Tea light toppers seemed too small, but eureka the Dollar Store came through once again with oversized light bulb shaped ornaments! Of course, they’re supposed to hang upside down, however sitting upright on top the cardboard rolls they’re perfect for that mid-century mood. A few hours and mixed coats of orange, red, and gold paint later, that bold flame faux was in full Dark Shadows effect. The location in mind for these candle imitations, unfortunately, is a small spot with little floor room for any ornate base – perhaps a re-purposed tall lamp or plant stand. On what then could I set my faux candle rolls? I spent the winter browsing ugly brass and plastic sconce shelves in the thrift store yet none were the right size, shape, or material for this old fashioned Dark Shadows look. Sconces would keep the floor free, but perusing home improvement stores didn’t yield any kind of affordable corbel or ye olde wooden plaque, either. Then, #stayathome forced my search online, and after a late night scouring on Amazon, I finally found a set of reasonably sized sconce shelves with an ornate scroll motif in the spirit of those big old candelabras. My black heart could see passed their white finish thanks to some handy burnt umber paint! The interior scrolls were painted black for dark definition, and after two umber coats, a yellow ochre dry brush added a bronzed patina.

Initially, the cardboard rolls were cut into four twelve-inch and two fourteen-inch candle pillars. Glue drips around the top created that faux melting wax, and the painted bulbs were glued on top. The bulb height, however, made the candles too tall for the shelves, so they were cut down to two ten-inch and one twelve-inch pillar per sconce. After a white base coat, more yellow ochre mixed with a dash of brown added dimension to the glue drips before mixing the white with the yellow ochre for a creamy, antique finish. The completed candles with bulbs were glued to the sconce, though the candle base felt bare compared to the Dark Shadows lamps with metal foliage accents. A $5 roll of metal craft trim from Amazon worked splendidly once painted with black and ochre for an aged look and glued in place (and I used the remaining piece to make an impromptu tiara, as you do in a pandemic amirite?) Although I spent more than usual for the sconce shelves at $20 for a set of four, the “only a few left” and delayed shipping fears are what really kick-started this three-day project into action. With $2 for wrapping paper, $6 for the bulbs, and $5 for paint and glue sticks already in stash, $38 total is an affordable, fun homage compared to a much more complex electrical redesign or antique purchase.

These gothic mock sconces were a case of working with what I had, finding inexpensive items to use in new ways, and paying more for a completed vision. It’s difficult to hold out for the right pieces or even see creative value in these tough times, but ideas and inspirations can still become a reality! There is however, a certain irony to making fake Dark Shadows candles imitating a real electric lamp that was fake candles – “vampires pretending to be humans pretending to be vampires.”

Revisit more Kbatz Krafts and Frightening Flix including:

Dark Shadows Video Review

DIY Cardboard Coffin

Painting it Black

For more step by step Project Photos, Follow Kbatz Krafts on Facebook

Instagram: https://www.instagram.com/kbatzkrafts/

Kbatz Kraft: DIY Flower Pens

I love zany pens – especially goofy or oversize flower pens and buy a bunch at a time whenever I see them in the Dollar Store so I have a back up when one runs out of ink. Yes, the bane of these fun conversation pieces (that no one can nonchalantly steal from us overprotective pen lovers) is that eventually, the ink ceases to flow. Occasionally I’ll leave a cool one in the pen cup, but then you inevitably end up grasping for that one working pen among the pretty but useless accumulation. Bulk pen options online look to be only cutesy daisies or rose wedding favors that feel cheap – a bud topped on a pen wrapped in ribbon. Well then, I can do that my tacky self!

Our on hand ingredients are simple:
*back to school clearance stick pens
*assorted thrift store flowers
*dollar store floral tape.

1.) After cutting single stems from the floral bunches to the length of the pen without its cap, hold the stem and pen firmly together and start wrapping the tape at the bottom of the pen.

2.) Once it is tightly started, continue winding the tape around the pen and stem – the green tape sticks to itself and any rough spots can be smoothed.

3.) At the top of the pen – just beneath the flower – the tape edge can be folded to cover the pen top.

OPTIONAL: On a few flower pens, I hot glued extra leaves from the floral bunches beneath the flower to hide any troublesome gaps.

Mine are red flowers with just the green floral tape stem, but for more dramatic looks one can use a longer flower length, feathers for faux quills, or go totally goth garden with black flowers and a black wrapped ribbon finish. My bunch inside a reused dark candle jar looks misleadingly real, and my husband said, “So THAT’S where you’ve been hiding the pens!”

This craft feels deceptively simple and almost not even worth sharing. However, during these stay at home initiatives, it’s the perfect time to revitalize old artificial flowers as something both summer vase decorative and useful fresh for that new at-home office or classroom. The kids can ritz up their writing utensils with bemusing toppers with this spare change fun, and the best part is that when the pen runs out of ink, you can remove the flowers for another project and make more themed pens per season.

Halloween pen bouquets, oh yes!

Revisit more Kbatz Krafts including:

Repurposed Black Topiaries

Creepy Cloches

How to Make Stuffed Pumpkins Video

For more Project Photos, Follow Kbatz Krafts on Facebook! 

Instagram: https://www.instagram.com/kbatzkrafts/

Kbatz Kraft: Gothic Thrift Alterations

For those looking to build a vintage wardrobe or add sophisticated pieces to your closet, second-hand shopping such as Goodwill or thrift stores is a great way to find unique styles at affordable prices. Occasionally, however, a great outfit may have one or two problems – a missing button, hemming, or other size adjustments. Even if you are new to sewing or fearful of minor tailoring, this kind of customized alteration can really make a thrift find zing.

In this video, Kristin Battestella aka Kbatz shows you easy fixes, quick stitches and taking in tricks as well as what to look for such as detailed handwork or designer extras. For a few dollars and some sewing practice, altering thrift finds can lead to unique trendsetting and fashion that makes you feel good.


Thank you for being part of Horror Addicts.net and enjoying our video, podcast, and media coverage!

Our Horror Addicts.net Facebook Group: https://www.facebook.com/groups/horroraddicts.net

Horror Addicts.net Online Writers Conference: http://horroraddictswriters.freeforums.net/

Tell Kbatz what you’d like to see with our Online Survey: https://forms.gle/3CE4LjFTLLxxyedK6


Revisit more Kbatz Krafts including: 

Upgrading Masquerade Masks

Victorian Bonnets and Capes

Gothic Romance Video Review

For More pictures, Follow Kbatz Krafts on Instagram! 


Kbatz Kraft: Upgrading Masquerade Masks

It’s that time of year when masks pepper the stores – ritzy but cheap playthings for an evening masquerade or Mardi Gras. I picked up a few at the Dollar Store and found another at the thrift shop, and although these are a little flimsy or faux plain, that just means they can be properly jazzed up with more feathers, glam, and accessories.

Of course, one can immediately tell the difference between the slightly more expensive three dollar thrift mask compared to the two different Dollar Store styles thanks to the central red plumes and structured mask. The sequin trim had come undone in a few places, but outside of those glue gun repairs, this didn’t need anything else. I actually found another small red and black mask in my stash – clearance from Joann’s with lace designs and a solid shape but otherwise plain. Adding red and black feathers anchored with a black flower jazz up one side, and although I am tempted to ritz it up further, it’s feminine and petite style creates a his and hers bargain with its thrift mate. The purple Dollar Store mask is embellished and sturdy, but one measly flower is hardly a worthy accessory! Contrasting yellow feathers from a feather assortment add immediate pop alongside purple ones while white feathers match the silver and white trim already on the mask. With hot glue on the stems, I layered and arranged the feathers behind the flower, and beneath it I glued some dangling, glittery purple berry picks invoking grapes and bacchanal flavor. Also from the Dollar Store, these little balls chip or break off easily, so I secured trouble spots with purple glitter hot glue sticks. These accessories have visual weight but aren’t heavy on the mask, and a dash more feathers on the left corner create festive balance to complete the look.

More holiday picks and swirly clips from my craft stash certainly look party-ready, but they are much too heavy for the black Dollar Store mask. It has a lot of moody black feathers on its right, however, the mask itself is flat and flimsy. Unlike the others, this also has a holding stick rather than a tie around the head. In need of heft in glam without weight, long black leaves from Dollar Store bunches did the trick – creating height and three-dimensional shape for the flat facade. A new gray and silver flower also cut from a cheap floral bunch anchored the leaves while silver glitter branches become lightweight but eye-catching sprigs. At this point, I went overboard adding shiny branches around the top and bottom of the mask for more dimension and trim before anchoring the left side with a sparkly little bat. This did make the mask feel heavy – I probably should have backed it with some sturdy materials before I decorated it – but I couldn’t resist something a little, you know, Kbatz. To compensate for the heft, I added a tassel and ribbon tie at the bottom of the stick, so one could let the mask dangle at the wrist while one dances, as you do.

Outside of eight dollars for four masks, costs here mainly come in hot glue, feathers, and florals if you don’t have already have a craft stash. Even when calculating those crafting essentials likewise found affordably at the dollar or hobby stores, upgrading cheaper masks for a night or two of revelry costs far less than the elaborate but expensive and not necessarily better quality masks found at the Halloween shops or party chains. These Dollar Store upgrades are an affordable way for anyone to get creative with something customized and unique at the masquerade. Why not? Go wild! There’s always room for another feather!


Revisit more Kbatz Krafts including:

Re-purposed Black Topiaries

Creepy Cloches

Victorian Bonnets and Capes


Thank you for being part of Horror Addicts.net and enjoying our video, podcast, and media coverage! Join the Costuming Conversations on our HorrorAddicts.net Facebook Group or tell Kbatz what you’d like to see with our Online Survey


For Additional Photos, visit Kbatz Krafts on Instagram!

Kbatz Kraft: Victorian Bonnets and More!

Members of our Horror Addicts.net Facebook Community may recall my October post asking how to glam up a plain white three dollar Halloween bonnet from Goodwill – and I went back to the store to pick up a second hat after our old fashioned fashionistas suggested so many great ideas! Fortunately, this festive season is the perfect time of year for a red and black design dark for Dickensian mood or delicious for a Victorian Christmas.

Viewers of the on-location author interviews featured at the Horror Addicts.net Online Writers Conference may also recognize the red pintuck taffeta fabric used here – once my backdrop material now re-purposed in a variety of home projects. This was the last piece of what is a very forgiving material that could be folded over and glued along the edge of the hat and tucked under in the back without worrying about taut perfection. While there are great Youtubers paying attention to period detail and historically accuracy who would cringe at glue, this project is more about aesthetics than proper Victorian recreation. Initially, I didn’t expect to sew, but the flimsy, clearance, black lace from my stash needed to be gathered around the bonnet brim. Stitching it in place on to Dollar Store black ribbon became a time-consuming step that took twice as long as it should have. Once done, however, the bonnet came together quickly until I caught a raccoon with his nose pressed up against the glass door looking inside watching me. That was creepy!

Of course, this project reminds me of how they say to re-enact within your means. To dress in fine fabrics and glam trims like Queen Victoria would be very expensive! By sewing this lace carefully, however, it became a proud, handcrafted detail that a lot of regular ye olde folk probably did on their clothing. Cheaper materials may be cumbersome but using what you have is affordable. So one has to decide whether more time for detail or budgeting for materials is best for your crafting means. Outside of the initial inspiring bonnet itself, the black lace, black ribbon, artificial flowers, feathers, and fabric were items from my craft closet. Once you have such stock, it’s easier to customize mainstream designs or make anew. A wide black ribbon for the bonnet tie meant I could press the lace gathers faster along a hot glue line at the crown plus the width makes for a big, dapper bow under the chin. Was it too much ribbon and lace? Victorians were known to have some pretty outlandish things on their hats – like nests or taxidermy, so decorating the bonnet is the fun part! Red Dollar Store mums and a marked down giant black feather plume make for some holiday style. Since the green leaves showed beneath the flowers; black, brown, and cream feathers from an assortment added to the natural scheme – accenting a Mrs. Cratchit tone were the feathers were acquired via from the bird modest alongside festive accessories accumulated over time. While yellow and orange feathers from the assortment were tempting as a festive pop, I think they’ll do better contrasting a future more Halloween-ish purple bonnet.

Hot glue again came to the rescue attaching the accents to the sides of the bonnet, a few hours work done except there was just enough fabric left to make a jaunty little cape to match! The construction here would seem straightforward with sewing all the sides with black lace trim and a ribbon tie at the neck. Unfortunately, I only made more work for myself in again gathering lace. I don’t think ladies had anything to do back them but gather all their fluffs, lace, and ruffles! Not only did I neglect taking pictures of this bonus, but guess who made a really dumb mistake on the front corners and had to undo two days worth of work and start over again? Me. But at least I was also able to make a matching muff out of the mistake fabric. When inspiration strikes, sometimes you just have to roll with it, and after all that, I wanted to include a few holly jolly bells somewhere on the ensemble. Rather than permanently attach it, stray leaves and bells in a festive, grape style dangle became a separate little pin. The bell cluster was simply tied onto the leaf stem and then both a pin back and barrette clip were hot glued on the back to wear as a brooch or in my hair as you do. It’s a little delicate but for some free jingle, why the heck not?

This ensemble was both easy yet complicated – one project that turned into four. To buy the materials would probably be a reasonable thirty dollars perhaps, but sewing know-how can be priceless. In addition to the fun and festive wear, the point of the project became perhaps to not be discouraged. None of the sewing here has to be perfect, for a hidden ugly or seam basics on something small and inexpensive is great for those new to sewing or intimated by a needle and thread. Don’t let any money, mistakes, or material hurdles take the wind out of your crafting sails!

For More Kbatz Krafts, Check out Our Halloween Mayhem:

Re-purposed Black Topiaries

Creepy Cloches

How to Make Cardboard Tombstones Video

Everything Pumpkin!

Halloween may be over, but PUMPKIN season is just beginning!

By now you’ve had a chance to check out Kbatz’s multitude of Krafty pumpkins! Releasing later this month, we’ll have a Pumpkin Special Podcast that you can listen to while you prep that perfect pumpkin dessert or look ahead to family gatherings you may or may not be excited about attending. Until then, here are some awesome new pumpkin ideas for you to try:

Wordy Pumpkins

I just love using dollar store pumpkins to make cooler pumpkins. This look is created by modge podgeing book pages (in this case pages from an old dictionary) onto pumpkins and then using a black marker or paint to put the letters you would like on them. This boo-tiful craft takes only a few supplies: stryo pumpkin from a dollar store, old book/dictionary pages, glossy modge podge, a foam paintbrush (or you can use your fingers), and a thick black sharpie.

Pinned Pumpkins

These looks are pretty easy because you aren’t even covering the entire pumpkin.

Buttoned Pumpkin supplies: tons of mini buttons of varying colors, but all about the same size, crafting wire that can be cut and poked into the foam through two holes (like a staple).

Ribboned Pumpkin supplies: thin black ribbon or curling ribbon, a thicker specialty ribbon, pins.

Pumpkin Recipes:

Horror Addicts Guide to Life

Check out Dan’s Pumpkin Patch Party Recipes in Horror Addicts Guide to Life. 26 pages of pumpkin reciepes from pepita brittle to maple pumpkin ice cream!

Other Pumpkin crafts:

Finale Craft: Making Quilted Pumpkins

Kbatz Kraft: Pumpkin Ottomans, Oh Yes

How to Make Stuffed Pumpkins – A Kbatz Kraft!

How to Make a Pumpkin Cat House – A Kbatz Kraft!


Kbatz Kraft: Mini Coffin Tray

Have you ever hung a table picture frame and been so annoyed by the little stand in the back interfering against the wall that you’ve ripped it off? No? That’s just me?

I looked at these little picture backs with my cheap and spooky mind and thought, “Gee, they look like coffins!” But what could I do with them to show off their unusual shape? Some kind of cemetery diorama like the ones we used to make in school would be decorative but not necessarily useful. Would it be more efficient if this little cemetery was displayed openly on a serving tray? Kooky yet functional! Rather than cheap plastic or a Halloween themed platter that would be flimsy or too cutesy, I found a great old fashioned tray at Goodwill for $2. This chipped and worn cream with gold scroll work was going to become brown for that earthen look – the paint known as ‘nutmeg’ strikes again!

Obviously I could not repaint the entire intricate scroll design but went over some of the vine motifs on the corners in lime green paint for a creepy brier look. Of course, this lucked upon step was time consuming and took a few coats of both the green paint as well as the surrounding brown. I am not an artist, but I am a perfectionist, and some of the brush strokes are apparent if you take a closer look. After three or four coats, I could convince myself real creepy vines and cemetery dirt would have imperfections, however there are probably better stencils, brushes, and skills if you are intentionally going for an elaborate Halloween design. Although this paint doesn’t specifically say it glows in the dark, the lime is bright enough to do so – another fun bonus!

Despite already being dark, I painted the frame stands turned coffins black, hiding lingering sticker marks on the back while the brush strokes became fitting faux wood grain. I wanted a simple ‘R.I.P.’ in white to emphasis them as coffins, but the white paint picked up the marker tracings, leaving the phrase, well, peach. Maybe one could excuse it as a touch of Halloween orange, but I didn’t like it. When I started to go over the letter again with the brush I used for the black paint, I ended up with another ‘happy accident’ just like Bob Ross says. The darker dry brush picked up some of the surface texture – aging my peachy R.I.P. Like vintage erosion. Whew!

At last, my little coffin family was ready to go on the tray, staying upright with some basic glue and tape. After touching up the bottoms of the coffins with more black and covering the rest of the tape lines with my trusty nutmeg, I glued some green moss around the bases. This covered my imperfections and base support with a final spooky mound, and if you look closely, I used green glitter glue sticks in case any of the glue shows. Naturally, one should not put food directly on this kind of painted tray nor use it for a lot of grabby trick or treater hands. True artists would probably also use some sort of glossy sealant to protect their designs, but for me, a shiny top coat didn’t go with the graveyard mood.

Of course, one doesn’t have to make a three dimensional cemetery tray. Kids can spend a fun October weekend painting much simpler platters and gluing on an array of bugs, spiders, fake fingers, toy eyeballs, or anything that fits your Halloween theme. This idea works perfectly as a fun centerpiece whatever your inspiration and style, obnoxious picture backs or not.

Revisit more Kbatz Krafts including:

How to Make Stuffed Pumpkins

Spooky Spellbooks

Tea Stained Labels and Spooky Bottles

Creepy Cloches

It’s a Pumpkin Cat House

Kbatz Kraft: DIY Cardboard Coffin

I told myself, “Kbatz, no more cardboard tombstones!” and had actually been recycling several of the boxes that came my way. However, when one long, slender, perfectly coffin sized box happened upon my doorstep, I could not ignore it!

Granted, this was only the oblong base for a Cardboard Coffin that suddenly landed in my lap, and I needed to make the graduated, angular top to complete the silhouette. Cutting another box open to adjust around the top of my long box took some trial and error – centering as best possible, taping the flaps down to close the front, then reinforcing all the seams with more masking tape. After the front was loosely in place, I laid down my delicate shape and traced the top onto another piece of cardboard to be used as the backing piece. One could leave portions of the coffin open, but that can seem like parts were missing and this needed the structural support as well.

Although, one flap on my top box was indeed missing. I thought about cutting another piece of cardboard to wedge it closed, but the Bob Ross happy accidents continued once I decided to leave it open for some creepy hands to pop out. I have some Dollar Store skeleton hands intended for making coffins out of old pallets in yet another get to it someday project, but when looking for the skeleton hands I found monster fingers I had picked up at Goodwill for $1. Because these are singles rather than a jointed boney hand, I could spread them further apart to cover the opening as well as let them really stick away from the coffin for total scary effect!

Before I could break the monster out, however, I had to paint my cardboard coffin. Using the same technique as my DIY Tombstones, I graduated and varied different brown and black acrylic paints in marbled streaks with darker old sections and lighter, seemingly worn corners. After a few coats of blending for full coverage, my cardboard was really starting to look like a coffin! Should I paint on a big R.I.P.? Add claw streaks from my monster nails? I chose to leave the coffin plain otherwise, but a real artist could add monster eyes or pre-made ripped open monster decals. They do make ’em!

Now it was time to hot glue in my green monster fingers, spacing them out with Dollar Store moss to fill in any remaining gaps. It didn’t take long at all and the creepy long fingers set off the entire piece. Who has time to notice it’s really just a holey, tape together piece of cardboard? Since this wasn’t a coffin for the dead with a skeleton hand and more a buried monster break out, I picked up some Dollar Store chains to go around the box, adding visual balance while hiding some trouble spots. You can buy foldable fabric and cardboard cutout coffins in the Halloween store, but for their borrowed time breakable, store bought faux seems over priced at $25 or more. Then again, seriously sophisticated Halloween folks can get elaborate here with sound effects, motion sensors, or lighting – spending for a prop that will certainly scare as well as last if you have the right materials and know how. Naturally any cutting is best left to mom and dad and kids would need help in holding everything together as it is assembled, but this can be a family friendly project customizing what scary zombie arms or fun tails and toes to expose.

Because I had to open the top box and tape the angles back together, this coffin was slightly flimsy and top heavy. Maybe the cardboard should actually look more like damaged wood with jagged edges, and there are probably more sturdy materials to make your own DIY Coffin. I also dislike the noticeable seams upon closer inspection and even for a coffin getting bent out of shape by the monster inside, the proportions are still a little askew. For an on the whim project, however, this came together quickly in a few days with only paint drying delays. Using found materials and basic supplies that cost under $12, I now have a fun, spontaneous Halloween showstopper.

(It’s amazing what you can do in a day without internet service, and apologies to the workmen outside my house that afternoon who may have looked in my front window to see an upright coffin in the center of the room, you know, just chillin’.)

Revisit more Kbatz Krafts including:

How to Make Stuffed Pumpkins

Spooky Spellbooks

Tea Stained Labels and Spooky Bottles

Creepy Cloches

It’s a Pumpkin Cat House

Re-Purposed Halloween Topiaries

Pumpkin Ottomans, Oh Yes!

DIY Spooky Candle Clusters

Cardboard Tombstones How-To Video

Finale Craft: Making Quilted Pumpkins

On this year’s finale, we made quilted pumpkins!

You can listen to the step-by-step instructions on the finale show audio below, but here are some pictures to help you along your way.

Audio for Season Finale, #176 Halloween Special

Gather your items:

  • 1 styrofoam pumpkin
  • Bunch o’ straight pins
  • At least 126 fabric squares, 3×3 inch, alternating colors – one of them being green. They should be ironed into triangles
  • Thimble
  • Stitch gauge (or a ruler and piece of cardstock to measure the stitches)
  • An iron

CREATE!

If you quilt them properly, all the ends should be down and hidden. However, “punking” the design is also encouraged, like this last picture where E.M. Markoff went for a more artsy, rough-around-the-egdes look.

Kbatz Kraft: Paint it Black

Like The Rolling Stones said, sometimes when you want a little morose, all you need is a hefty coat of black paint. A $4 grab bag of bowl filler from our trusty Mr. Goodwill helped me prove this theory as traditional balls and gourds became rustic orbs and goth glam. Shiny brass or holiday gold candlesticks and sconces likewise become sophisticated, useful pieces year-round, and Dollar Store frames turned into expensive-looking conversation pieces.

As discussed in my Re-purposed Black Topiaries project, painting floral items black is more involved, but worth the spooky look. When I picked up another holiday vase filled with pine and poinsettia greenery for $3, out came the flowers and everything else was spray painted black – tacky gold base, leaves, stems, and all. Touch-ups were needed for some of the smaller needles, but now I have a black floral base that can change with the season. After some cream and blush color flowers on the empty picks for the summer, it’s all black flowers for Halloween, red for the holidays, purple for winter, and white for spring. Customizing fake flora displays at the craft store can get pricey, but for $5 including spray paint, I have not just one one of kind centerpiece, but five.

Perhaps everything all black all the time would be too much for some, but one or two black accent pieces can be classic or rustic to suit your décor without being expensive. After last year’s Spooky Bottles and Tea Stained Labels, black paint came to rescue when I wanted to add more creepy jars to my shelf. Saving a few unique bottles from the recycling, painting them black, and wrapping rustic twine around the tops adds a touch of mystery to any apothecary. Have anything broken and useless lingering in your garage? I took apart the base of a damaged silver lamp, removed the wiring and painted the pieces black for a few more goth candle holders.

When my mom gave me this little lantern house – bought for pennies at the thrift store – I was tempted to keep the tin look. However, it felt a bit too country amid the rest of my décor. So I painted it all black for a fun light not just for Halloween, but something that can be used year-round. For those fearful of bigger crafts and projects or those hesitant to go bold and expensive with dark, sophisticated colors, painting smaller items black is a can’t go wrong, affordable touch for any room or season.

Revisit more Kbatz Krafts including:

How to Make Stuffed Pumpkins

Spooky Spellbooks

Tea Stained Labels and Spooky Bottles

Creepy Cloches

It’s a Pumpkin Cat House

Pumpkin Ottomans, Oh Yes

DIY Halloween Candle Clusters

Kbatz Kraft: Cardboard Tombstones Photo Shoot

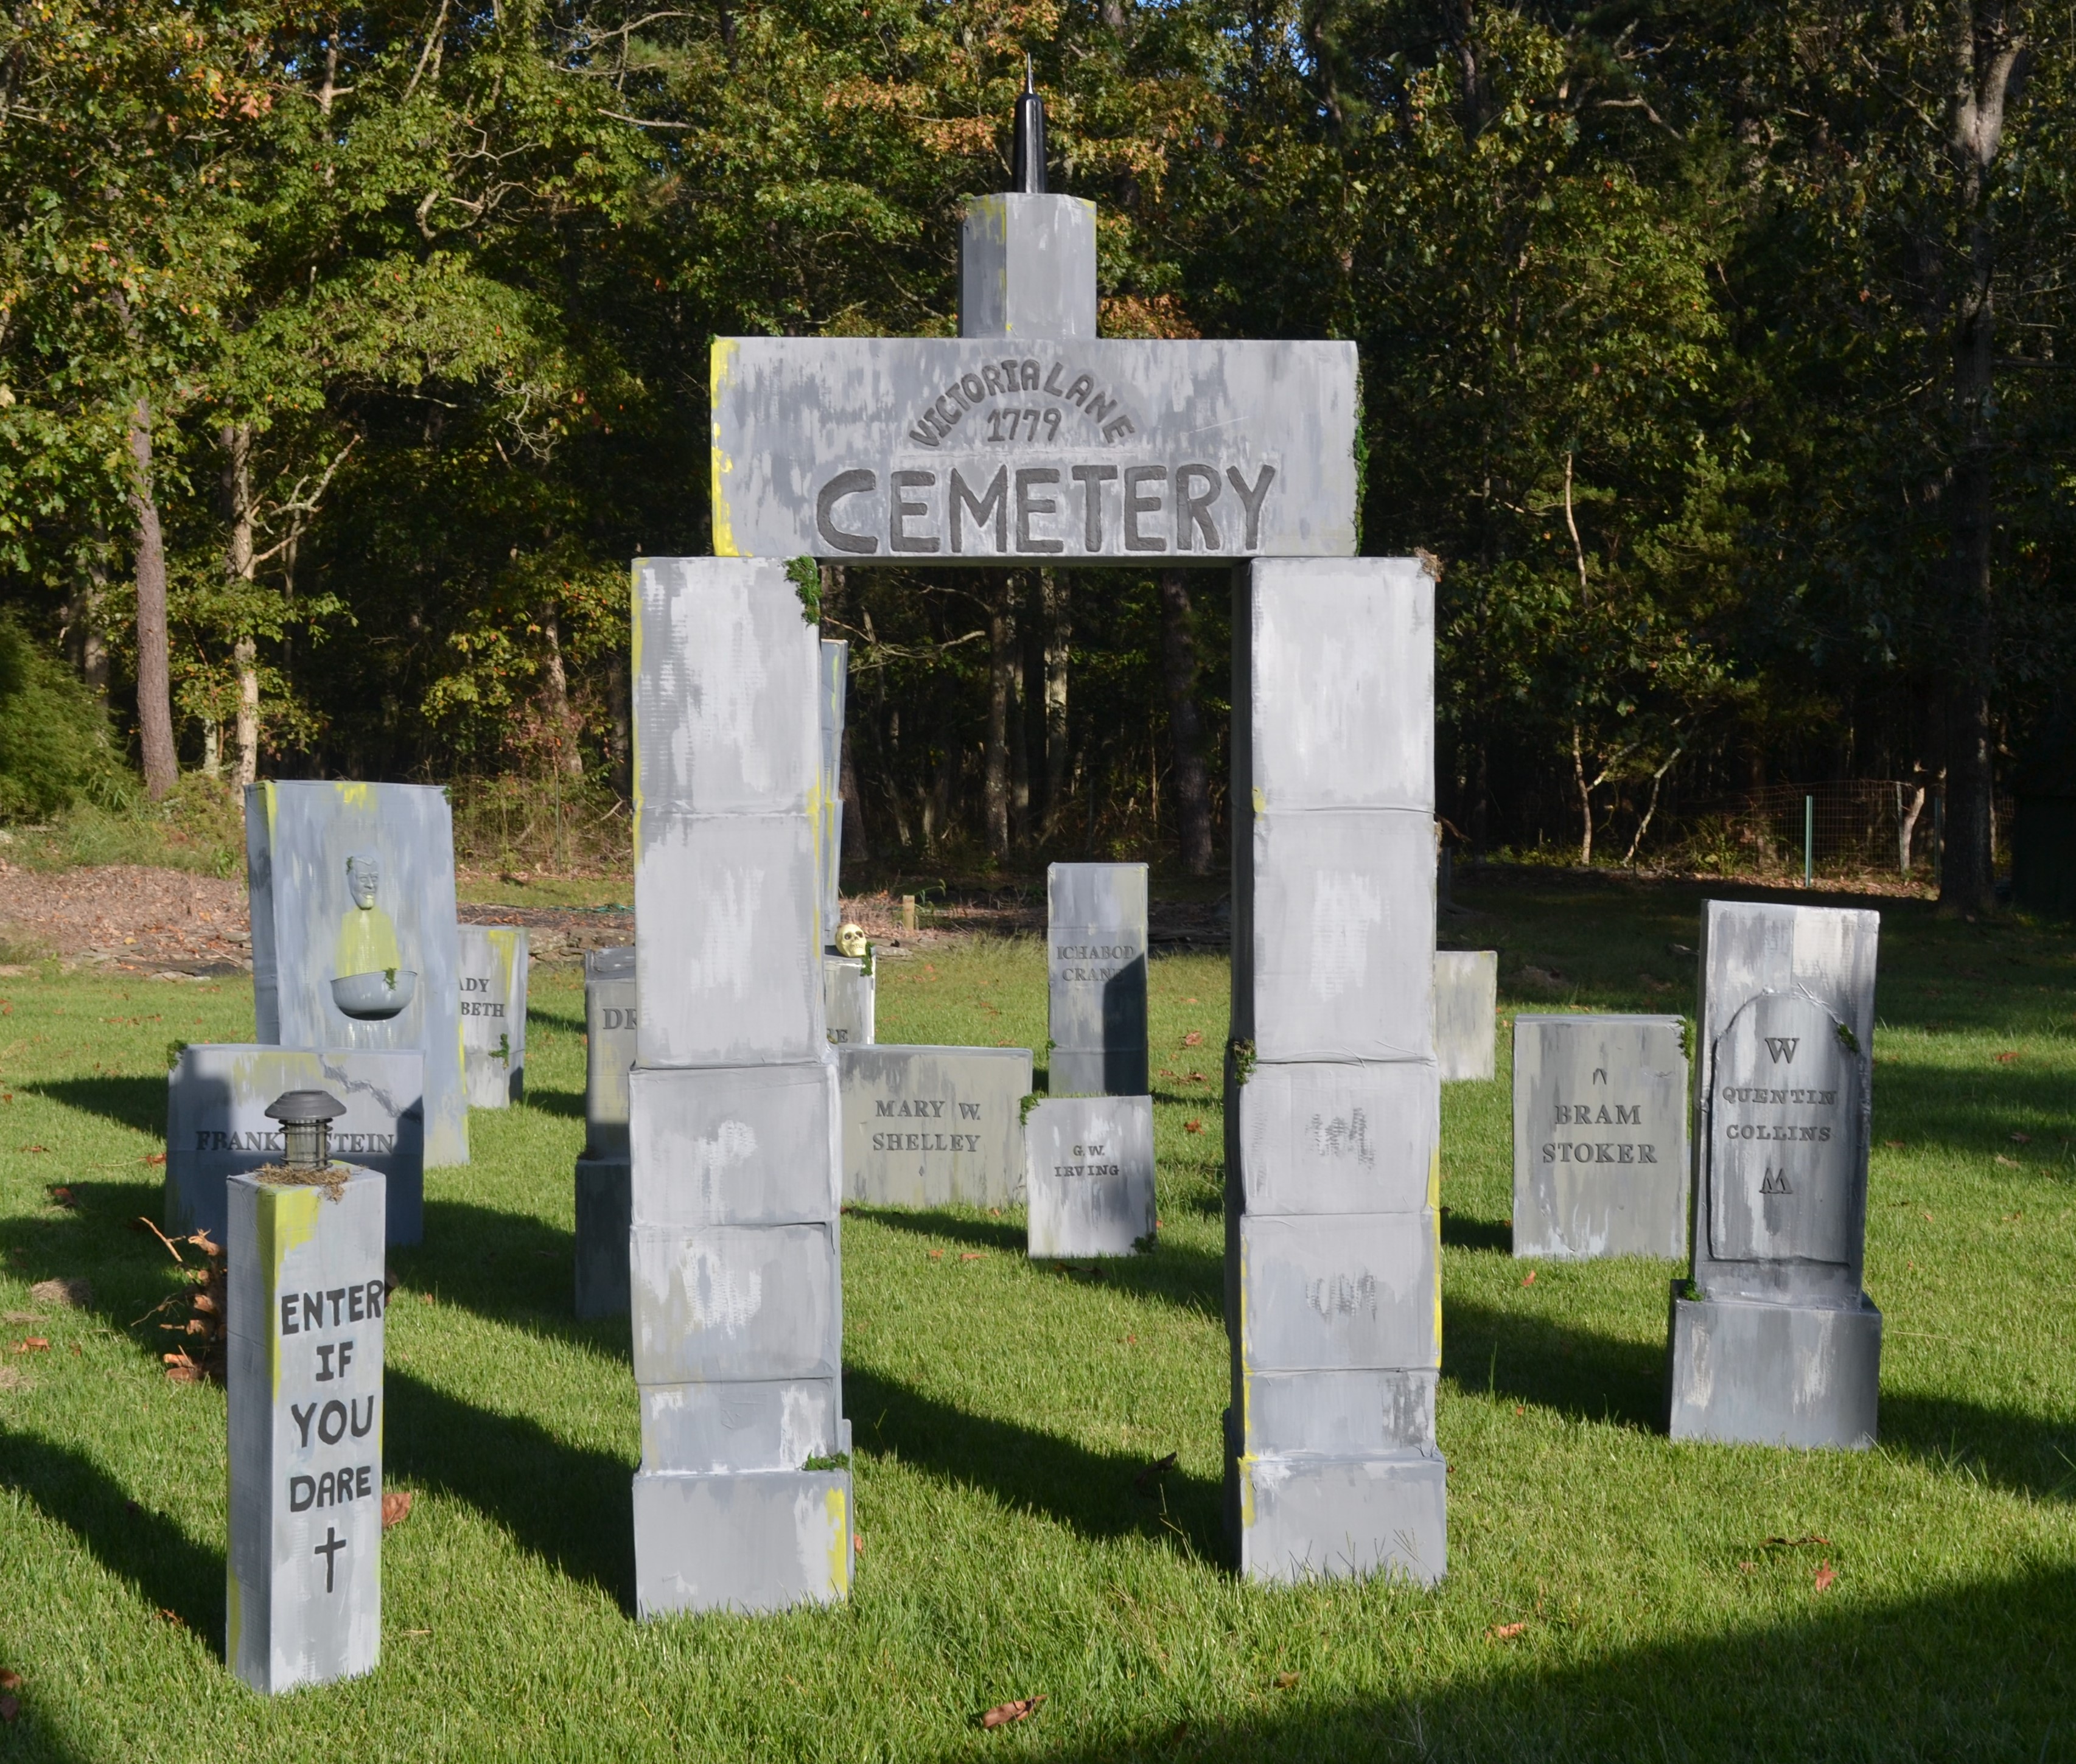
Trees are changing color, leaves are falling on the ground – it’s the perfect time to break out my DIY Cardboard Tombstones for a little spin in the backyard. You know, just to keep the neighbors talking!

As I detailed in my How To DIY Cardboard Tombstones Video, this type of cardboard graveyard is really only meant for one night of wow during Trick or Treating times or Halloween itself rather than all October long. I had purchased a spray sealant expressly for paper crafts but didn’t like the way it looked on a few tests, and after being stored as a faux stone wall in my basement, three of the earliest stones had chipped paint and needed touch-ups. One thing, however that I didn’t anticipate was how heat may effect the boxes. Fortunately, only the Shakespeare (which was made from taped together corrugated cardboard which I said not to do in my video) needs structural repair after warping in the sun during my photoshoot. If you live in a place that is always hot and sunny on Halloween and intend to have cardboard tombstones outside for more than a few hours, you should probably research what tape or glue and supplies may be better. By keeping these from getting wet, storing them delicately, and expecting to have minor repairs, one can probably get a few seasons worth out of this cardboard graveyard or eventually retire damaged ones and paint more boxes into tombstones anew. That’s not bad for $50 in supplies making twenty big headstones, columns, a fountain, and a unique gateway compared to $20 or $30 for a generic store-bought kit of small, breakable foam headstones.

For a final touch, I hot glued moss on a variety of nooks, crannies, and corners on each of the headstones. I had used green paint on several already for an aged patina and didn’t want to overdo it and cover them all up, but a hint of realistic greenery also hid any imperfections. Remember, though, that some faults are okay – embrace the crooked box or the ripped corner for that two-hundred-year-old spooky look! Although I left my graveyard plain rather than go overboard on accessories like blood for Dracula or tentacles for Lovecraft, those with know-how can add color lights, sensors, sounds, motion effects, and go plum buck wild for an entire haunted house tour through the cemetery. I certainly intend to keep my gateway ready for more spooky photography scenes.

It took me off and on about five weekends to do these, and so long as you leave any cutting or hefty painting to mom and dad, a family doing a few at a time can probably make a good dozen in a few weekends, too. Recycle and get the whole family to embrace their inner Halloween Picassos!

Revisit more Kbatz Krafts including:

How to Make Stuffed Pumpkins

Spooky Spellbooks

Tea Stained Labels and Spooky Bottles

Creepy Cloches

It’s a Pumpkin Cat House

Re-Purposed Halloween Topiaries

Pumpkin Ottomans, Oh Yes!

DIY Spooky Candle Clusters

Cardboard Tombstones How-To Video

Kbatz Kraft: Cardboard Tombstones Video How-To!

Why paint just one box gray when you can make use of all your cardboard boxes for an entire DIY Graveyard?

Check out Yours Truly Kbatz in My Latest Video for details on the pros and cons of making your own Cardboard Cemetery!

Kristin Battestella aka Kbatz gets a little BATTY in showing how you, yes YOU can make your very own Customized Cardboard Tombstones for the BEST Halloween Haunt in YOUR Neighborhood! Also featuring Giant Pumpkins, Scary Basements, and One Pesky Feline.

Thank you for being part of Horror Addicts.net and enjoying our Video, Podcast, and Media Coverage!

Revisit more Kbatz Krafts including:

How to Make Stuffed Pumpkins

Spooky Spellbooks

Tea Stained Labels and Spooky Bottles

Creepy Cloches

It’s a Pumpkin Cat House

Pumpkin Ottomans, Oh yes

Kbatz Kraft: Yo-Ghost Candlesticks!

Does your family love those on the go and drinkable yogurts? Do you purchase bulk six or eight packs weekly only to rinse and toss the bottles in the recycling bin without a second thought to your penchant for horror décor?

One day the label was partially peeling off my drinkable yogurt, so I pulled it off all the way, as you do. Suddenly, it wasn’t a convenient snack but a blank white slate. I saved it for some more spooky bottle projects – painting it ye olde and putting a creepy label on it as seen in my Spooky Bottles and Tea Stained Labels fun last Halloween.

However, after using pre-cut foam letters on this year’s Cardboard Tombstones, there were a lot of filler pieces left over – the inside of the O, triangles within the A, pop-outs from Ps, Bs, and Rs. Rather than seeing these little black stickers as trash, my horror brain saw the inner O as an open, gasping mouth. Eureka, these little throwaway pieces could be the faces for a ghostly white yogurt bottle. Immediately I chugged down some more yogurt just to save the bottles, sticking the letter bits on the plain white surface. Varying the eye shapes and the angles of the O mouths looked cute, but trying some other shapes for the mouths didn’t look right and it was nice to leave them matching in some way. What then was I to do with a bottle that looks like a ghost? I don’t have any white décor, and even painted the Dollar Store battery candles from a stark white to a more aged, cream color…

Since they are marketed as a purely Halloween item, I buy up all the battery candles once they arrive at the Dollar Store in the fall. I told the checkout lady I used them all year and all over my house – which I guess might be strange if I was stocking up on the ones that have the red blood drips on them. The plain white ones, however, come in a removable black base and are perfect for sitting in the window sill as well as candelabras or sconces where drafts or smoke detectors are impractical for real candles. Putting the candles inside the ghost bottles didn’t work, nor did sitting them on top with the cap removed, but putting the black base on top of the cap fit perfectly!

Now, I had a use for my ghost bottles as ghost candlesticks! Lo, though they still seemed incomplete. A candle stuck on top of a bottle, big deal. I thought I could wrap some twine around the base to create something rustic just like the Halloween décor you see in the store. Ironically, wrapping the connection in plain old Dollar Store twine was one of the most difficult and time consuming tasks in all of my Kbatz Krafts. Rather than gluing one end to wrap wrap and then glue the other end, the curved base forced me to glue as I went, wrap more than one area numerous times for full coverage, and cut or glue pieces in extra layers. I’m pleased with the result, but what I expected to take an hour took an entire evening, a lot of glue sticks, and somehow a bit of back pain.

Cute and rustic aren’t really my style, however, I had the materials to make something fun and went where the spooky appeal took me. It’s tough for Horror Addicts to find some of the décor we like, and if then only around Halloween. By necessity we should look at generic objects in a potentially unique way. These yogurt bottles could be painted orange with pumpkin faces used as a fall vase or green for monsters with fun objects on top. Kids can learn about recycling by saving their own bottles for a personalized craft – so long as adults handle the tedious twine gluing!

Revisit more Kbatz Krafts including:

How to Make Stuffed Pumpkins

Spooky Spellbooks

Tea Stained Labels and Spooky Bottles

Creepy Cloches

It’s a Pumpkin Cat House

Kbatz Kraft: Re-Purposed Black Topiaries

When macabre aficionados such as ourselves are looking for unique wares, it pays to shop at your local thrift stores, Goodwill, and charity shops. One of a kind donated items and inventory rotate regardless of season – meaning not only can you get Halloween items in June, but you can also find other holiday items to take from trash to sophisticated treasure.

I’m always looking out for florals, wreaths, or other stems to cut up and Kraft, and I stared at these Christmas style fruit bowls and toparies for quite some time wondering how I could Halloween ’em up, so to speak. Spray painting the fake, dated brass bases was an obvious choice, but the glittery fake waxy fruits of yore were not paintable. For $2 a piece thanks to the Goodwill half off tag, however, I could go with the gothic glam of red apples, purple grapes, and gold pineapples.

At home, I took the bowls and trees apart, sorting the fruits in bags to assure I was putting the right stems back into their correct topiary. Yes, the bases would be gloss black, but I decided to spray paint the leaves black also to further contrast the fruits. It took multiple coats for as much full coverage of the leaves as possible. Of course, the styrofoam core absorbs a lot of spray paint, and the fabric leaves certainly needed touch ups after drying for a few days. Fortunately, regular black acrylic craft paint did the trick for any of the green undersides remaining, although when totally dried, some of the leaves looked more gray than true black. Rather than more coats that may not have any better result, however, that touch of gray adds a black, but old, aged, memento mori style.

There was actually a full size fake tree in the store as well, the kind that retails for $100 green and more for autumn or black tree varieties. Even for $8, the based was damaged and there were just too many leaves to spray paint once, twice, three times, or touch up every single one. After seeing how these leaves took to the black paint and touch ups, I’m glad I passed on that big, leafy tree!

Certainly nothing was going to be in the exact same place when it came time to put the assorted fruit arrangements back in their rightful spots. It took a bit of sticking here, having to remove a pick there and arranging to make sure there weren’t too many pears or apples in a row. All this pick and play, however, did get a little messy. Glittery bits and bobs got everywhere! Be sure to line your table or floor with some paper or plastic and keep the vacuum or broom handy.

This isn’t a family friendly project, more something for the Victorian florist indeed. It also takes a bit of luck in finding the right floral nothing to make into gothic something. However always keep an eye out for holiday greenery you can take for a Halloween spin. For two toparies, two fruit bowls, and a few cans of paint, I paid under $12. My cheap self was ecstatic to see the original price of the tall toparies when I peeled the Goodwill sticker off the bottoms: $24.95 each!

Initially these pieces looked old, sentimental, and eighties faux expensive. There was a time when this kind of artificial style was everywhere each December. Store bought autumn topiaries, Halloween trees, and festive fall bowls today are often very expensive, too – a luxury item not easy to find or cost effective to make. By shopping alternatively for older seasonal items with an October eye, you can save heaps of time and money without sacrificing on the dark, sophisticated décor.

Revisit more Kbatz Krafts including:

How to Make Stuffed Pumpkins

Spooky Spellbooks

Tea Stained Labels and Spooky Bottles

Creepy Cloches

It’s a Pumpkin Cat House

Kbatz Kraft: Cardboard Tombstones Video How-To!

Why paint just one box gray when you can make use of all your cardboard boxes for an entire DIY Graveyard?

Check out Yours Truly Kbatz in My Latest Video for details on the pros and cons of making your own Cardboard Cemetery!


Kristin Battestella aka Kbatz gets a little BATTY in showing how you, yes YOU can make your very own Customized Cardboard Tombstones for the BEST Halloween Haunt in YOUR Neighborhood! Also featuring Giant Pumpkins, Scary Basements, and One Pesky Feline.


Thank you for being part of Horror Addicts.net and enjoying our Video, Podcast, and Media Coverage!

Revisit more Kbatz Krafts including:

How to Make Stuffed Pumpkins

Spooky Spellbooks

Tea Stained Labels and Spooky Bottles

Creepy Cloches

It’s a Pumpkin Cat House

Pumpkin Ottomans, Oh yes

Kbatz Kraft: DIY Halloween Candle Clusters

Why spend heaps on battery operated candle sets when you can save your paper towel and toilet paper rolls to make your own DIY Halloween candle clusters? Recycle, craft, and help the planet!

Of course, the reason it took me so long to do this project was because I thought there was a technical aspect to the candles – running wires from each light to a bottom base or arduino breadboard with a smartphone remote or toggle switch. To the at home computer hobbyist such advanced lighting schemes are no problem, but regular ole me had no idea how you could glue drips around a tea light yet be able to use its on off switch. Fortunately, our own illustrious horror hostess Emerian Rich made the simplest observation that there must be a shelf inside the roll to hold the candle. Huzzah!

Armed with such wisdom, I traced circles onto a piece of cardboard, cutting them out and trimming each to fit a roll before taping and gluing them inside at the tea light depth. Next I bunched my two clusters together with ten tiered rolls cum candles each, varying the designs so they are symmetrically asymmetrical rather than matched or mirror images. By stacking or cutting rolls, I could make the tiers taller or smaller, taping and gluing the rolls as needed. Rather than spray painting everything Halloween black, I chose red paint for year round décor. I debated painting all my rolls and going around their rims with the glue drops a la wax motif before gathering them together. However, I suspect that would mean I was painting in unnecessary hidden spots or stuck with glue in places that didn’t fit.

On to my trusty glue gun, I added globs of glue drips around my rolls – long drips, short lumps, globby pieces in all the nooks and crannies. Obviously, this is part of the candle look, but once hardened, the glue also added stability to the bunch and the rolls became quite sturdy. This is a time consuming detail that took a day to dry before touch ups, and in addition to clear, I used red and silver glitter glue sticks, hoping they might add a sparkly touch. For more realistic attention to detail, I also did a glue ripple around the bottom of the bunch. After Round One, I could see spots that needed more waxy drip effects, so I did another layer of glue globs to conceal any problem spots. At first, these looked really bad, obviously cheap, and barely held together. It’s not as simple as it looks – oh Etsy, glue drips and toilet paper rolls make tea lights look like big candles, yeah Pinterest!

Indeed, with different textures, thin cardboard, glue, and tape, these clusters needed several coats of paint. The more I painted and glued, fortunately, the more they really started to look like candles. The tea lights themselves also needed several paint coats. Rather than buying red that had a red light, I chose the white tea lights for their realistic glow. Originally, I wanted to do these bunches in an aged off white or creamy color. After seeing how many coats it took of red, however, I’m super glad I didn’t choose a light paint where all the tea lights could illumine every T.P. imperfection. For my final coat, I added a drop of darker paint called ‘Berry’ – last used in my Spooky Spellbook DIY – to the red base. I painted both clusters in this slightly darker hue, not worrying about every little crevice, resulting in an antique, realistic look. Now instead of obvious recycled materials, that a la wax dimension is what you see first.

For something more substantial than a plastic tray or no base at all, I picked up two silver plated trays at Goodwill for $2 each. Both clusters actually fit on one larger tray – a classy centerpiece that fits in right through all the holidays. Overall, this project took about four days with the drying time between coats as the biggest hurdle. One should also make sure the tea lights still fit as you add your gobblely glue trim. Some became snug and need to be wedge in gently. After the ins and out to turn them off and on, a few have chipped, so expect touch ups if you are going to repeatedly poke and prod at the candle lights. The 8 ounce red acrylic paint was $4 and a pack of 24 tea lights was $8, both from Amazon. So for around $16, I have two stylish, unique candle clusters compared to at least $20 for one from Spirit or gasp $80 at Pier 1 – neither of which appear to be available online this season. Of course, with store bought battery candles, once one burns out or there is a remote timer problem, they often don’t work anymore. When one of these goes bad, I can just change the tea light!

Though not necessary a family friendly project, one can customize these faux candle clusters – creepy face designs, blood drips on white candles, go huge by using tubes or piping instead of towel rolls, or dozens of individual rolls can become an entire room of Harry Potter floating ceiling candles. We all certainly use enough T.P.!

Revisit more Kbatz Krafts including:

How to Make Stuffed Pumpkins

Spooky Spellbooks

Tea Stained Labels and Spooky Bottles

Creepy Cloches

It’s a Pumpkin Cat House

Pumpkin Ottomans, Oh Yes

Kbatz Kraft: Pumpkin Ottomans, Oh Yes

Last Halloween, I shared a video on how to make ‘Puffed Stumpkins.’ This How-to on making your own stuffed pumpkins out of recycled materials was squishy fun for the whole family.

This summer, I again found myself with more stuffed pumpkin making supplies – plenty of plastic bags, recycled denim padding from organic food shipments, and an orange felt-like remnant on sale for $2. When the material seemed too tough for smaller pumpkins, I went big. Instead of a lot of cute little pumpkins the more the merrier in a patch, I cut my material into more realistic large pumpkin sizes.

The preparation is the same, sewing a gathered bottom closed before stuffing and gathering the top and adding twine seams and leaf toppers. I used green Dollar Store twine and cut up floral stems for the leaves, continuing the true to nature look with green accents. A $5 bag of driftwood bowl filler at Wal-Mart provided for realistic stems compared to the curly, glittery pipe cleaners on my smaller jazzy pumpkins. Some of these gnarly bleached pieces I painted brown – a fall color fittingly called “nutmeg” – to go on my previous pumpkins, too, while others I left white to be a contrasting stem on some of the mini black pumpkins.

Two of the four larger pumpkins seemed crooked or wobbly, so I glued them together with more leafy accents between them since stacked pumpkins are popular but expensive. These can be amid the patch or set up on a nice stand when all total these cost less than $10. Of course, since I had more felt fabric, I made one, BIG pumpkin. Charlie Brown size. Big enough to sit on it!

I packed this largest pumpkin pretty firm with plastic bags, but I still wanted a leaf topper even if you could sit on it. Enter my trusty friend Goodwill and the half-off color tag with several sets of green cloth napkins, some as cheap as four for fifty cents! I sewed two together and stuffed it with one layer of the recycled denim batting, making a chair cushion to go on top the pumpkin. After tacking the corners down, I now have a fun “green” piece of extra fall seating for pennies compared to the cost of a generic designer poof.

Then again, I also had an old sixty inch round orange table cloth that looked like it could be an even BIGGER pumpkin ottoman and plenty more recycled denim to fill it. Since this was already round, I didn’t have to sew the bottom closed but gathered the edge as much as possible before giving it a good old stuffing. Had this been a stiffer fabric, a drawstring closure might have been better, and it is also possible to build a square frame inside for a properly firm piece of furniture. This basic gather and stuff method, however, anyone can do, no matter how tiny or huge the pumpkin!

This giant pumpkin poof, though, did take a lot of stuffing, and one might pay hundreds to buy this much polyfill and foam. All the plastic bags I had gone to the outer layer with the gathers creating the pumpkin seam-like squat around a center recycled denim core. Because this pumpkin was shorter and wider than my firm pumpkin poof, I sewed eight green napkins together for two oblong padded leaves on top. After tacking the corners down, I found end pieces from a beige table runner in my fabric stash and sewed them into a stem shaped throw pillow as a piece de resistance.

It would cost a hundred dollars or more to make something like these with store-bought materials and much more to buy ottomans in this size – not that you can get a pumpkin-shaped ottoman in stores! Not everyone may have the recyclable materials to do this, but I hope this gives you an idea on how to make good Halloween use of plastic bags or excess packing supplies when you do have them. Though giant compared to the mini, instantly stuffed pumpkins, these are still kind of small for adults. For imaginative kids, however, these poofs are a Cinderella loving dream.


Revisit more Kbatz Krafts including:

How to Make Stuffed Pumpkins

Spooky Spellbooks

Tea Stained Labels and Spooky Bottles

Creepy Cloches

It’s a Pumpkin Cat House

How Not to Make a Spooky Spell Book – A Kbatz Kraft!

How Not to Make a Spooky Spell Book

by Kristin Battestella

Inspired by having extra tea stained pages from my Spooky Bottle Labels project, Old Kbatz here decided to make a Spooky Spell Book. Not having some of the right materials, however, led to some time consuming mistakes.

First I selected a book to decorate. Many bibliophiles and macabre folks love the idea of these often expensive stacks of creepy looking books but none of us really want to damage a book to make one! You can go to a local library sale of thrift store and choose an old outdated encyclopedia or reference book. However, even after purging my books for a move, I still had several cookbooks I wasn’t using.


This one was large enough on the front to do the design I had in mind on the outside and I intended to stick my tea pages in the middle of the book. In theory, it’s still perfectly usable as a cookbook should I ever need some kind of hamburger recipe that can’t be found online. I sketched out my wording with a marker and then traced over the lettering with Tacky Glue. Maybe the hot glue gun would have been quicker, but Tacky Glue allowed me a little more time with a toothpick as I perfected the letters. If you’re doing this with the kids, it might be easier to paint first and then make some lettering with a more friendly glue and some glitter, however I didn’t want this to be sparkly glam, just an old innocuous book with a goofy plastic scorpion I glued on the front.

Once the glue was dry, I colored over the white glue with black marker so it would stand out more as I painted the rest of the book. It was okay if I got some on my letters or scorpion, because I intended to go over them at the very end with a final coat of black. Using red paint, I went over the book cover. Unfortunately, the red paint peeled and chipped off as it dried, and another coat did the same thing. I wondered if there was a sheen to the book that should have been sanded first or if it was the paint itself. I liked the contrast of the bright red with the black, but this poster paint kept peeling and never had good coverage. I debated doing a third or fourth coat and having to go buy some kind of artist spray sealant. By time I did all that, I could have just bought a spooky spell book!

The next day, I let all the red paint chip off and decided to try using a smaller tube of acrylic paint I had called Berry Wine. I did small sections on the back of the book and let them dry – sticking and with better coverage! I like the aged, deeper color more than the bright red, but I thought because I had a smaller quantity that there wouldn’t be enough for the book. Instead, the acrylic paint covered more and went further without all the terrible peeling. After a few coats of the berry paint dried, I went over the lettering and scorpion with one coat of black. Lesson learned: I’m not an artist at all, and knowing which materials work together and having the right supplies to do a project is paramount.

Now I was able to work on my interior pages. At first I was going to trace assorted ye olde symbols, but that is also out of my artistic area of expertise and I didn’t want anymore mistakes. Instead I wrote Macbeth quotes on the pages in colored pencil making slightly oldeth calligraphy style lettering before going over the wording again in brown marker. Here I was careful of the order I wanted for the pages and which quotes I wanted to be showing when the book was opened flat. I also didn’t use both sides of the pages or use the marker when they were stacked together lest any ink bleed through. It was back to the Tacky Glue as I made a line down the left side of the pages one at a time, gluing them together to be inserted in the exact middle of my cookbook. I trimmed the right side of the pages so they wouldn’t stick out as much and made a line of glue on the inside of the book to insert the pages.

This was a spur of the moment project that took several days longer than it should have thanks to my painting errors. It looks great now that it is complete, and once I realized which paint worked best, I was able to make another spellbook that took less than a day. Although I had gotten rid of several old Writer’s Market editions in my move, I still had a beat up hardback 1997 edition on my shelf that was thick enough to do some spine wording. Again I sketched my letters and traced them in glue. This time I used a green marker to make the lettering stand out, for I was painting this book with black acrylic paint that covered in less than two coats. For the letters, I wanted a contrasting yellow, however, the yellow paint and green marker have blended together to create a creepy looking color. I may go over it again to make it more golden, but I kind of like the icky look. This book I can also use again if I wanted, however I’m tempted to use it as the base of a spooky cloche – but that is another Kbatz Kraft!

Creepy Cloches – A Kbatz Craft!

Creating Creepy Cloches – A Kbatz Kraft!

By Kristin Battestella

Kristin Battestella aka Kbatz here again to show our Horror Addicts Community how to make your very own Spooky but affordable cloches for Halloween or year round macabre décor!

For us alternative folks, it really pays to shop at thrift and second hand shops to find off the beaten path accessories. I lucked into finding two actual cloches, one large and one small, at two different Goodwill stores. The smaller cloche was $1 and already had the orange floral décor inside, so I put a fun orange spider from a Dollar Store party favor pack inside, keeping the orange theme for Halloween rather than something more realistic like a black spider.

The larger cloche was $3 – a steal when more elaborate Halloween cloches in stores cost $10 or more for whatever generic creepy is inside them. This actually had an unusual Good King Wenceslas doll inside that looks slightly creepy itself. I don’t trust him, so he’s going right back inside a homemade Christmas cloche! Once he was out, I put a Dollar Store skull on a pedestal inside and used hot glue to surround the skull with glittery Dollar Store branches and stems. I originally wanted to fan the branches all the way around, but obviously, the glass lid has to fit over the design, so the branches became a more compact bunch with smaller pieces in front going inside the skull’s open mouth for full effect.

Naturally I intended to have a bat perched on top the skull, but it was too big for the glass and I used a plastic ant instead. Next I used Dollar Store moss to cover the pedestal base. Some of it sits where I need it, but other places I again hot glued strategic moss in place. As this is a three dimensional glass display, the back must look just as nice as the front. I planned a realistic spider below in front to create visual balance. However, I found the large stick inside my moss bag and went with it as a perch for a bug from my spooky favors assortment. I could have gone outside and used natural leaves, moss, and branches, but I’m quite pleased with how this cloche came out. It looks like a skull was once preserved, but it’s as if something grew around it and died – a pleasingly morose display I might keep out year round!

In addition to these two lucky finds, I also saved several large party mix plastic barrels to make homemade Halloween cloches. Truly, the most difficult part of all these DIY crafts was getting the darn labels off these jugs! Fortunately or unfortunately, the most expensive thing in all these projects for my wallet and waist was eating these snacks! Instead of trying to fit everything through the jar opening, I cut the top off so I could turn it upside down. The edge didn’t have to be perfect because I would cover it with moss, but I did get cut doing this. It’s official, I’ve bled for HorrorAddicts.net! I put a Dollar Store glow in the dark skull on top of more natural green moss with glittery green branches and added glow in the dark spiders. My base for this was a simple plastic plate, and it is a little flimsy compared to the wood bases of the real cloches. In the future I might get wooden plaques available at the craft store or natural rounds. One can set a homemade cloche on something fancy like a silver platter or cake stand, but obviously we’re not permanently gluing the base with those.

To cover the lingering label lines on my jar, I strategy placed more moss as if it was growing up the outside and top of the cloche complete with a glow in the dark bat as the piece de resistance. My idea here is that this was something alive but now overgrown. Naturally, the cutting and hot glue are not family friendly crafting, and different materials can be used if a child has any allergies. Since this is fairly lightweight, I wouldn’t put it where kids or pets may knock it over or keep it out year round – and be warned the moss may attract real spiders and the like! I quite like how this cloche turned out, however, side by side with the real glass cloches, you can tell it is plastic and homemade. Then again, in cutting off the tops of two party mix jugs and putting them together, I ended up with a bonus orb which, as I posted on our Horror Addicts.net Facebook community, I was unsure how to use.

I debated using bloody drips to make it look like something bloody escaped or filling it with spider webbing like there was something cloudy and unseen inside before filling it with assorted plastic bones. I glued brown ribbon on to cover the jar rims and seams and then tied rustic yarn around it for an apothecary style, adding a ‘Do Not open until October 31’ tag and leaving off the top lid. My theory is that something was alive inside, but opening it early turned what was within to bones. Although that might not be immediately apparent, the beauty here is that it was a free bonus project that can be changed next Halloween.

By being thrift savvy and using affordable materials, I have several creepy cloches providing the most bang for my Halloween buck, and I hope you have some ideas for your own one of kind cloches, too!

Tea Stained Labels and Spooky Bottles – A Kbatz Kraft!

How to Tea Stain Labels and Make Spooky Bottles

by Kristin Battestella

Who has the money to buy all those fancy potion bottles and apothecary accessories in stores? Kristin Battestella aka Kbatz is here again to show how YOU can make some customized, old fashioned labels and aged Halloween bottles for your spooky display.

First, let’s focus on making the creepy labels, Eye of Newt and Toe of Frog and all that. I made up some Shakespeare inspired labels with a few clip art pictures and printed them. Of course, stark white printer paper doesn’t work for our aged apothecary, so we need some tea staining.

I brewed a pitcher of tea – using a few ginger flavors that I don’t really like, which actually left the paper with a nice spice smell! I dabbed the steeped tea bags all over the pages, soaking them to different degrees. Some of them I went over several times to darken them more, or to make even more aged lines and stains. You probably did this as a kid to make some kind of old looking paper, and it is totally effective for Halloween décor!


You can see I stained the whole pages, rather than cutting out all the labels first. Cutting them would have left a lot of paper to waste, and by staining the whole piece, it gave me scrap paper that was also tea stained after I cut out my labels. Now I have extra if I want to hand write some tags and do something else fancy!

I left my pages to dry, and in fact, had enough tea left over that I went ahead and stained some more blank pages, inspiring me to make up some kind of old fashion spooky spell books – but that is another Kbatz Kraft!

Once my labels dried and I cut them out, you can see some of the places where the ink ran. For some of them, it did ruin them as too illegible, but for others, it was just a little old touch that added unexpected character. Most of these I intended as labels, but a few others I planned on making tags to tie around my bottle necks.

Well, what bottles, do you ask? You can go to the thrift store or dollar shop and get some plain or unique bottles, but really, if you save some of your household bottles, you can recycle them into something spooky. I’ve spent the last few months saving anything unusual looking – from medicine bottles, shampoo, and bubble bath to wine, bug spray, and candle jars.

I still have some spice bottles and stained paper left over, and initially planned to match specific bottles with labels before wondering if I should mass theme everything by spray painting them all a uniform gloss black or old fashioned brown. Instead, I took each bottle one at a time, using craft paints in several colors and foam brushes. Some bottles were already nice colored glass and I just went over them with a bit of dry bush to dab an etched, age glass kind of look. I’m not an artist and it took me some trial and error do overs on some before I was happy, but others I simply had to paint the whole bottle one color to cover up a label, more stark white, or an ugly bottle cap.

Once my bottles were painted, I began matching them with labels. Some shapes and sizes I had in mind didn’t go together and I ended up switching them around. Some labels became tags, and other labels that were too big ended up with the written label on the bottle as well as the matching picture as a tie tag. It maybe wasn’t as I had intended, but a happy accident as Bob Ross says, as the bottle colors, assorted labels, and extra tag ties created more variety in my little apothecary collection.

I’ve mixed the bottles I made in with some fancy bottles as well as other wine and soda bottles that I had put on other store bought labels. I’ve put them all across the top of my refrigerator, giving my kitchen a bit of a Halloween double take. By not being overtly all black typically Halloween looking from a far, guests get a little WTF when they are up close and see Tooth of Wolf, Baboon’s Blood, or the eyeball I put in one of those amber medicine bottles!

In addition to collecting the bottles and making up some of the labels in advance, this took me about a weekend. I spent a couple evenings painting the bottles with acrylic paints, then a Saturday doing the tea staining, and a Sunday using tacky glue and yarn for the labels and tags. This is family friendly or classroom safe Halloween fun as well, just perhaps messy with maybe the adults handling the hot tea or any strong smelling paint or glue.

I hope this gives you some ideas on how you can recycle what you already have and print out something to make look ye olde without having to spend a lot of money to look potion proper. Heck, I may just leave my bottles out year round!


How to Make Stuffed Pumpkins – A Kbatz Kraft!


Kristin Battestella aka Kbatz steps outside of her Frightening Flix beat at HorrorAddicts.net to show how YOU can make your very own Affordable, Stylish Stuffed Pumpkins! 


“Puffed Stumpkins” by Kbatz!!


Since you can’t see all of the pumpkins in the video frame, here are a few pictures of my pile:


How to Make a Pumpkin Cat House – A Kbatz Kraft!

How to Make a Pumpkin Cat House – A Kbatz Kraft!

By Kristin Battestella

When doing some of our seasonal Halloween Shopping, I’ve seen several types of fabric cat houses in assorted pumpkin shapes. Some are just orange tent styles and other are more rounded, so I decided to give it a go and make my own sort of insulated cat house. It didn’t come out perfectly like I expected, however I hope this gives you an idea on how you can make something fun and fall inspired for your pet.

First, I had to gather my sewing supplies and cut my fabric. I made a football-shaped pattern to create a dozen ovals, sewing them together to make the outer section of the pumpkin. For the bottom I cut two circles from the orange baby blanket I bought at Goodwill for $4 (Don’t judge me, fertile people without four legged children!) One circle was sewn to the outer sections, then the other was sewn on top and I stuffed between the two with styrofoam to make a little padded base before sewing it closed.

Next I sewed the inner flat wall along the bottom circles’ rim. This left a channel that I could being stuffing with plastic bags – insulation along with heaps of catnip sprinkled inside the sections as I went. I began sewing the top of the inner wall and the outer section top together as I stuffed, adjusting to make the outer sections plump like a pumpkin on the outside while the inside remained flat and smooth. Once I was satisfied with the stuffing I sewed the entire top of the walls closed. Of course, you don’t want your wall to go all the way around – there has to be an opening for the cat, Poe fans!

Finally, I sewed another circle of fabric to the top of the walls and went around with the last of my fabric on top of that. Like the base I stuffed the top before gathered the fabric closed. I glued artificial leaves on top of my seam and added coiled pipe cleaners for whimsical stems and tendrils.

As I said, there were a few places where I was somewhat unhappy with the project, mainly some of my seams in the front that were a little unsightly and the final gather at the top. At first I thought it looked okay to be a little off to one side – a little off center whimsy! However, it just looks…off center.

Of course, you may expect something designed for a pet to get chewed on or messy perhaps, so I figured it doesn’t matter if there are a few less than perfect spots in this a quick weekend project you may only use for a few months out of the year. Unfortunately, my familiar is a very finicky little feline…

He doesn’t like his pumpkin cat house and won’t go in it!


Finale Craft: Horror Door Hangers…Zombie Alarms

Tomorrow on the Season Finale and Halloween Special, Episode #136, our craft will be:

Horror Door Hangers or “Zombie Alarms”

You will need:

  • Scissors1013161454
  • Heavy duty yarn (we used 100% Mercerized Cotton)
  • 4 small silver bells
  • 1 large pumpkin bell
  • 5 Halloween buttons or icons
  • 1 small crochet hook (best sizes 6, 7, 8) You don’t have to be able to crochet to do this project. It’s just a tool to thread the items on.

Make these easy Horror Door Hangers to decorate your home, or alert you to zombie attack. Hung on your door knob, they will jingle whenever the door is opened or moved. Not only a great zombie protection item, this will brighten up an ordinarily boring item in your home – the door knob. If you collect your items, you can make these with us as you listen to the finale. We give set-by-step

1. Choose your icons.1013161335

Most of us have a bevy of Halloween or horror doodads lying around the house. If you don’t, they can be purchased at any craft store or dollar store at this time of year.

You also need 4 silver bells and a pumpkin bell to make this exact hanger. If you are on a budget, just use any bells you have around or purchase some cheap ones at the dollar store.

2. Cut your yarn.

Cut three 2-yard lengths of string and fold them in half. Generally a yard is from the tip of your nose to the end of your out-stretched arm. However, if you have dino arms like me, you might want to make it a little longer.

3. Attach your pumpkin bell.
bookmarkfold

After you attach one string, attach the other two in the same fashion. When complete, you should have 3 lengths of yarn “Bookmark” folded on your bell. This will leave you with 6 threads of yarn.

4. Braid your yarn and add bells.1016161211

Once your pumpkin is attached, braid about 1.5 inches and attach one of your silver bells on one of the threads. Then tie a big knot with all the threads to secure the bell in  place. Repeat this step until you have 3 silver bells in place.

5. Braid and secure the door knob loop.

After the 3rd bell is in place, knot it to keep it in place, and then braid for another about 4 inches. You should now have a generous loop to loop over the door knob. Test on a nearby door if you are uncertain. Tie a knot at the base of the loop so that your bells hang down on one side, and 6 loose strings hang on the other.

6. Attach your icons, and last bell.

With the remaining 6 loose threads, attach each each of your buttons, icons, and the last bell using the crochet hook to pull the yarn through. Then tie a knot on each item to secure it. Stagger the lengths to add some interest.

7. Hang your hanger.

Now you are ready to show your Halloween style and protect yourself against zombies at the same time! For full instructions and an audio walk through, listen to the season finale, airing October 22nd, right here at HorrorAddicts.net.

Serial Scribbler Series: Master Your Craft


SerialScribbler


In this world of indie publishing, creating a book is as easy as point and click. This convenience has led to an overwhelming issue that all “indies” are facing these days. Something I like to call complacency.

We all know that it’s hard to find someone to show us the ropes when we first start out. Some indie authors who have found a measure of success are very tight lipped about how they’ve done it. Whether they feel that revealing their how-to methods will create competition or they just aren’t sure, themselves.

Being an independently published author comes with some major perks, like getting to keep your royalties for one. But that perk can quickly turn out to be your demise. This is why you hear so many traditionally published authors looking down on the “indies”.

In my last article, I spoke about book covers and the importance of them. In this article I’d like to continue with Mastering Your Craft.

What does that mean, exactly?

You’re a published author now! So what. Yeah, I said it. So what. I want to know what you plan to do next. And if you haven’t answered this question – or let’s be frank – if you haven’t asked yourself this question yet… you have much to learn.

You owe it to yourself and to your readers, to get better. No one’s first book is perfect. If they tell you it is, they’re lying. Your first book is where you cut your teeth in this industry. Anyone can write stories. Yep, I said that, too! ANYone can write a story. Will you like it? That depends. Some people have this amazing ability to weave words and tell a tale that sucks you in and makes you want to know more. But is everyone an author?

Here’s the distinction:

A writer, writes. Maybe it’s their job. Maybe it’s something they do as a hobby.

An author is someone that considers this his/her trade, craft, passion, career.  If they’re not writing, and perfecting each story than they aren’t really happy with it. These people want to hear more than, “Oh this is really good!” They want to hear in-depth critique, suggestions, questions, and to discuss their work.

In their head, these worlds are real and they mean something to them because when they wrote it, they put something of themselves into it.

There are writing groups, guilds, Facebook groups, Meet-Up groups, etc. Go to them. Get your work critiqued by someone you trust to be brutally honest with you. This is something else you owe to yourself, and your readers.

Being an author is hard. If this is something you want to do outside of a hobby, you need to constantly evolve. In my next article, we’ll discuss other ways to do that.

For now, keep the horror in the story, not in your end product.